Certificate Center
Certificate Center


Document

- Documentation
 Certificate CenterSSL CertificateUser guideCertificate managementDeleting an SSL certificate
 Copy page
 Download PDF
Certificate management
Deleting an SSL certificate
Copy pageDownload PDFDeleting an SSL certificate
For SSL certificates that are no longer needed or cannot be used, you can delete them in the BytePlus Certificate Center console. Once you delete an SSL certificate, BytePlus Certificate Center will no longer retain the record of the corresponding certificate.
Conditions for deleting certificates
Certificate type | Conditions for deletion |
Certificates ordered through BytePlus Certificate Center |
|
Certificates uploaded to BytePlus Certificate Center | Not used by cloud resources |
Check methods
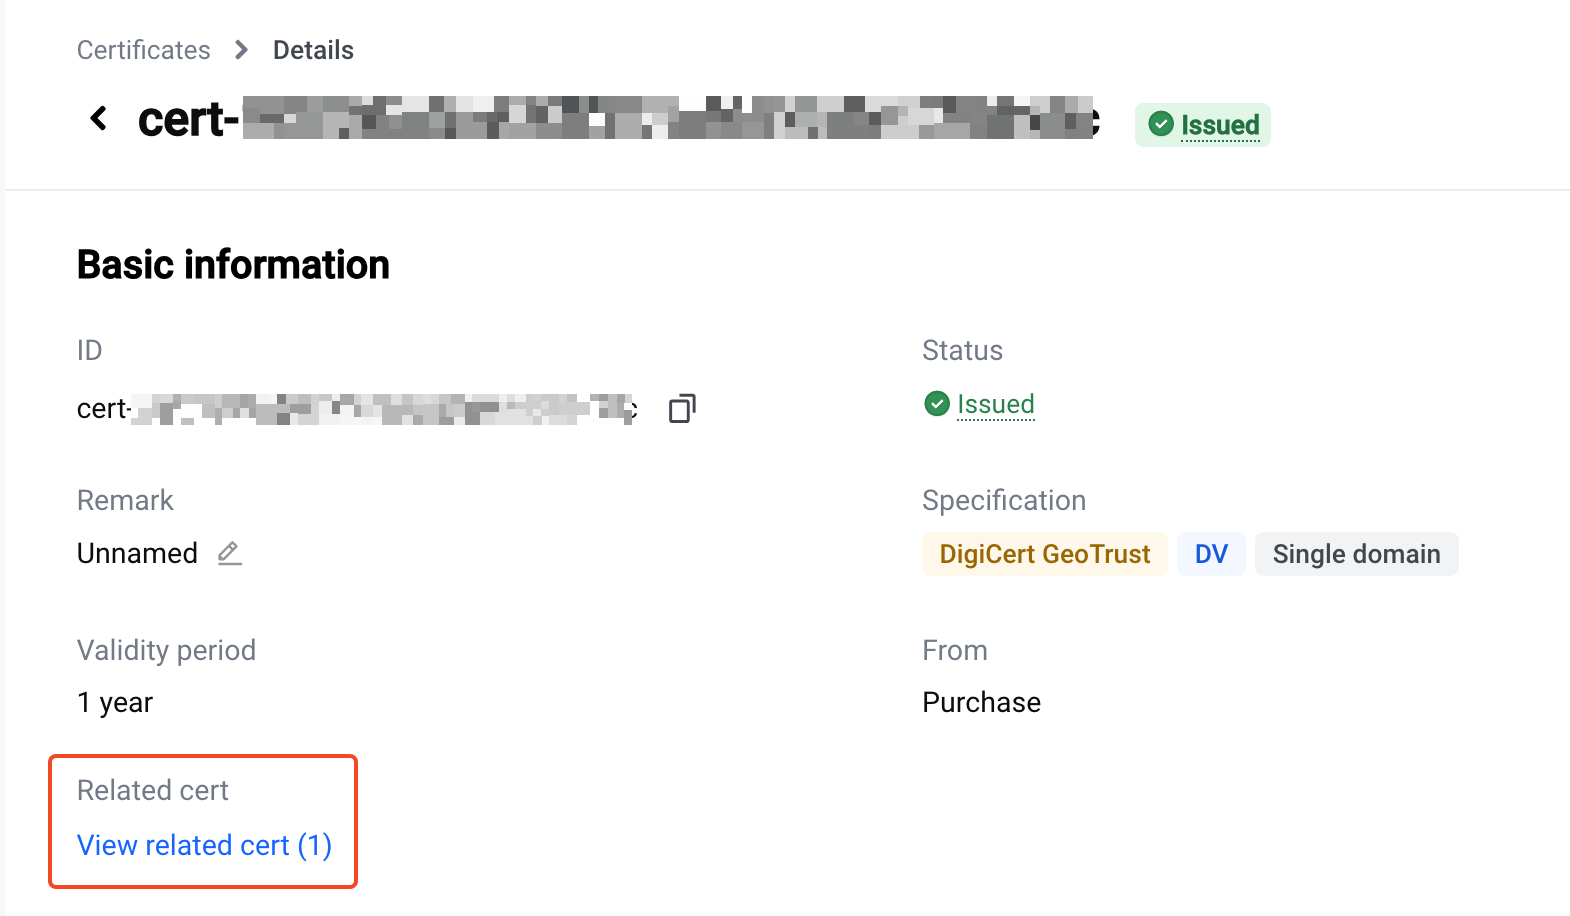
- Check if the certificate is associated with other certificates:
- Open the certificate details and check the Related cert in the Basic information section. If it shows -, it means the certificate is not associated with other certificates; if it shows View related cert, it means the certificate is associated with other certificates.
-
- Check if the certificate is used by cloud resources:
- In the certificate list, check the content of the Used by column. If it shows -, it means the certificate is not used by cloud resources; if it shows other content, it means the certificate is used by cloud resources.
-

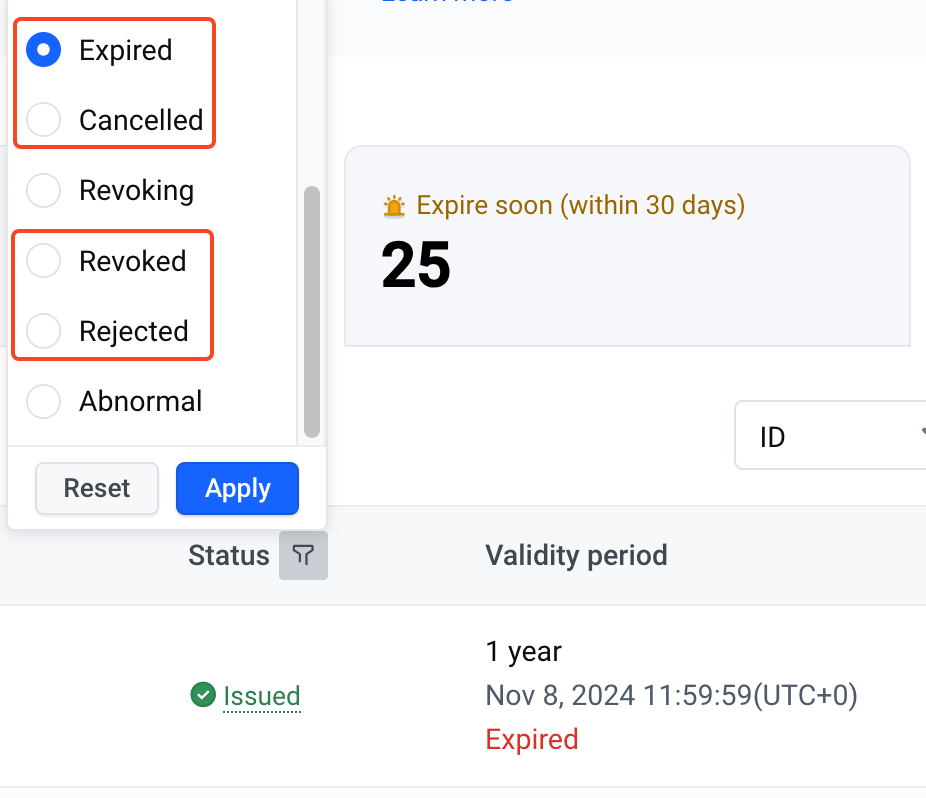
- Check the status of the certificate:
- In the certificate list, check the Status and Validity period columns:
- If Status is Cancelled, it means that the certificate order has been cancelled.
- If Status is Rejected, it means that the certificate request has failed.
- If Validity period includes Expired, it means that the certificate has expired.
- If Validity period includes Revoked, it means that the certificate has been revoked by the CA.
-
Precautions before operation
Once a certificate is deleted, it cannot be recovered. Please proceed with caution.
Procedure
- Log in to the Certificate Center console.
- In the left navigation pane, select SSL Certificate > Certificate management.
- In the certificate list, find your certificate, and in the Actions column, click Delete.
tip
The Delete button appears only when the certificate meets the conditions for deletion.
- Confirm that the current certificate is not being used by any servers or BytePlus cloud services.
- In the pop-up dialog box, select Confirm and then click Delete.
Last updated: 2026.04.01 10:51:37
All rights reserved © Beijing Volcano Engine Technology Co., Ltd2024
