Big Data File Storage
Big Data File Storage


Document

- Documentation
 Big Data File StorageBest practicesConfigure Flink to access CloudFS
 Copy page
 Download PDF
Best practices
Configure Flink to access CloudFS
Copy pageDownload PDFConfigure Flink to access CloudFS
Flink is a distributed framework for stateful computation on bounded and unbounded streams. It supports both streaming and batch processing applications.
This topic describes how to configure Flink services in EMR to use and access CloudFS.
Prerequisites
- CloudFS service is enabled; a file storage instance is created; and mount information is obtained. For detailed actions, see Create file storage instance.
- Complete cluster creation in E-MapReduce. For details, see E-MapReduce cluster creation.
- Prepare a test file.
Step 1: Configure the CloudFS service
tip
Modify the following settings on all cluster nodes.
- Connect to the E-MapReduce cluster as follows:
- Connect to the public IP address of master node of the cluster by using local terminal SSH.
- Connect to the private IP address of cluster node by using a cloud server instance in the same region.
- Run the following command to download the CloudfsSDK package version 1.5.3.49.
- wget https://cloudfs.tos-cn-beijing.volces.com/sdk/prod/cloudfs-client-1.5.3.49.tar.gz
- Run the following command to unzip the CloudfsSDK rar.
- tar -zxvf cloudfs-client-1.5.3.49.tar.gz
- Copy the extracted file cloudfs-client/lib/cloudfs-sdk-1.5.3.49.jar to the cluster directory /share/hadoop/hdfs.
- cp {YOUR_DOWNLOAD_PATH}/cloudfs-client/lib/cloudfs-sdk-1.5.3.49.jar /opt/{Directory}/hadoop/share/hadoop/hdfs/
- Configure core-site.xml file.
- Run the following command to open the core-site.xml file in the Hadoop installation directory:
- vim {hadoop_installation directory}/hadoop/conf/core-site.xml
- Add the following configuration in core-site.xml:
- <property><name>fs.defaultFS</name><value>cfs://xxxx.cfs-cn-beijing.ivolces.com</value><!-- Enter the mount target address --></property><property><name>fs.cfs.impl</name><value>com.volcengine.cloudfs.fs.CfsFileSystem</value></property><property><name>fs.AbstractFileSystem.cfs.impl</name><value>com.volcengine.cloudfs.fs.CFS</value></property> <property><name>cfs.access.key</name><value>AKxxxxxxxxxxx</value><!-- Enter the access key ID --></property><property><name>cfs.secret.key</name><value>SKxxxxxxxxxxx</value><!-- Enter your private access key --></property><!-- Optional: If you use an STS Token, this is required -->.<property><name>cfs.security.token</name><value>STSTokenxxxxxxxx</value></property><!-- Optional: To enable cache acceleration, configure the VPC subnet used for cache acceleration access --><property><name>cfs.client.network.segment</name><value><VPC subnet, for example, 192.168.0.0/16></value></property>
Step 2: Configure Flink
- Copy the cloudfs-client/lib/cloudfs-sdk-1.5.3.49.jar file from the extracted SDK directory to the Flink lib folder.
- cp {YOUR_DOWNLOAD_PATH}/cloudfs-client/lib/cloudfs-sdk-1.5.3.49.jar /{Directory}/flink/lib/
- Restart the Flink service.
- Log in to the VolcanoEngine E-MapReduce console.
- On the cluster management page, locate the target E-MapReduce cluster.
- Click Service List to locate the Flink service.
- Click the Restart button on the right side of the list page and select Restart All Components. Reconnect to the cluster after restarting.
Step 3: Verify Flink configuration
tip
Upload test data yourself.
- Prepare test data.
- hdfs dfs -ls cfs://`{`Directory`}/`{document}<!-- View files in the upload directory -->
- Run the Flink computing command.
- export HADOOP_CONF_DIR=/`{`Directory`}`/hadoop/conf<!-- This command specifies the environment; use the conf folder of your Hadoop installation -->flink run -t local /`{`Directory`}`/flink/examples/batch/WordCount.jar \---input cfs://`{`Directory`}`/{document} \<!-- The data in this folder is used as input -->--output cfs://`{`Directory`}`/{document}<!-- The output file after WordCount calculation is stored here -->
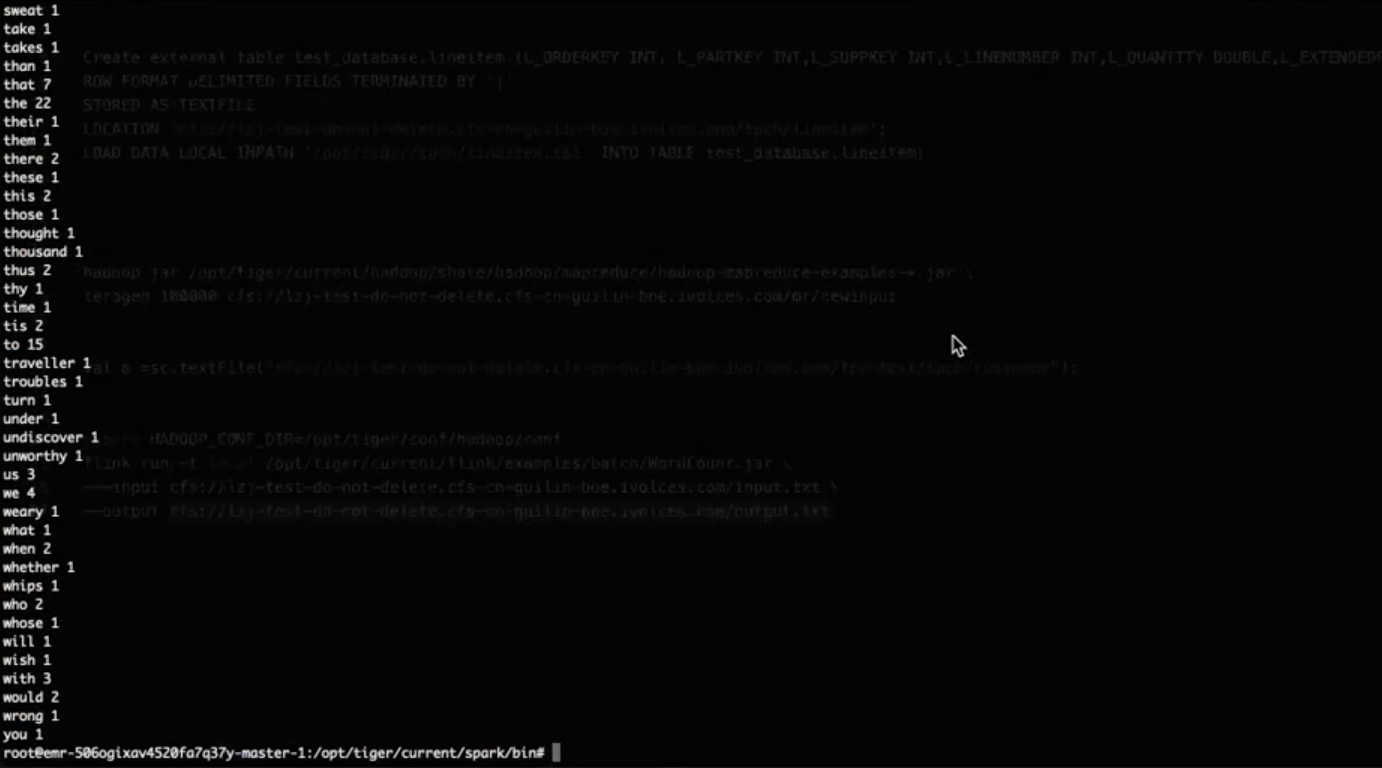
- View the computation results.
- hdfs dfs -cat cfs://`{`Directory`}`/{document}<!-- Here is the file path after calculation -->
- If information similar to the figure below is returned, Flink configuration is successful.
-
Last updated: 2026.02.02 11:22:42
All rights reserved © Beijing Volcano Engine Technology Co., Ltd2024
