Server Migration Center
Server Migration Center


Document

- Documentation
 Server Migration CenterBest PracticesManually releasing temporary resources
 Copy page
 Download PDF
Best Practices
Manually releasing temporary resources
Copy pageDownload PDFManually releasing temporary resources
Migration may fail due to causes such as network issues, changes to the source server, or other failures. In this case, SMC does not automatically release the temporary cloud resources it creates for data migration (for example, EIPs, security groups, and volumes). You need to manually release these resources to prevent incurring unnecessary charges.
tip
Manual release of temporary resources is required only when migration fails during the process of migrating to ECS instances or custom images.
Procedure
Migration failure to ECS instance
- Log in to the Server Migration Center console.
- In the left directory tree, select "Server Migration Center > Migration Job".
- Select the "Migrate to server" tab.
- Click the "Logs" button in the Actions column on the right side of the target migration task.
-
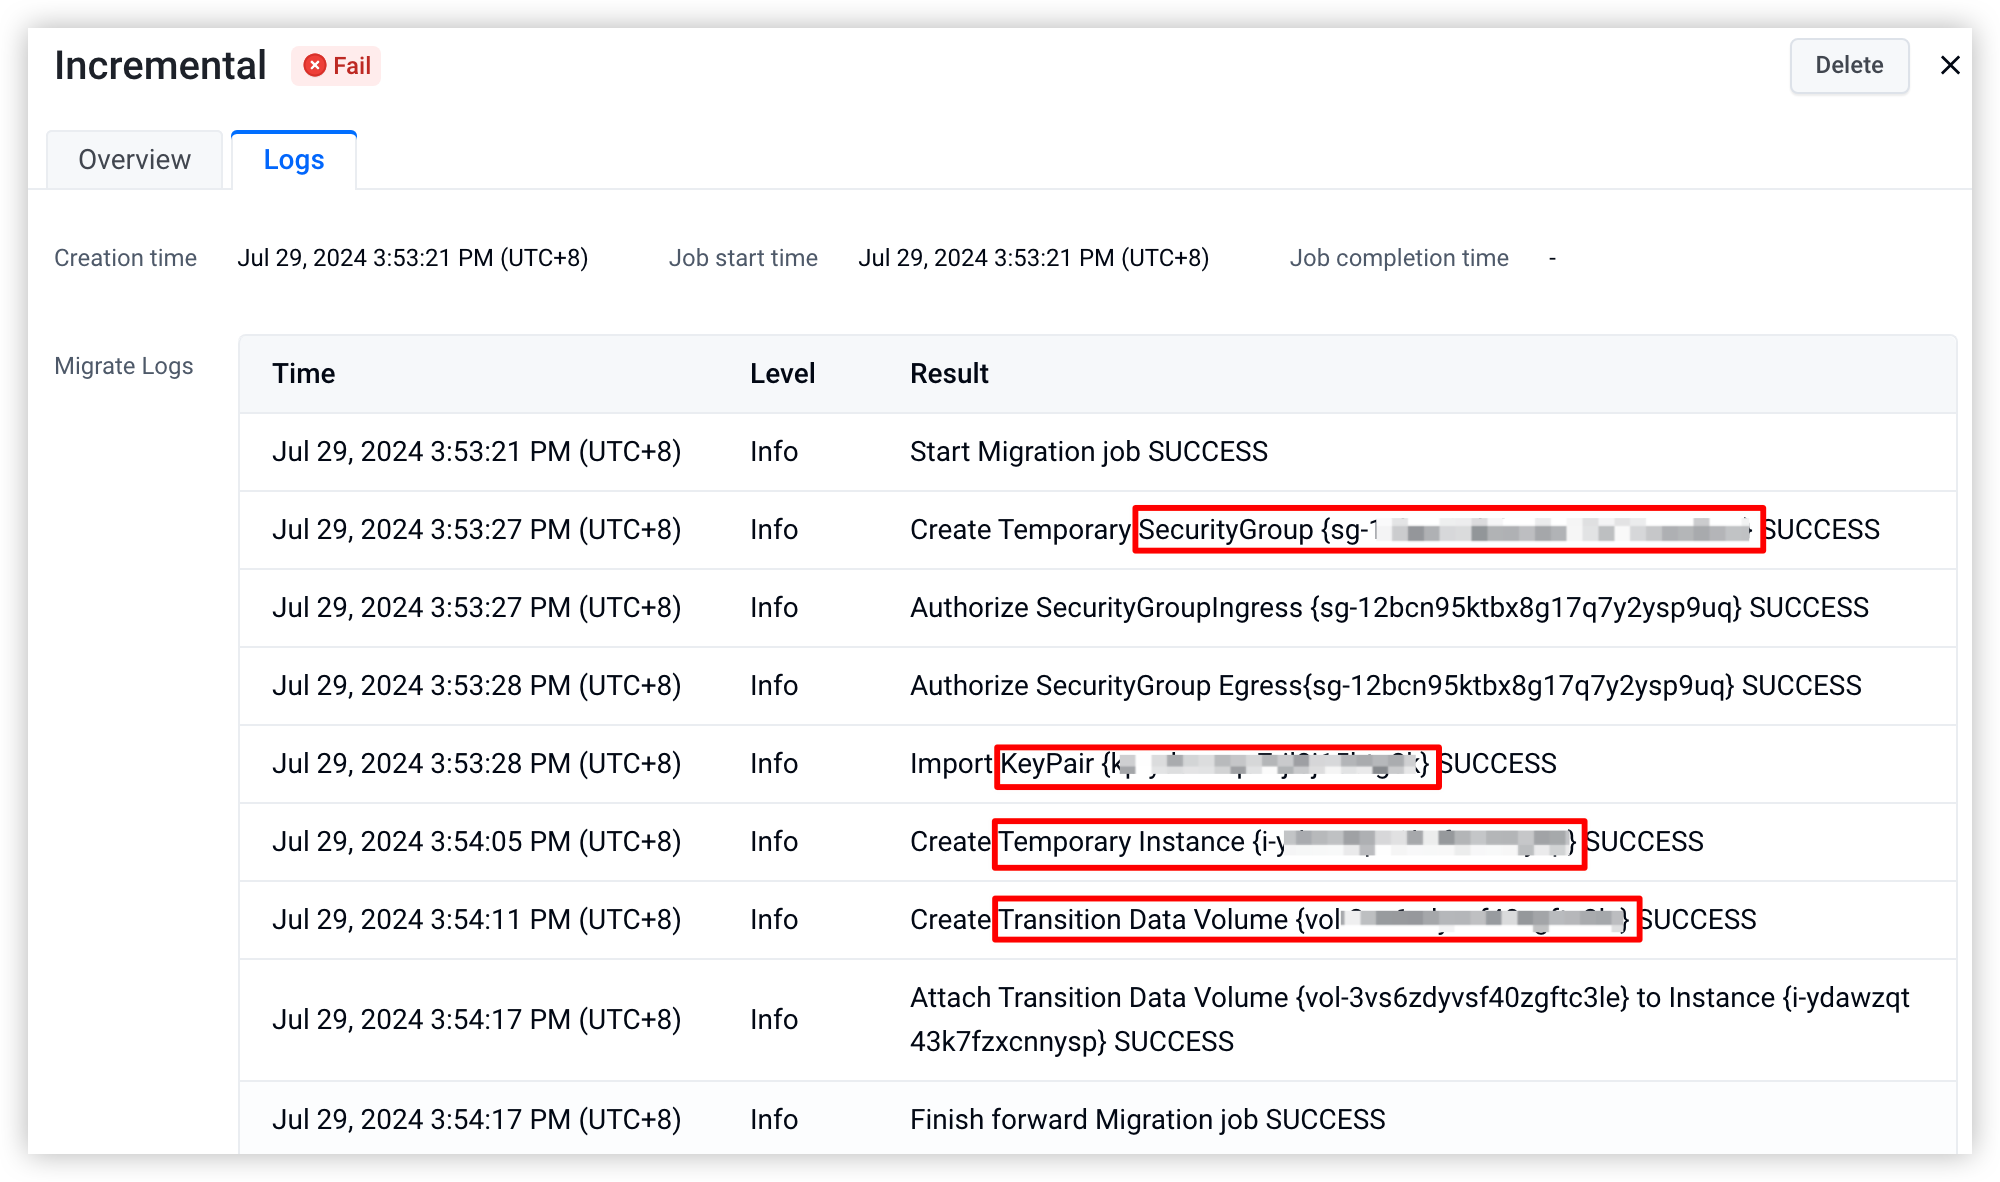
- Resource description:
-
- Manually release the corresponding resources based on the resource IDs displayed in the log information.
tip
Additionally, you can check the Agent logs located in the migration Agent directory on your source server.
- Linux operating system: Execute the cat smc.log command.
- Windows operating system: View the smc.txt file.
- Release temporary key pair
- Log in to the Key Pair console.
- In the top menu bar, select the region where the target instance resides.
- In the search box at the top right, select "ID" from the dropdown, and enter the value of KeyPair in the log information to search for the target key pair.
-

- Click the "Unbind instances" button in the Actions column to the right of the target key pair, and in the pop-up window, check the instance corresponding to the Instance parameter.
- Click the "Confirm" button to complete disassociation.
- Click the "Delete" button in the Actions column to the right of the target key pair, and confirm the key pair information in the pop-up window.
- Click the "Delete" button to complete deletion.
- Release temporary security group
- Log in to the Security Group console.
- In the top menu bar, select the region where the target instance resides.
- In the search box at the top right, select "ID" from the dropdown, and enter the value of Temporary SecurityGroup in the log information to search for the target security group.
- Click the "Associate ENI" button in the Actions column to the right of the target security group. On the "Associate ENI" tab, select the network interface associated with the instance corresponding to the Instance parameter.
- Click the "Disassociate" button in the Actions column to the right of the target network interface, confirm the network interface information in the pop-up window, and click the "Disassociate" button to complete the disassociation.
- Switch back to the security group list page, click the "... > Delete" button in the Actions column to the right of the target security group, and confirm the security group information in the pop-up window.
- Click the "Delete" button to complete deletion.
- Release temporary data volume
- Log in to the Volumes console.
- In the top menu bar, select the region where the target instance resides.
- In the search box at the top right, select "Volume ID" from the dropdown, and enter the value of Transition Data Volume in the log information to search for the target volume.
-

- Click the "... > Detach" button in the Actions column to the right of the target volume, and confirm the volume and target instance information in the pop-up window.
-
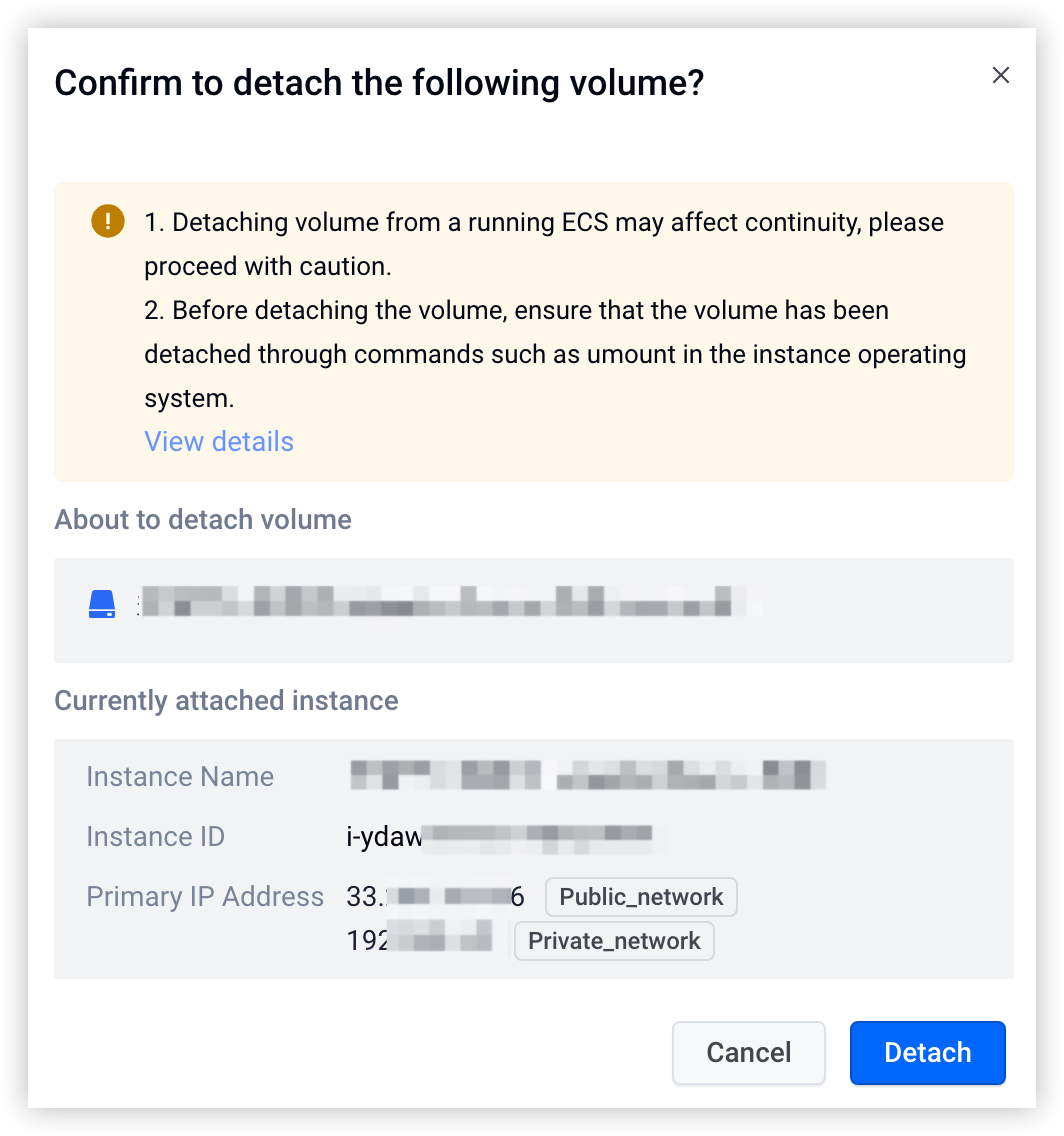
- Click the "Confirm" button to complete detachment.
- After detachment is complete, click the "... > Delete" button in the Actions column to the right of the target volume, and confirm the volume information in the pop-up window.
- Click the "Confirm" button to complete the operation.
- Reset target instance login credentials
- Since SMC replaces the login credentials of the target instance with a temporary key pair during migration, if migration fails, you need to reset the login credentials of the target instance to avoid login failure to the target instance. For operation details, see Resetting login password.
- Afterwards, you can use SMC to migrate source server data to the VolcanoEngine. For details, see Getting started.
Migration failure to custom image
- Log in to the Server Migration Center console.
- In the left directory tree, select "Server Migration Center > Migration Job".
- Select the "Migrate to server" tab.
- Click the "Logs" button in the Actions column on the right side of the target migration task.
-
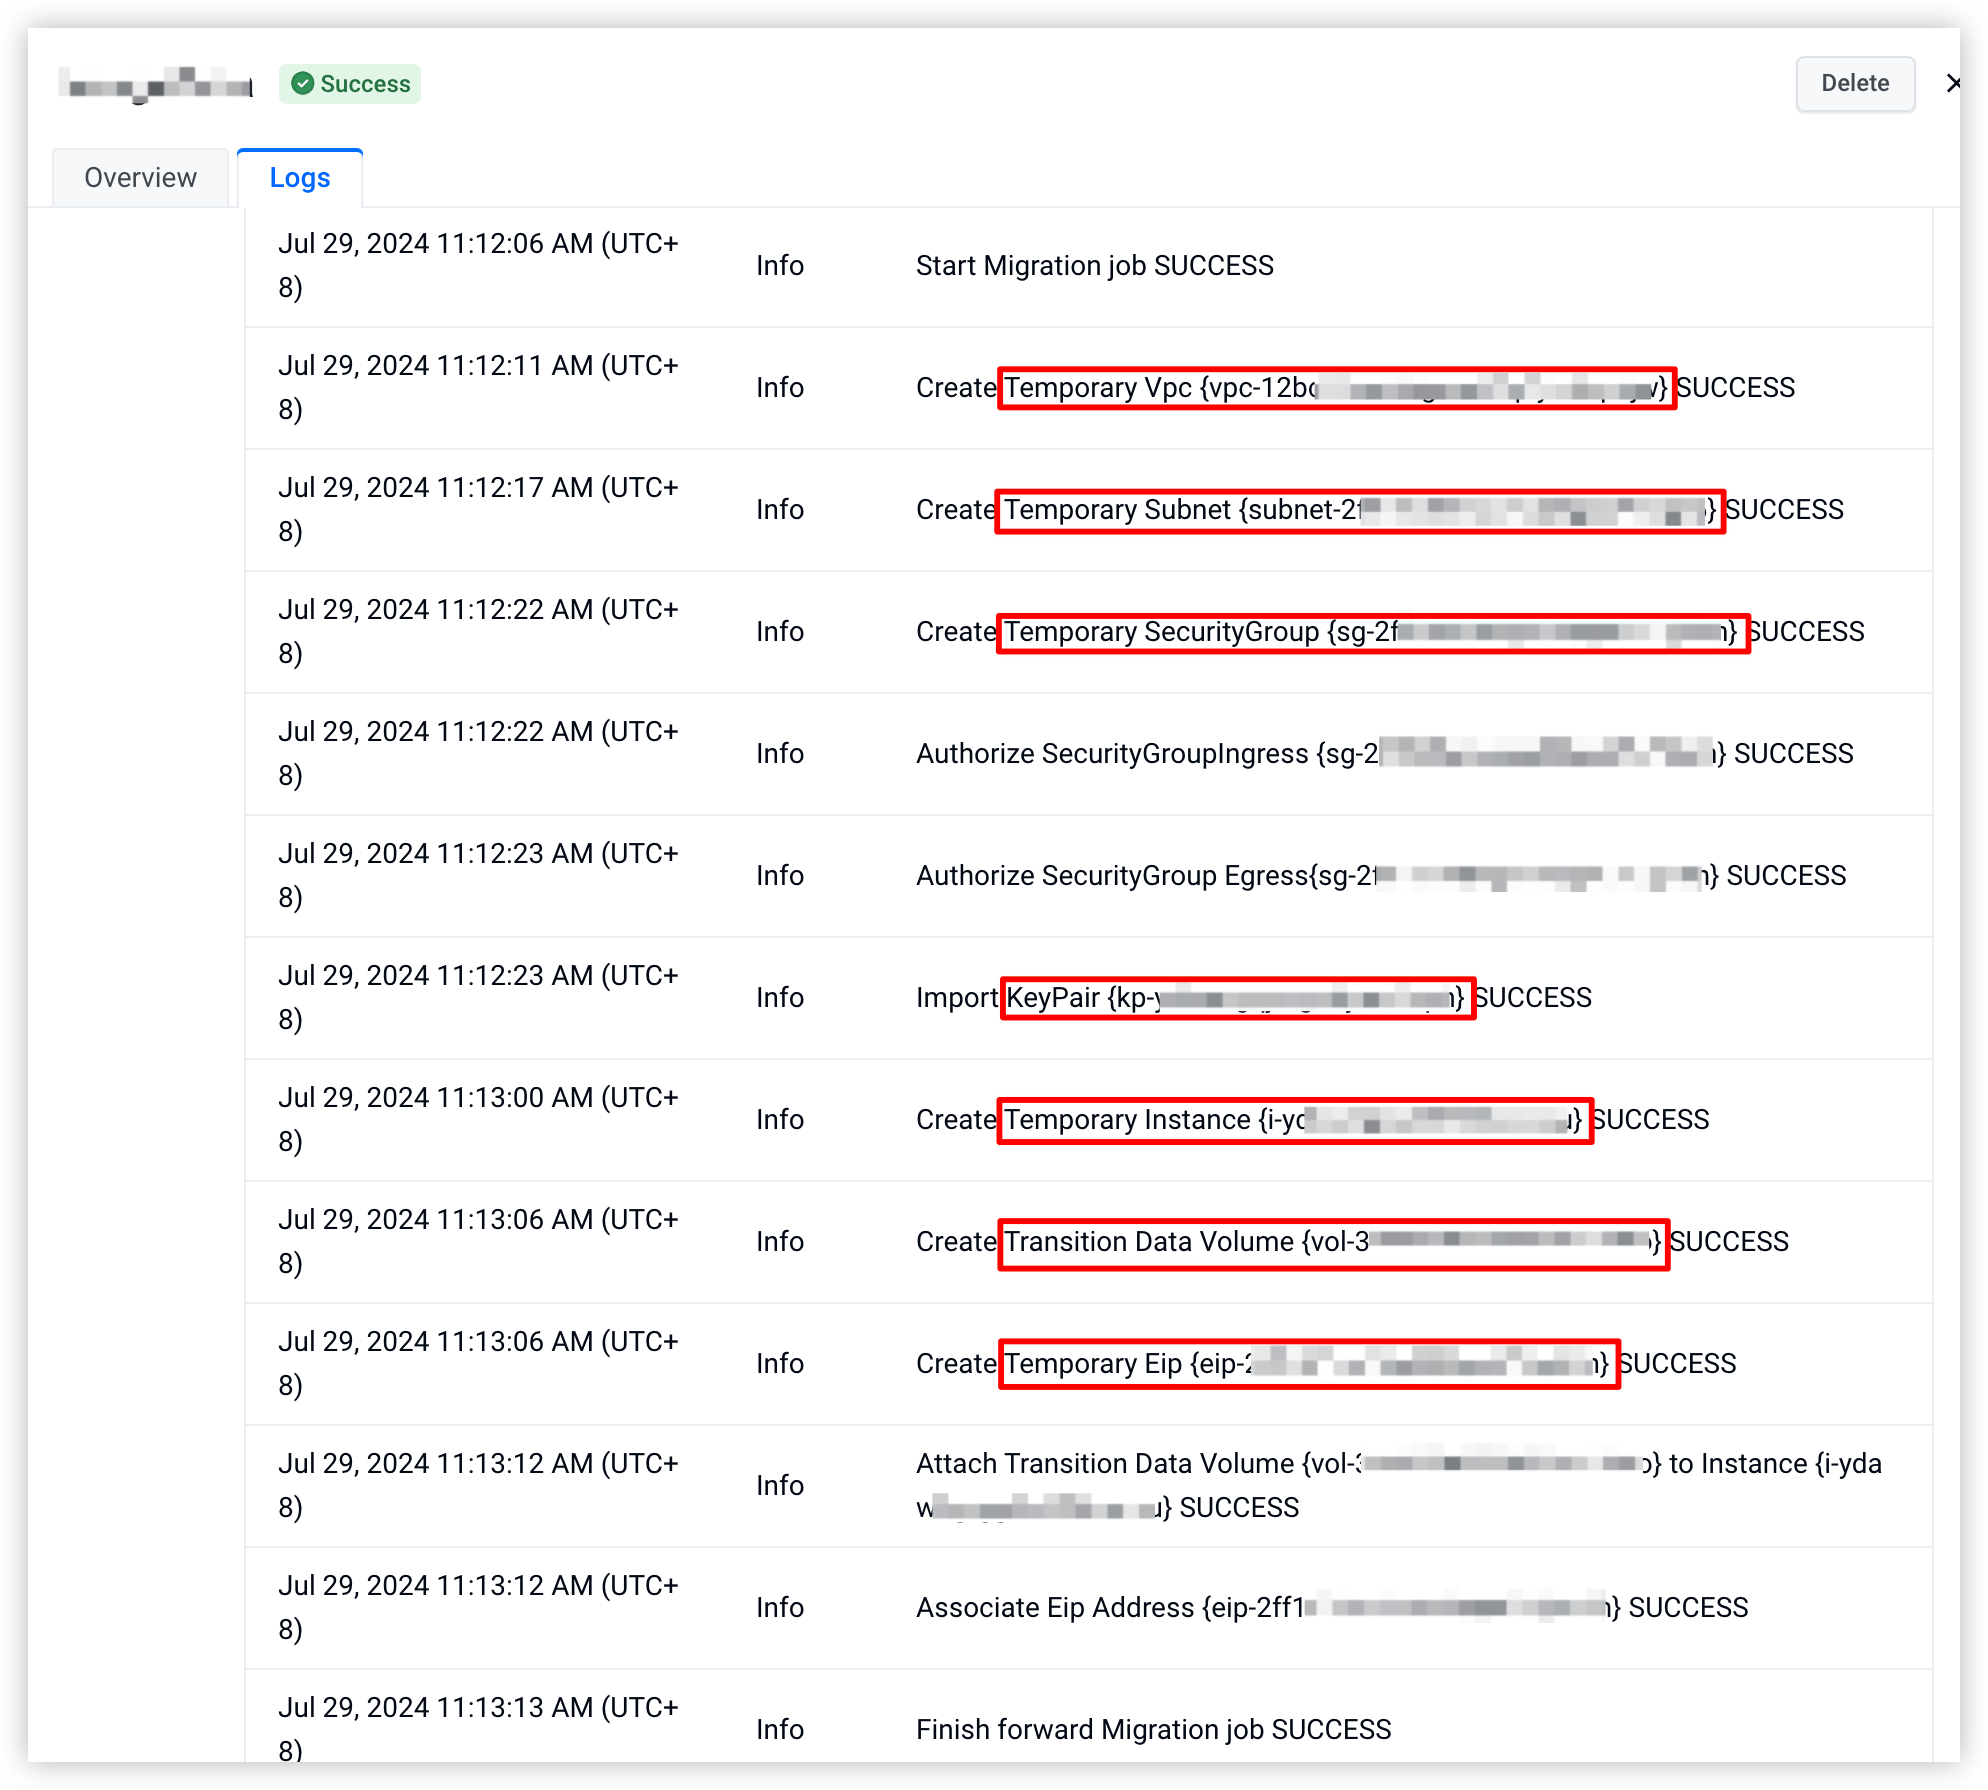
- Resource description:
-
- Manually release the corresponding resources based on the resource IDs displayed in the log information.
tip
Additionally, you can check the Agent logs located in the migration Agent directory on your source server.
- Linux operating system: Execute the cat smc.log command.
- Windows operating system: View the smc.txt file.
- Release temporary instance
- You can release the temporary instance and the temporary system volume, data volume, and temporary EIP associated with it in a single operation.
- Log in to the Instances console.
- In the top menu bar, select the region where the target instance resides.
- In the top search box, select "Instances ID" from the dropdown, and enter the value of Temporary Instance in the log information to search for the target instance.
- Click the "... > Delete" button in the Actions column on the right side of the target instance.
- In the pop-up window, check the temporary data volume, temporary EIP, and "I am aware of the Instances and related resources that are about to be deleted and understand the associated risks."
-
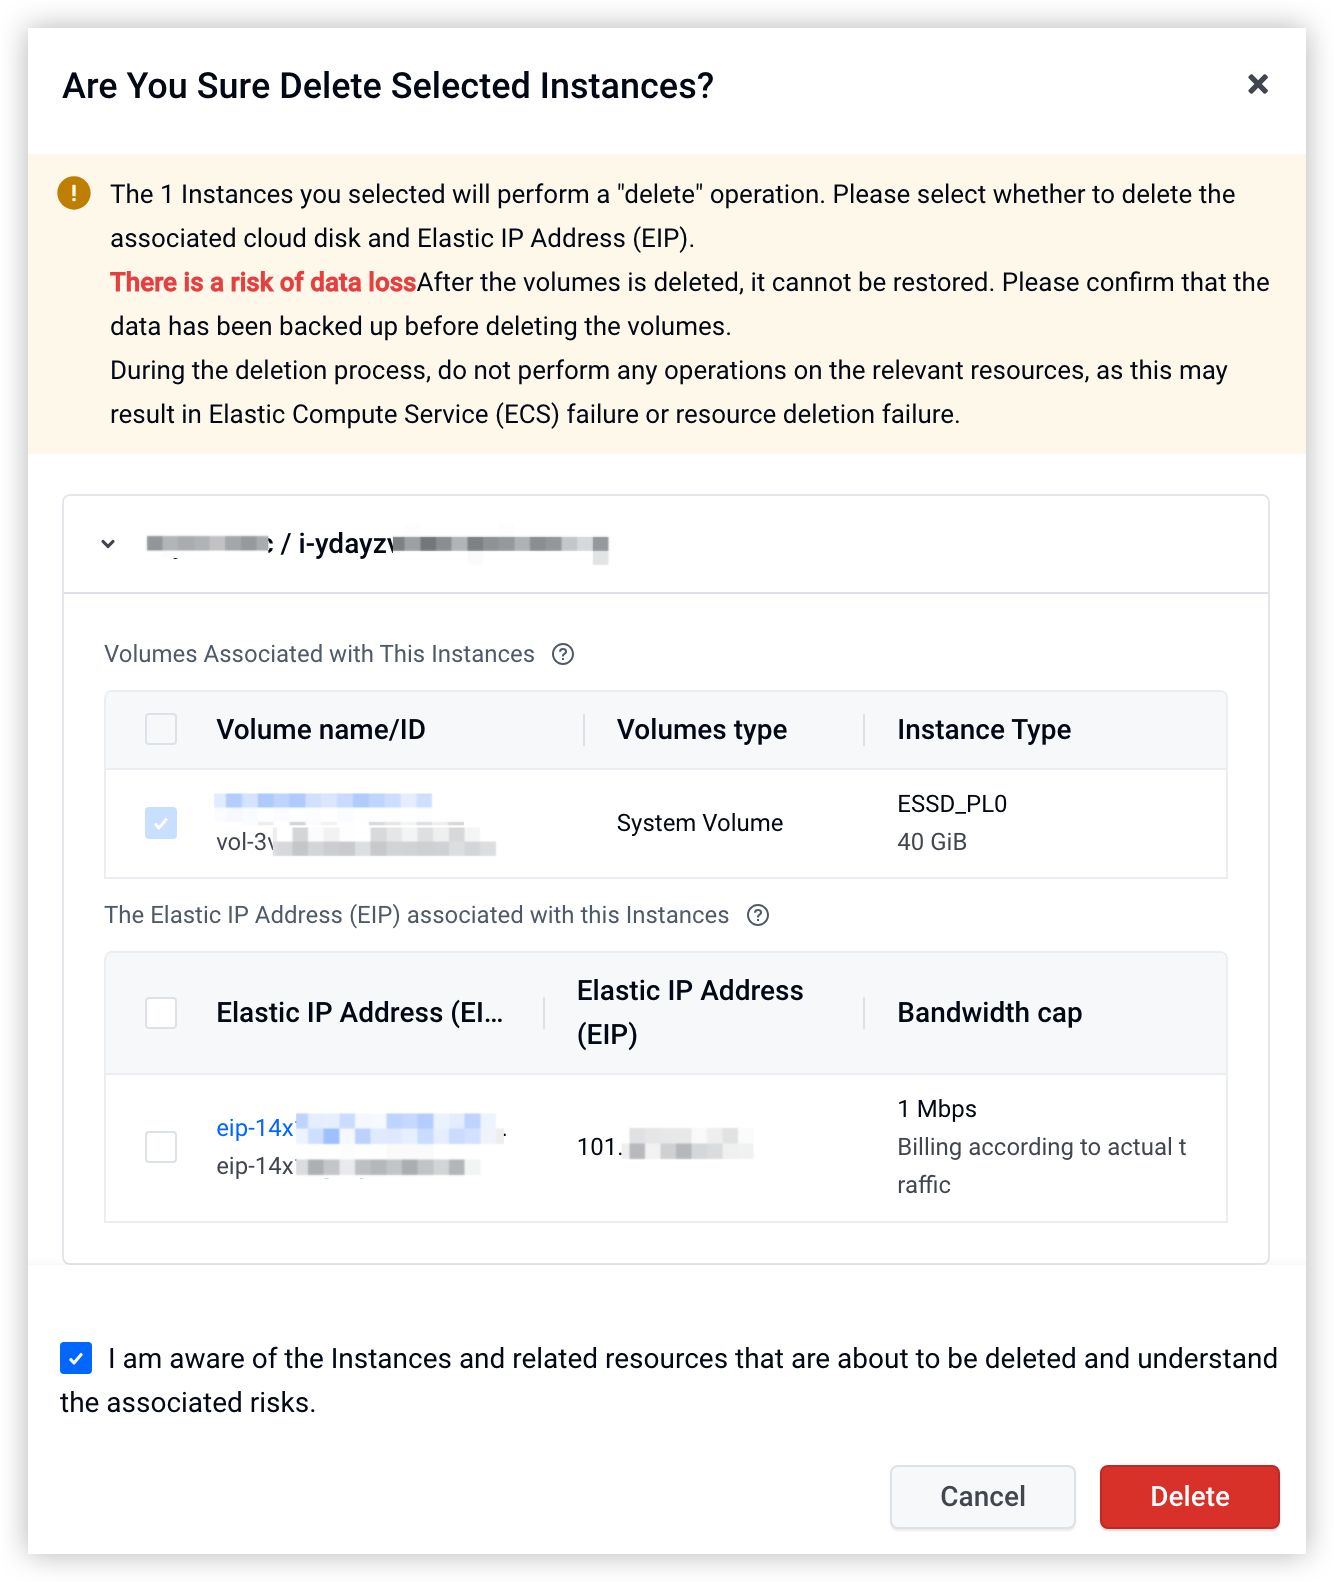
- Click "Delete" to complete the action.
- Release temporary key pair
- Log in to the Key Pair console.
- In the top menu bar, select the region where the target instance resides.
- In the search box at the top right, select "ID" from the dropdown, and enter the value of KeyPair in the log information to search for the target key pair.
-
- Click the "Unbind instances" button in the Actions column to the right of the target key pair, and in the pop-up window, check the instance corresponding to the Instance parameter.
- Click the "Confirm" button to complete disassociation.
- Click the "Delete" button in the Actions column to the right of the target key pair, and confirm the key pair information in the pop-up window.
- Click the "Delete" button to complete deletion.
- Release temporary security group
- Log in to the Security Group console.
- In the top menu bar, select the region where the target instance resides.
- In the search box at the top right, select "ID" from the dropdown, and enter the value of Temporary SecurityGroup in the log information to search for the target security group.
- Click the "Associate ENI" button in the Actions column to the right of the target security group. On the "Associate ENI" tab, select the network interface associated with the instance corresponding to the Instance parameter.
- Click the "Disassociate" button in the Actions column to the right of the target network interface, confirm the network interface information in the pop-up window, and click the "Disassociate" button to complete the disassociation.
- Switch back to the security group list page, click the "... > Delete" button in the Actions column to the right of the target security group, and confirm the security group information in the pop-up window.
- Click the "Delete" button to complete deletion.
- Release temporary subnet
- Log in to the Subnet console.
- In the top menu bar, select the region where the migration target instance resides.
- In the search box at the top right, select "ID" from the dropdown, and enter the value of Temporary Subnet in the log information to search for the target subnet.
- Click the "Delete" button in the Actions column to the right of the target subnet, and confirm the subnet information in the pop-up window.
- Click the "Delete" button to complete deletion.
- Release temporary VPC
- Log in to the VPC console.
- In the top menu bar, select the region where the migration target instance resides.
- In the search box at the top right, select "ID" from the dropdown, and enter the value of Temporary Vpc in the log information to search for the target subnet.
- Click the "Delete" button in the Actions column to the right of the target VPC, and confirm the VPC information in the pop-up window.
- Click the "Delete" button to complete deletion.
- Afterwards, you can use SMC to migrate source server data to the VolcanoEngine. For details, see Getting started.
Last updated: 2026.01.07 15:11:32
All rights reserved © Beijing Volcano Engine Technology Co., Ltd2024
