Server Migration Center
Server Migration Center


Document

- Documentation
 Server Migration CenterBest PracticesMigration Source tuningMigrating Alibaba Cloud CentOS 6.x operating system instances to VolcanoEngine
 Copy page
 Download PDF
Migration Source tuning
Migrating Alibaba Cloud CentOS 6.x operating system instances to VolcanoEngine
Copy pageDownload PDFMigrating Alibaba Cloud CentOS 6.x operating system instances to VolcanoEngine
Because the Alibaba Cloud CentOS 6.x operating system has a low rsync version, and the source server may have a static IP address configured, this will cause the migrated instance to fail to be pinged or logged into. Therefore, to migrate this specific type of Alibaba Cloud instances, additional configurations are required.
Prerequisites
- Your VolcanoEngine platform account and migration source must meet the requirements in the Limits.
- You have completed preparations.
Procedure
Step 1: Update rsync
- Log in to the source server.
- Execute the following command to view the rsync version.
- rsync --version
- If the tool version is lower than 3.1.0, update rsync to 3.1.1 by following the steps below.
- wget https://smc-beijing.tos-cn-beijing.volces.com/packages/linux/rsync-3.1.1-6cnt6.x86_64.rpmrpm -ivh rsync-3.1.1-6cnt6.x86_64.rpm --replacefiles
- If the version is 3.1.0 or higher, proceed with the subsequent steps.
Step 2: Migrate data
Select a migration method as needed and complete data migration by referring to Migration process overview.
Step 3: Adjust network configurations
If your source server is configured with a static IP address, follow the guide in this section to adjust the network configurations of the target instance (migration destination) after migration completes. This prevents the target instance from being unable to be pinged or logged in to.
- After migration succeeds, use VNC to log in to the migration target instance. For operation details, see Logging in to Linux instances.
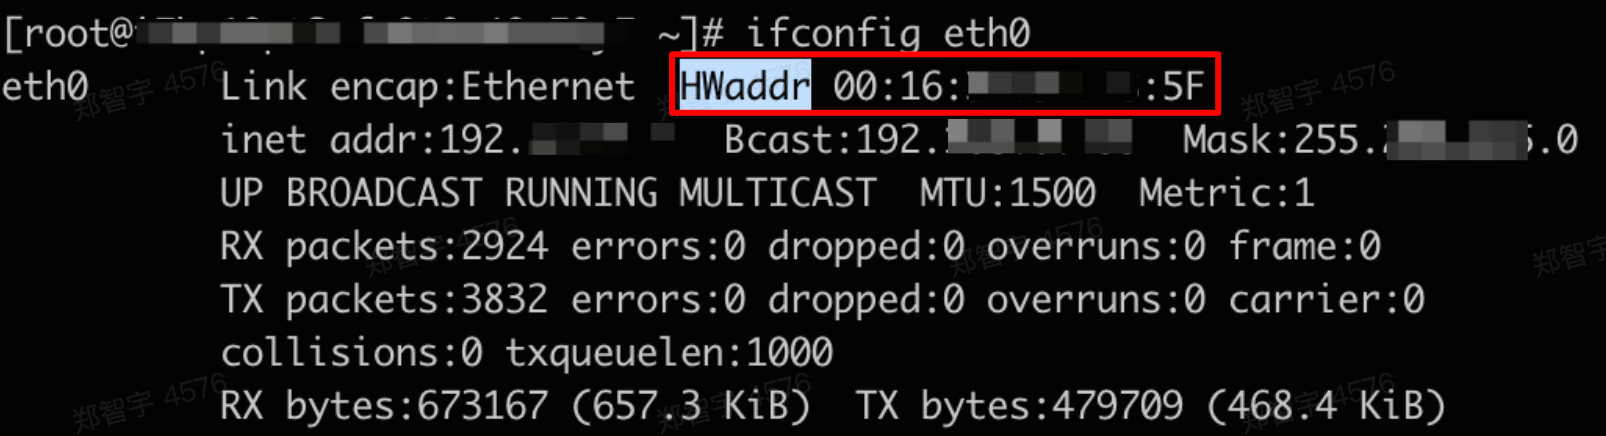
- Execute the following command in the instance to obtain the HWaddr information (hardware address, which is the MAC address) of eth0.
- ifconfig eth0
- Sample output
- Record the HWaddr value here.
-
- Modify the eth0 network interface configuration.
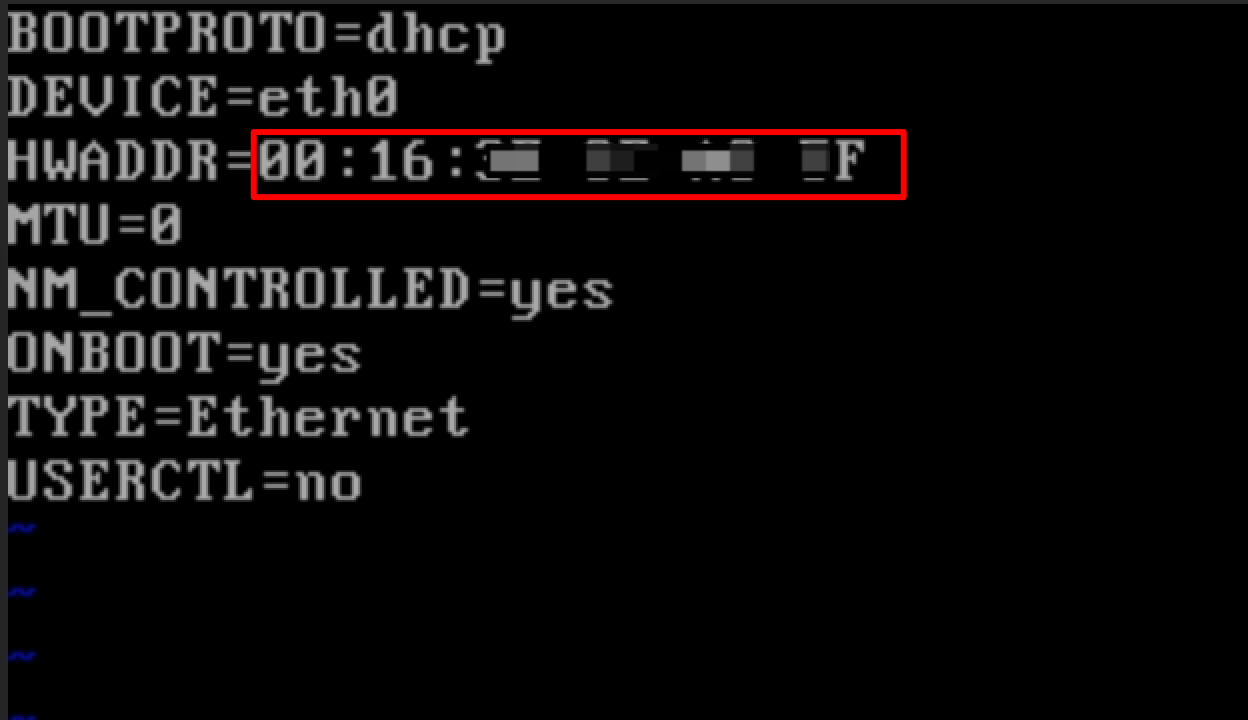
- Execute the following command to open the eth0 configuration file.
- vim /etc/sysconfig/network-scripts/ifcfg-eth0
- Press the i key to enter edit mode, and replace the HWADDR parameter value with the HWaddr value obtained in step 2.
-
- Press the esc key, enter :wq, and press Enter to save and exit the file.
- Modify the network file.
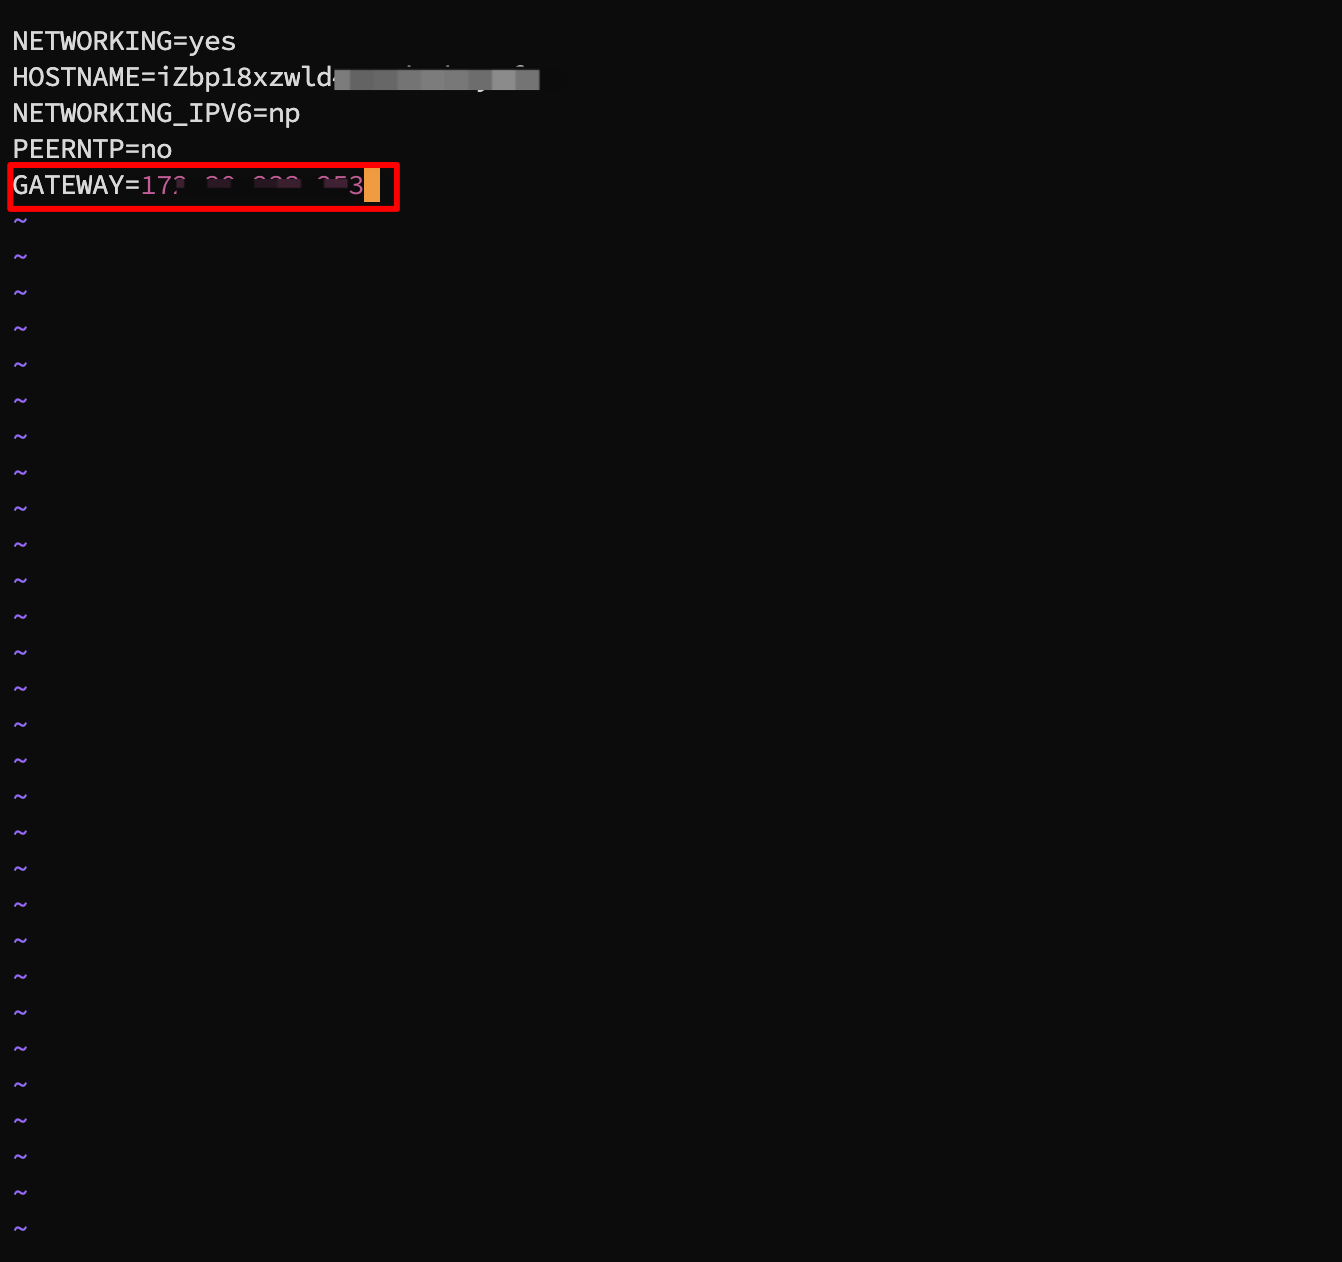
- Execute the following command to open the eth0 configuration file.
- vim /etc/sysconfig/network
- Press the i key to enter edit mode, and delete GATEWAY and its value from the file.
-
- Press the esc key, enter :wq, and press Enter to save and exit the file.
- Execute the following command to restart the instance for the configuration to take effect.
- reboot
Last updated: 2026.01.07 15:11:32
All rights reserved © Beijing Volcano Engine Technology Co., Ltd2024
