Load Balancer
Load Balancer


Document

- Documentation
 Load BalancerClassic Load Balancer (CLB)Best PracticesObtaining the client source IP addressGetting the client source IP for layer-7 listener
 Copy page
 Download PDF
Obtaining the client source IP address
Getting the client source IP for layer-7 listener
Copy pageDownload PDFGetting the client source IP for layer-7 listener
This topic introduces how the Layer 7 listener obtains the client source IP address accessing the Classic Load Balancer (CLB) service.
Scenarios
The Layer 7 listener of CLB (HTTP/HTTPS protocol) obtains the visitor's real IP address by configuring the backend server using the X-Forwarded-For method.
The real IP address of the visitor will be placed by CLB in the X-Forwarded-For field of the HTTP header, and the first address in this field is the real IP address of the visitor.
Configuration procedures
- Access the target backend server based on Logging on to a Linux instance.
- Run the following command to install Nginx.
- yum install -y https://mirrors.ivolces.com/nginx_all/centos/7/x86_64/RPMS/nginx-1.22.0-1.el7.ngx.x86_64.rpm
- Run the following command to check the Nginx version.
- nginx -v
- The output below indicates successful installation.
- nginx version: nginx/1.22.0
- Run the following command to check the path of the Nginx configuration file, nginx.conf:
- find / -name nginx.conf
- The output is shown below, indicating that the path of the Nginx configuration file is /etc/nginx/nginx.conf.
-

- Run the following commands in sequence to back up the Nginx configuration file in its directory, then open the original Nginx configuration file.
- cd /etc/nginxcp nginx.conf nginx.conf.bakvi nginx.conf
- Press it to enter edit mode, then add new configuration fields and details after the following server configuration information.
- server {listen 80;server_name localhost;
- Configuration fields and information to add:
- set_real_ip_from 100.64.0.0/10;real_ip_header X-Forwarded-For;
tip
You can add the proxy server's network CIDR block into set_real_ip_from <IP_cidr> to obtain the IP address of the proxy server. For example, add the IP address range of the Cloud Load Balancer (100.64.0.0/10 is a reserved address range for the CLB, which cannot be allocated to other users, eliminating any security risks). Separate multiple IP address ranges with commas (,).
- Press ESC to exit the editing mode, input :wq to save and exit the file.input
- Run the following command to restart Nginx.
- systemctl restart nginx.service
- Run the following command to check the path of the Nginx access log file, access.log:
- find / -name access.log
- The output is shown below, indicating that the path of the Nginx access log file is /var/log/nginx/access.log.
-

- Run the following command to view the Nginx access log and obtain the real visitor IP.
tip
cat /var/log/nginx/access.log
- Access the target backend server based on Logging on to a Linux instance.
- Run the following command to install Apache, using Apache 2.4.6 as an example.
- yum install httpd -y
- Run the following command to check the Apache version.
- httpd -v
- The output shown below indicates a successful installation.
- Server version: Apache/2.4.6 (CentOS)Server built: Mar 24 2022 14:57:57
- Run the following command to start the Apache service.
- systemctl start httpd
- Run the following command to set Apache service to start on boot.
- systemctl enable httpd
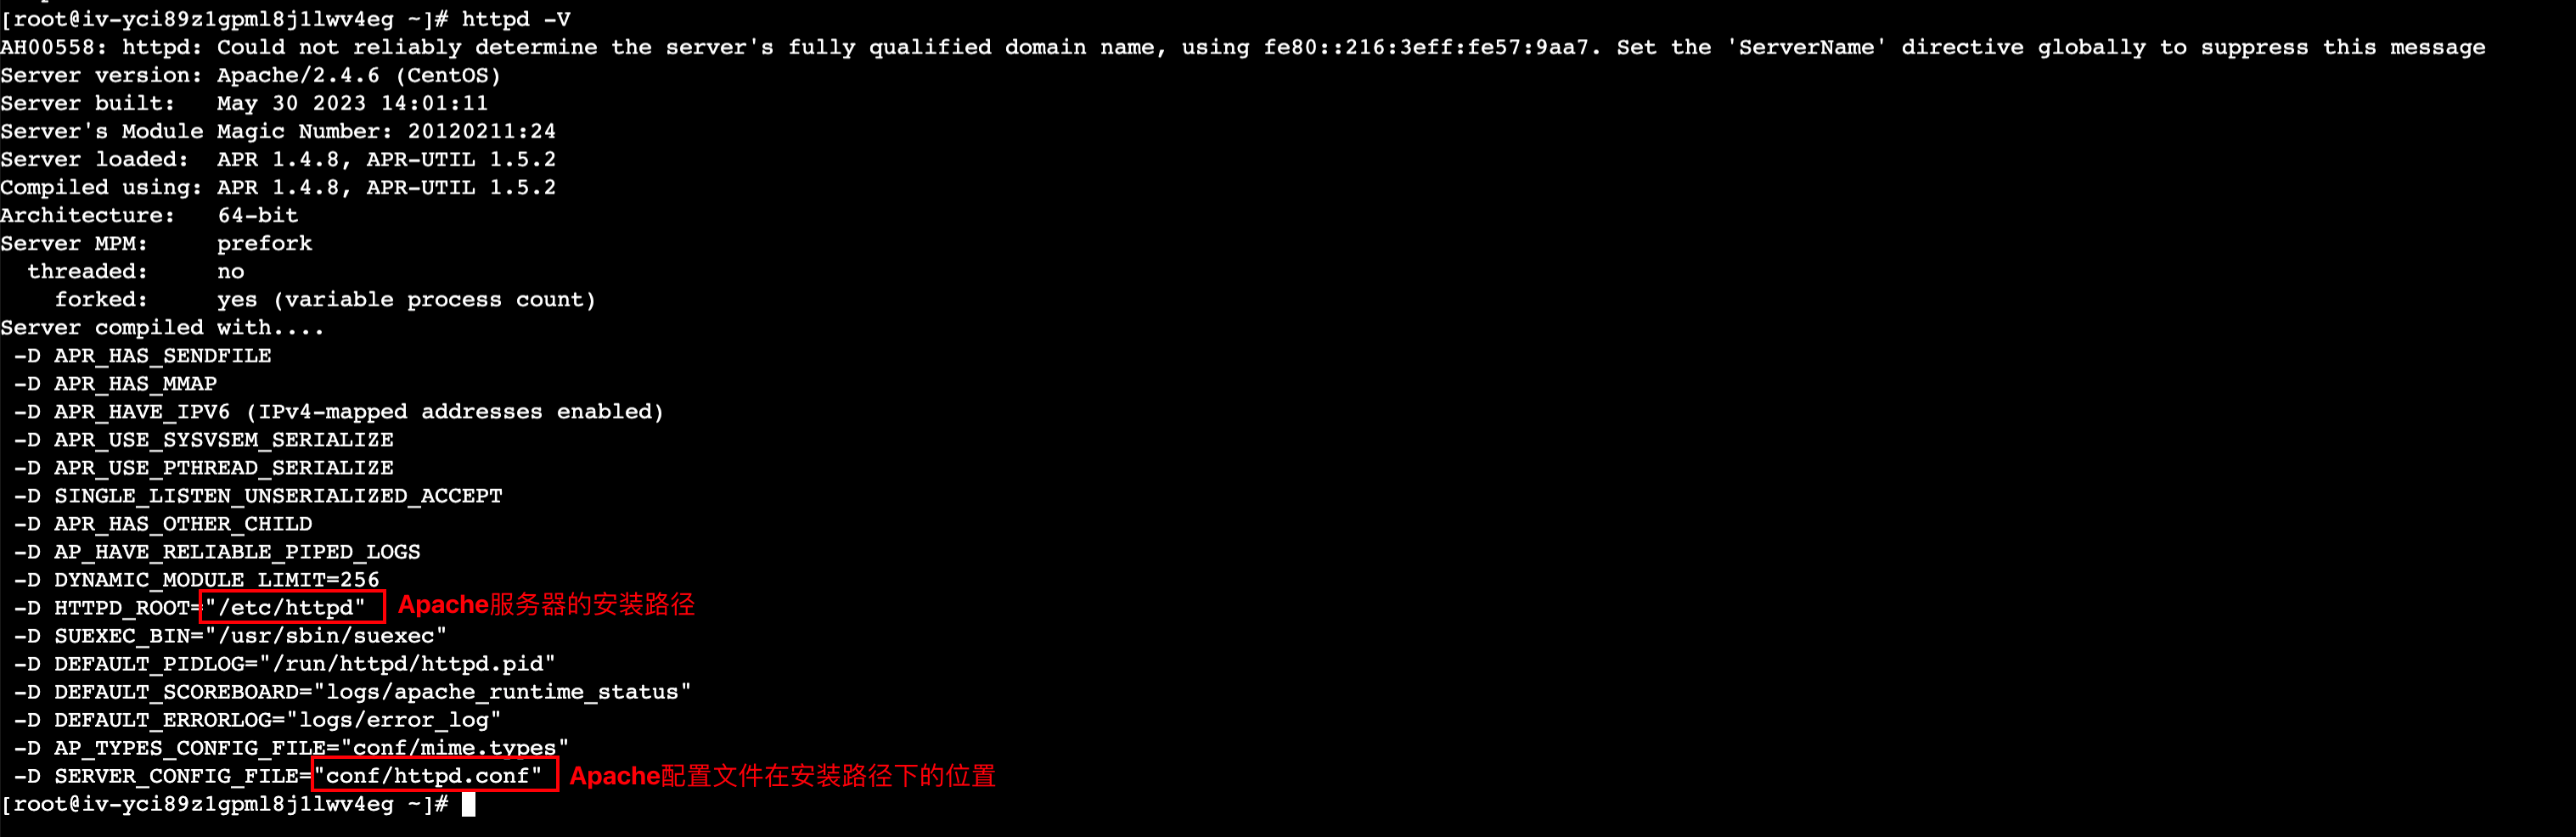
- Run the following command to view the Apache configuration file path.
- httpd -V
- The output shown below indicates the Apache configuration file path is “/etc/httpd/conf/httpd.conf”.
-
- Run the following command to open the httpd.conf file:
- vi /etc/httpd/conf/httpd.conf
- Press i to enter edit mode, modify the log format, and add the related configuration information at the end of the file.
- Modifications on the log format are as follows:
- LogFormat "%{X-Forwarded-For}i %h %l %u %t "%r" %>s %b "%{Referer}i" "%{User-Agent}i"" combined //在原内容中添加配置%{X-Forwarded-For}iCustomLog "logs/access_log" common //去掉此行配置前的注释符#
- Configuration fields and information to append:
- LoadModule remoteip_module modules/mod_remoteip.soRemoteIPHeader X-Forwarded-ForRemoteIPInternalProxy 100.64.0.0/10
- tip
- You can add the proxy server’s network CIDR block into RemoteIPInternalProxy <IP_cidr> to obtain the IP address of the proxy server. For example, add the IP address range of the Cloud Load Balancer (100.64.0.0/10 is a reserved address range for the Cloud Load Balancer and cannot be assigned to other users, ensuring no security risk). Separate multiple IP address ranges with commas (,).
- Press ESC to exit the editing mode, input :wq to save and exit the file.input
- Run the following command to restart Apache.
- systemctl restart httpd
- Run the following command to view Apache access logs and obtain the real visitor IP.
- cat /etc/httpd/logs/access_log
Last updated: 2026.08.06 14:31:17
All rights reserved © Beijing Volcano Engine Technology Co., Ltd2024
