GPU Compute Service
GPU Compute Service


Document

- Documentation
 GPU Compute ServiceGPU Compute ServiceBest PracticesBuilding applicationsGPU - Deploying NGC environment
 Copy page
 Download PDF
Building applications
GPU - Deploying NGC environment
Copy pageDownload PDFGPU - Deploying NGC environment
This topic describes how to deploy TensorFlow based on NGC on a Linux instance.
NGC overview
NVIDIA GPU CLOUD (NGC) is a deep learning container library developed by NVIDIA. It boasts powerful performance and excellent flexibility, helping scientists and researchers quickly build, train, and deploy neural network models.
The NGC official website provides images of mainstream deep learning frameworks, such as Caffe, TensorFlow, Theano, and Torch.
Software versions
- Operating system: In the example provided in this topic, Ubuntu 18.04 is used.
- NVIDIA driver:
- GPU driver: A program used to drive NVIDIA GPU cards. In the example provided in this topic, GPU driver 470.57.02 is used.
- CUDA: A computing platform that enables GPUs to solve complex computational problems. In the example provided in this topic, CUDA 11.4 is used.
- cuDNN: A deep neural network library designed for high-performance GPU acceleration. In the example provided in this topic, cuDNN 8.2.4.15 is used.
- TensorFlow: A deep learning framework.
Prerequisites
- You have purchased a Linux instance and selected "Automatically install GPU driver in the background". This way, the instance automatically installs the NVIDIA driver of the specified version when it starts. The total time from instance creation to the completion of driver installation is approximately 15 to 20 minutes. Wait patiently. For more information, see Creating GPU Accelerated instances.
- An EIP is associated with the Linux instance, enabling the instance to connect to the Internet. For information about how to associate an EIP with an ECS instance, see Associating EIPs.
- To use HTTPS or the DIGITS 6 service, you need to add the following inbound rules to the security group of the instance:
- Allow TCP port 443 (for HTTPS) or TCP port 5000 (for DIGITS 6).
Step 1: Verify that the driver version is installed successfully
- Remotely connect to and log in to the ECS instance. For more information, see Logging in to Linux instances.
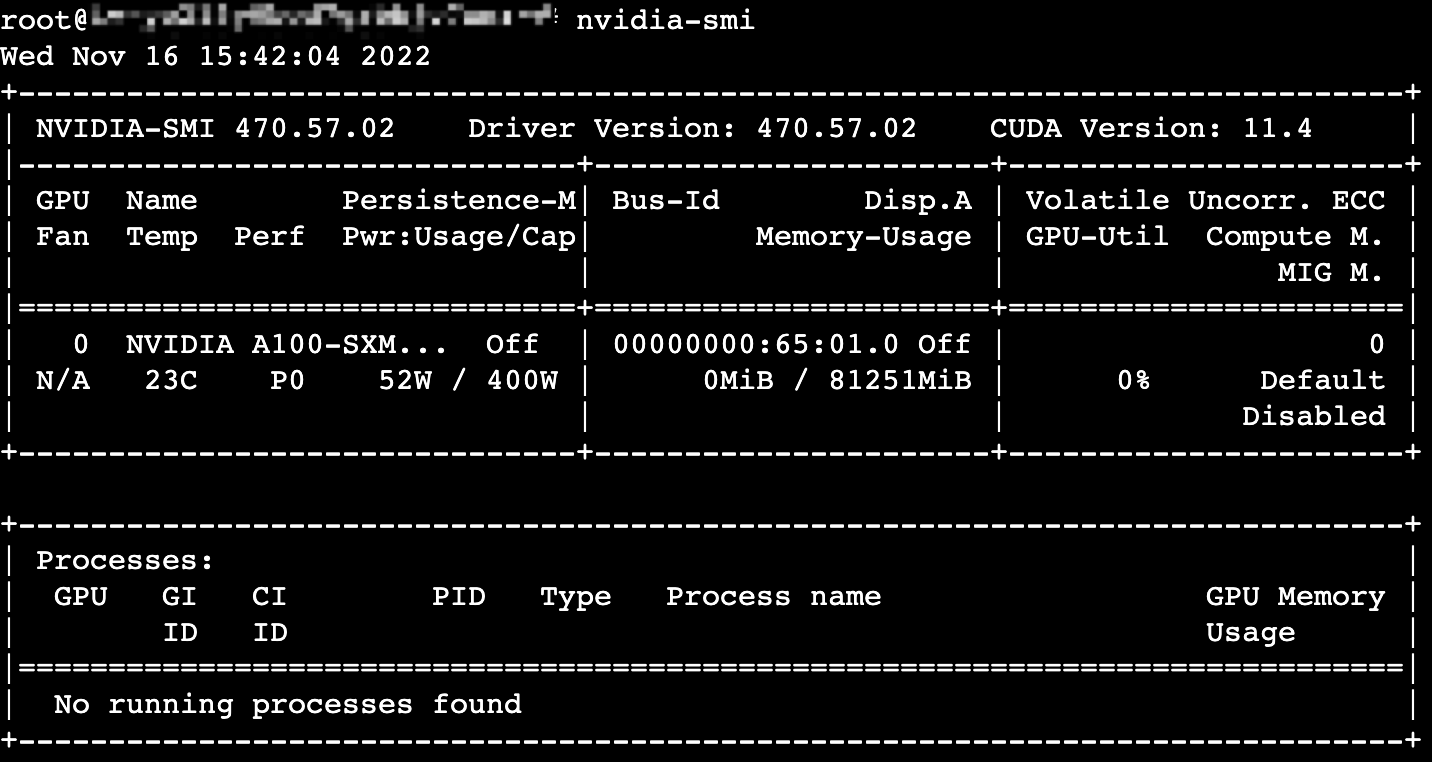
- Execute the following command to view the GPU driver.
- nvidia-smi
- If the following output is displayed, the installation is successful.
-
- Execute the following command to view the CUDA driver.
- /usr/local/cuda/bin/nvcc -V
- If the following output is displayed, the installation is successful.
-

Step 2: Install nvidia-docker
- Execute the following commands in sequence to configure Docker-CE.
- curl https://get.docker.com | sh \&& sudo systemctl --now enable docker
- Execute the following commands in sequence to configure the package repository and GPG key:
- distribution=$(. /etc/os-release;echo $ID$VERSION_ID) \&& curl -fsSL https://nvidia.github.io/libnvidia-container/gpgkey | sudo gpg --dearmor -o /usr/share/keyrings/nvidia-container-toolkit-keyring.gpg \&& curl -s -L https://nvidia.github.io/libnvidia-container/$distribution/libnvidia-container.list | \sed 's#deb https://#deb [signed-by=/usr/share/keyrings/nvidia-container-toolkit-keyring.gpg] https://#g' | \sudo tee /etc/apt/sources.list.d/nvidia-container-toolkit.list
- Execute the following command to install nvidia-docker2.
- sudo apt-get updatesudo apt-get install -y nvidia-docker2
- Execute the following command to configure the Docker daemon to recognize the NVIDIA container runtime.
- sudo nvidia-ctk runtime configure --runtime=docker
- Execute the following command to restart the Docker daemon and complete the installation.
- sudo systemctl restart docker
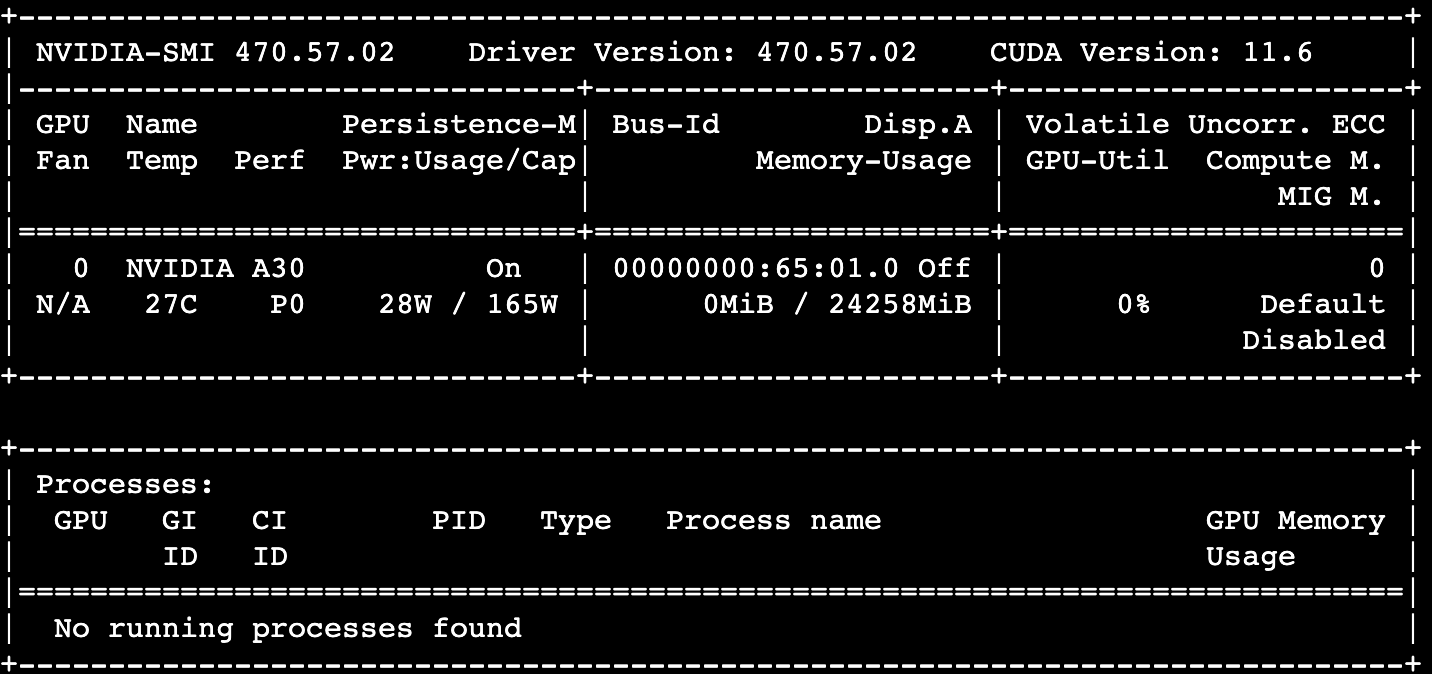
- Execute the following command to test whether nvidia-docker2 is installed successfully by running a basic CUDA container.
- sudo docker run --rm --runtime=nvidia --gpus all nvidia/cuda:11.6.2-base-ubuntu20.04 nvidia-smi
- If the following output is displayed, the installation is successful.
-
Step 3: Obtain the NGC image
- Log in to the NGC website and register an NGC account.
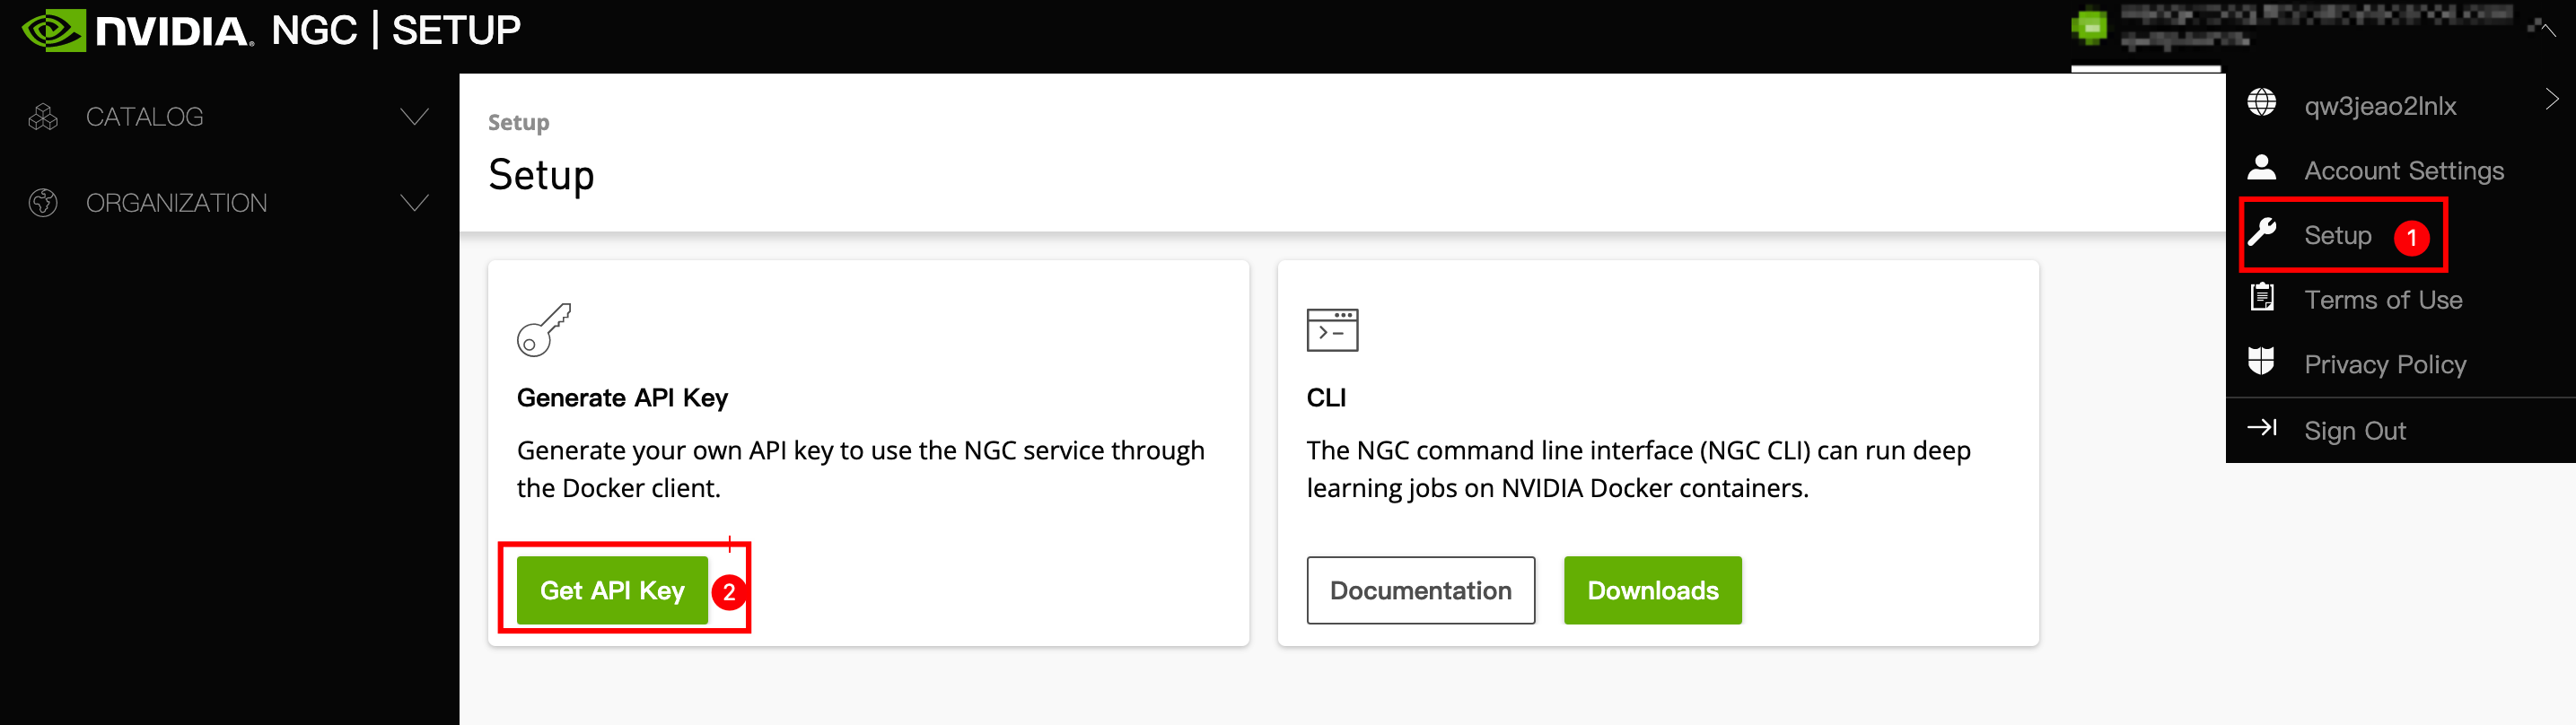
- Obtain the NGC API key and save it.
- Click the account name and select "Setup" from the drop-down list.
- Click the "Get API Key" button.
-
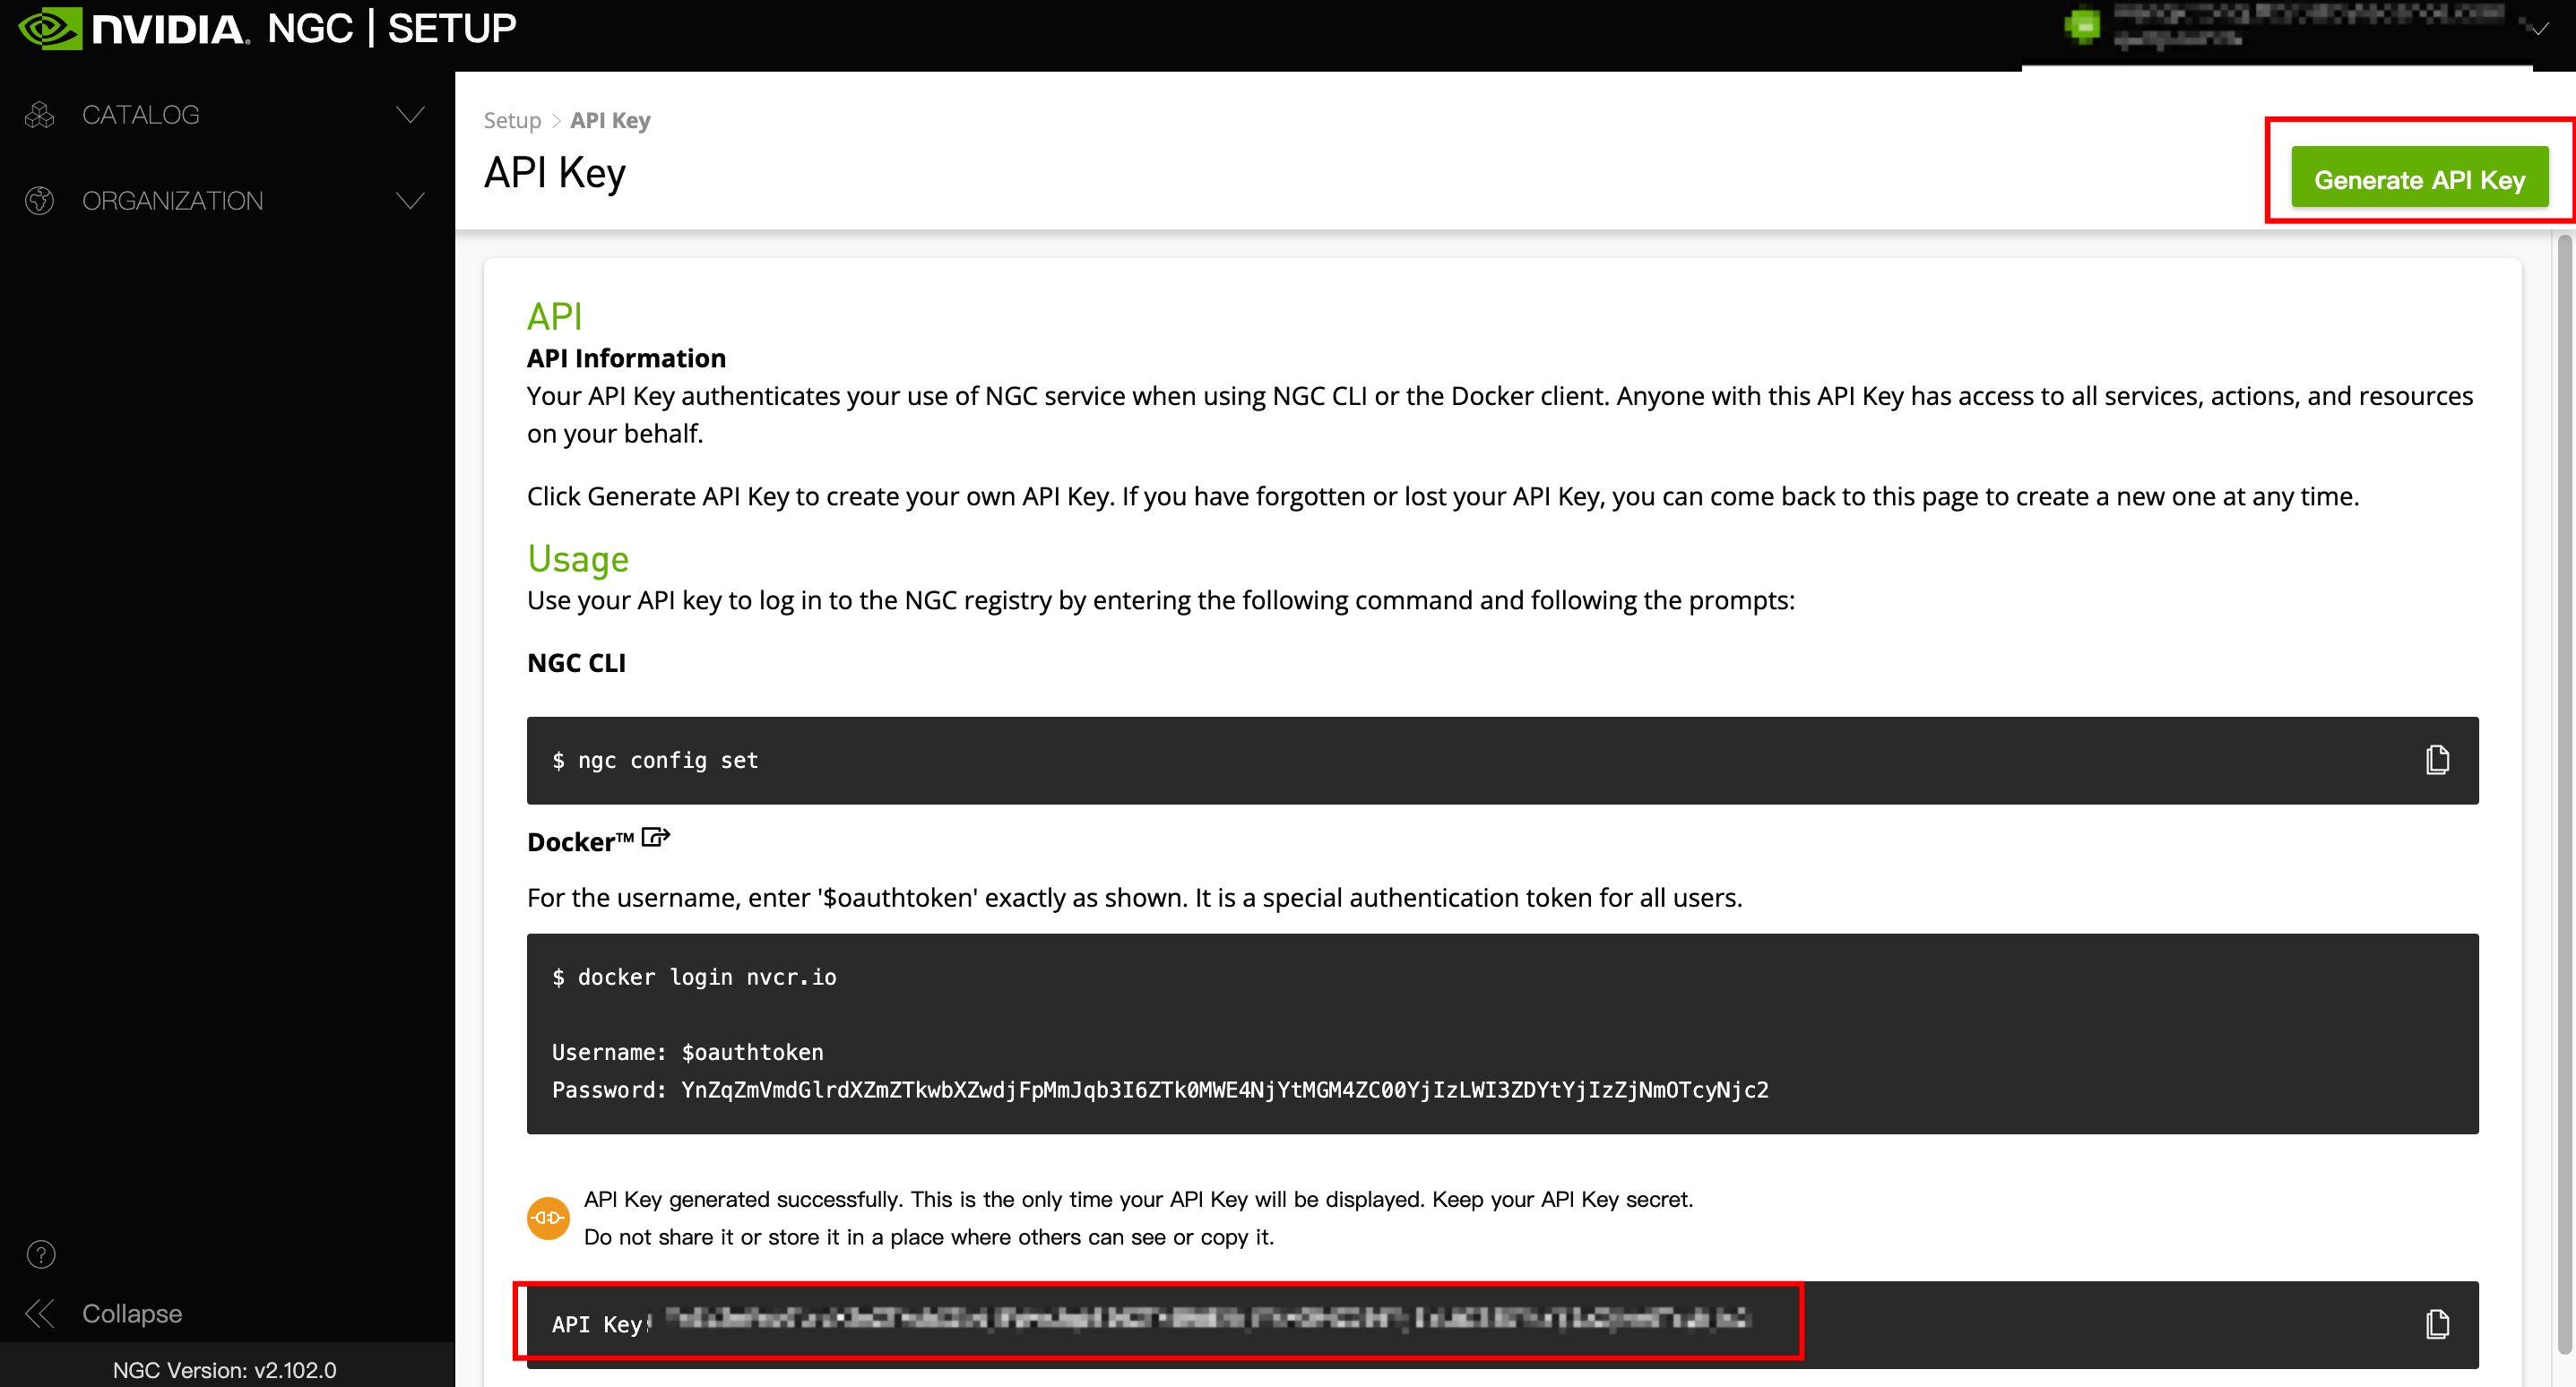
- Click "Generate API Key" in the upper right corner of the page, and then click the "Confirm" button. The API key will be displayed at the bottom of the page.
-
- Log in to the instance and execute the following command. Enter the account name (fixed as $oauthtoken) and API Key as prompted to log in to the NGC container environment.
- docker login nvcr.io
- If the following output is displayed, you are logged in to the NGC container environment.
-

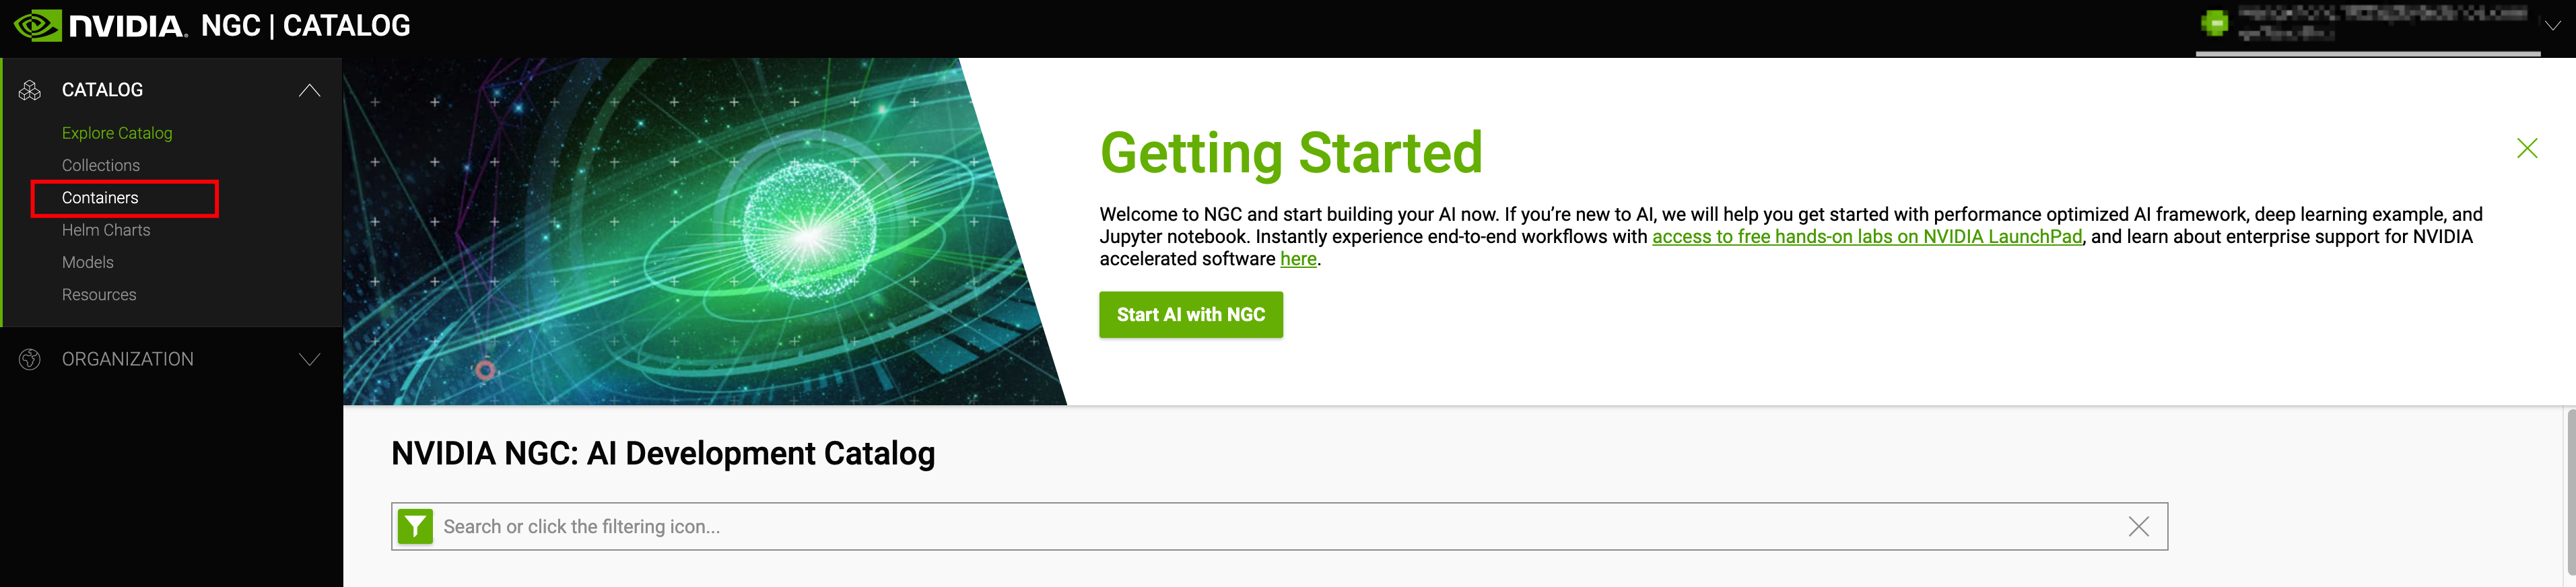
- Log in to the NGC official website and select "Containers" in the left navigation pane.
-
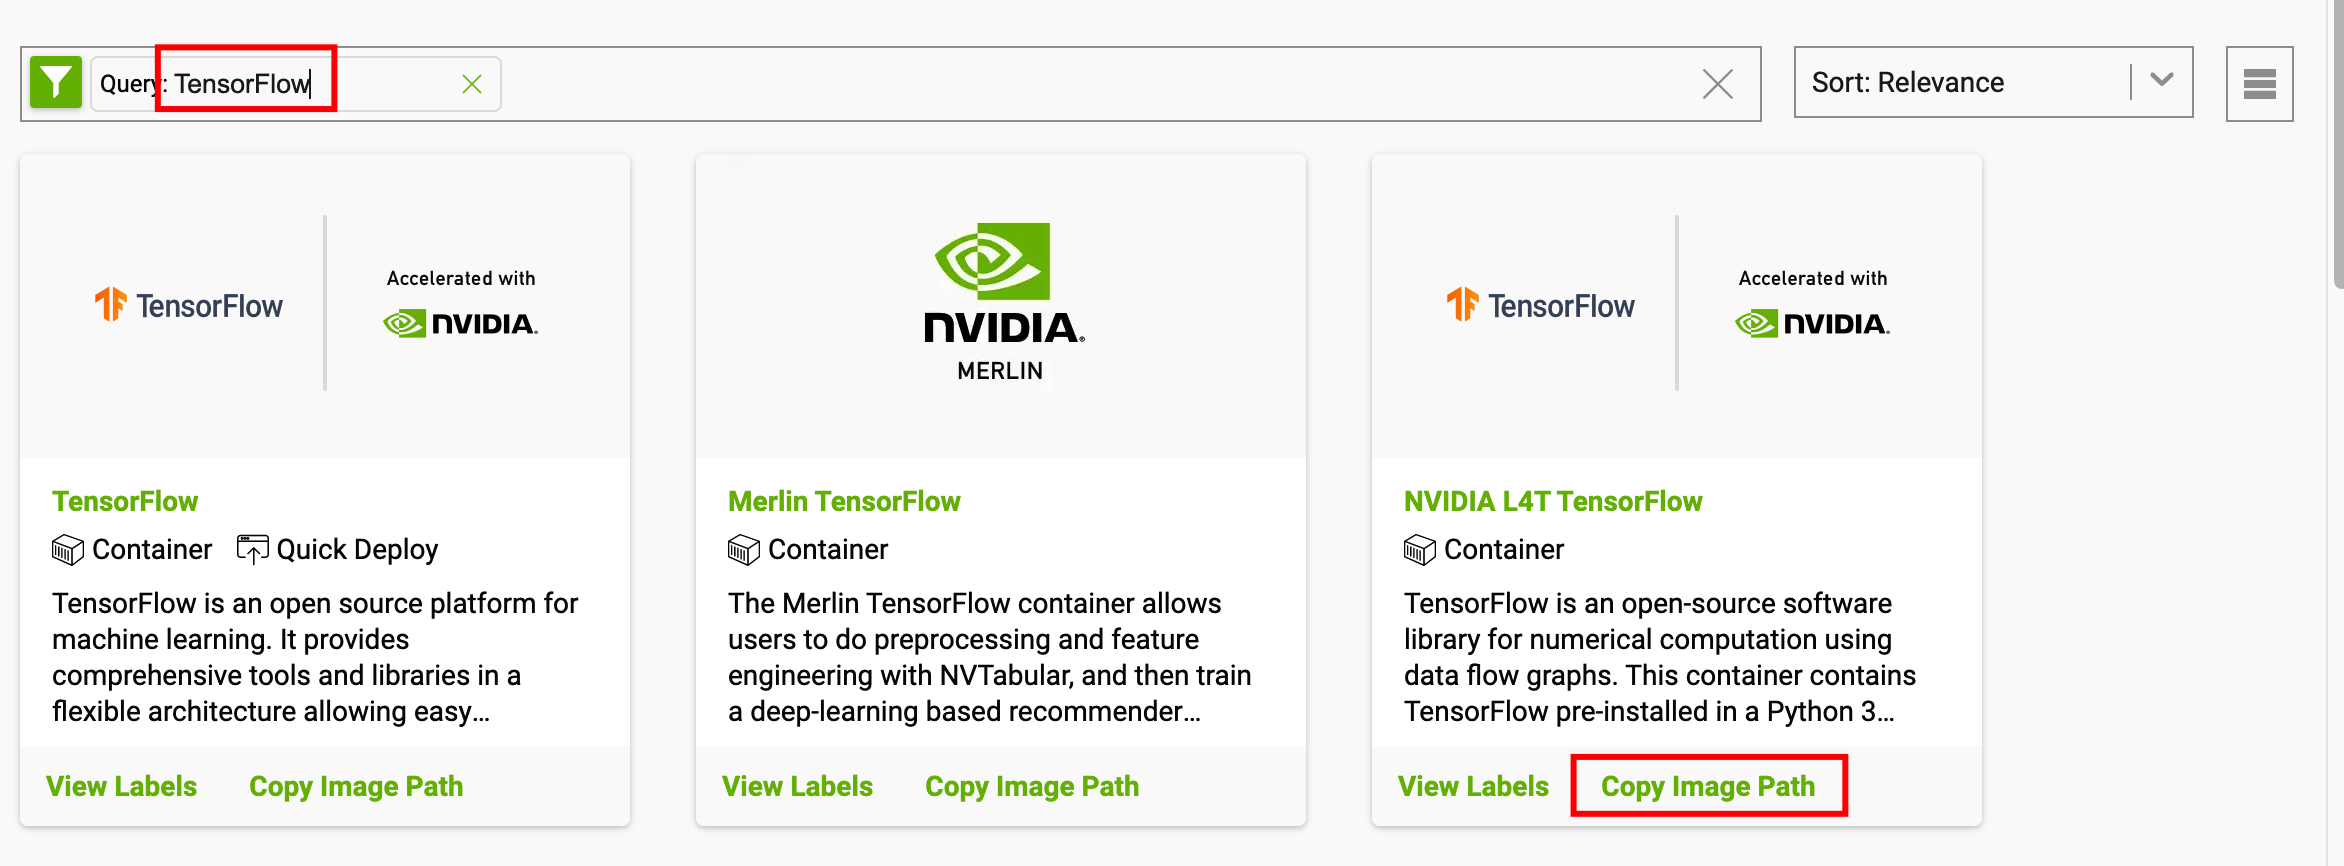
- Enter "TensorFlow" in the search box, and then click the "Copy Image Path" button on the NVIDIA L4T TensorFlow card to automatically copy the address of the latest version of the TensorFlow image.
-
- Execute the following commands in sequence to pull the image and view the downloaded image file.
- docker pull nvcr.io/nvidia/clara-agx/agx-tensorflow:21.05-tf1-py3 //Please replace the <link> with the TensorFlow <image> address copied in the previous stepdocker images //view the downloaded image, the output is as follows, indicating the pull was successful
-

Step 4: Deploy the TensorFlow development environment
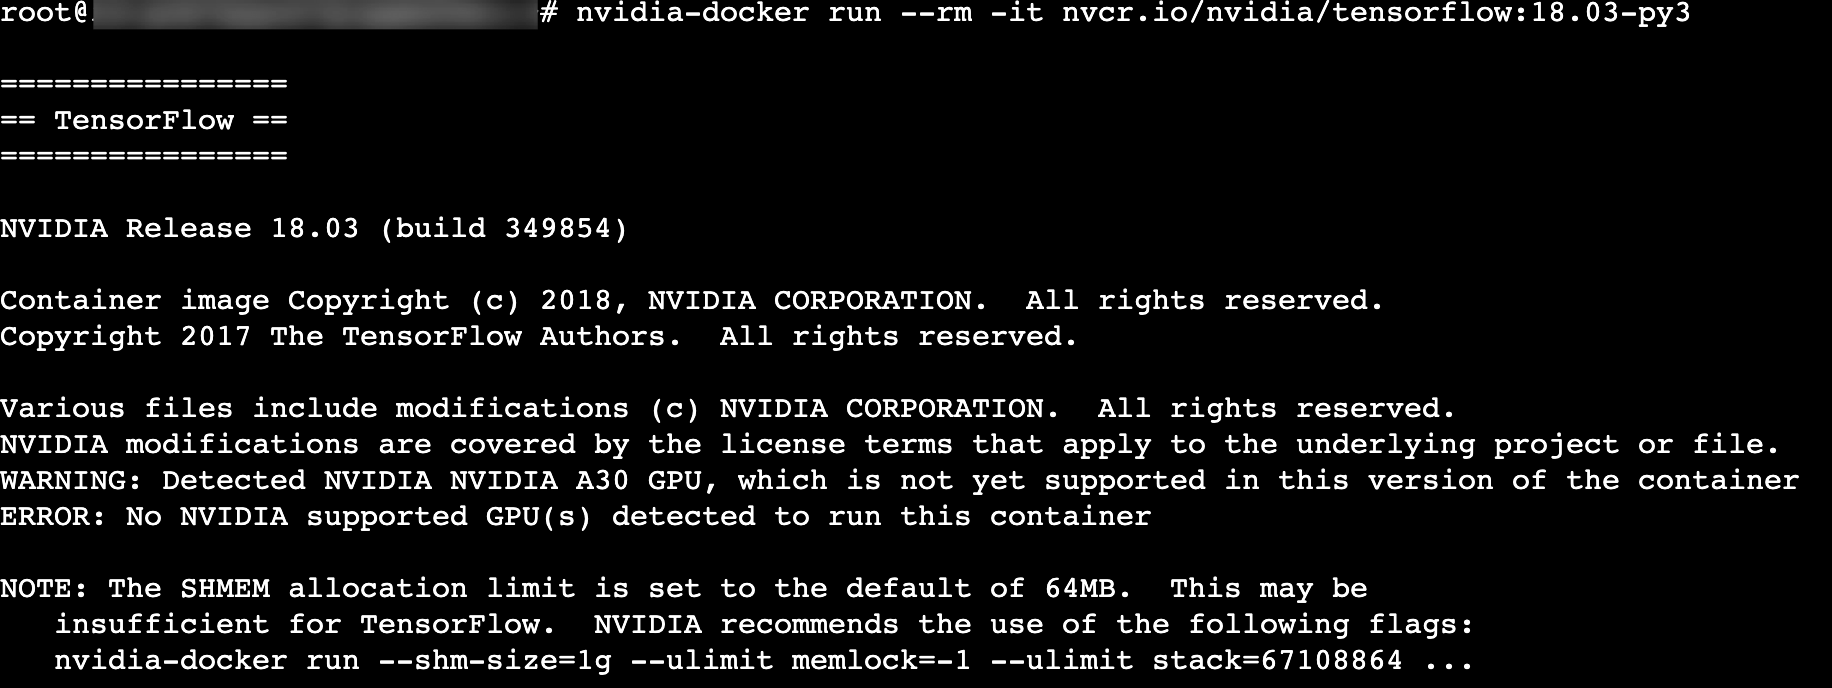
Execute the following command to run the container.
nvidia-docker run --rm -it nvcr.io/nvidia/tensorflow:18.03-py3
If the following output is displayed, the deployment is successful.
Step 5: Verify and test the environment
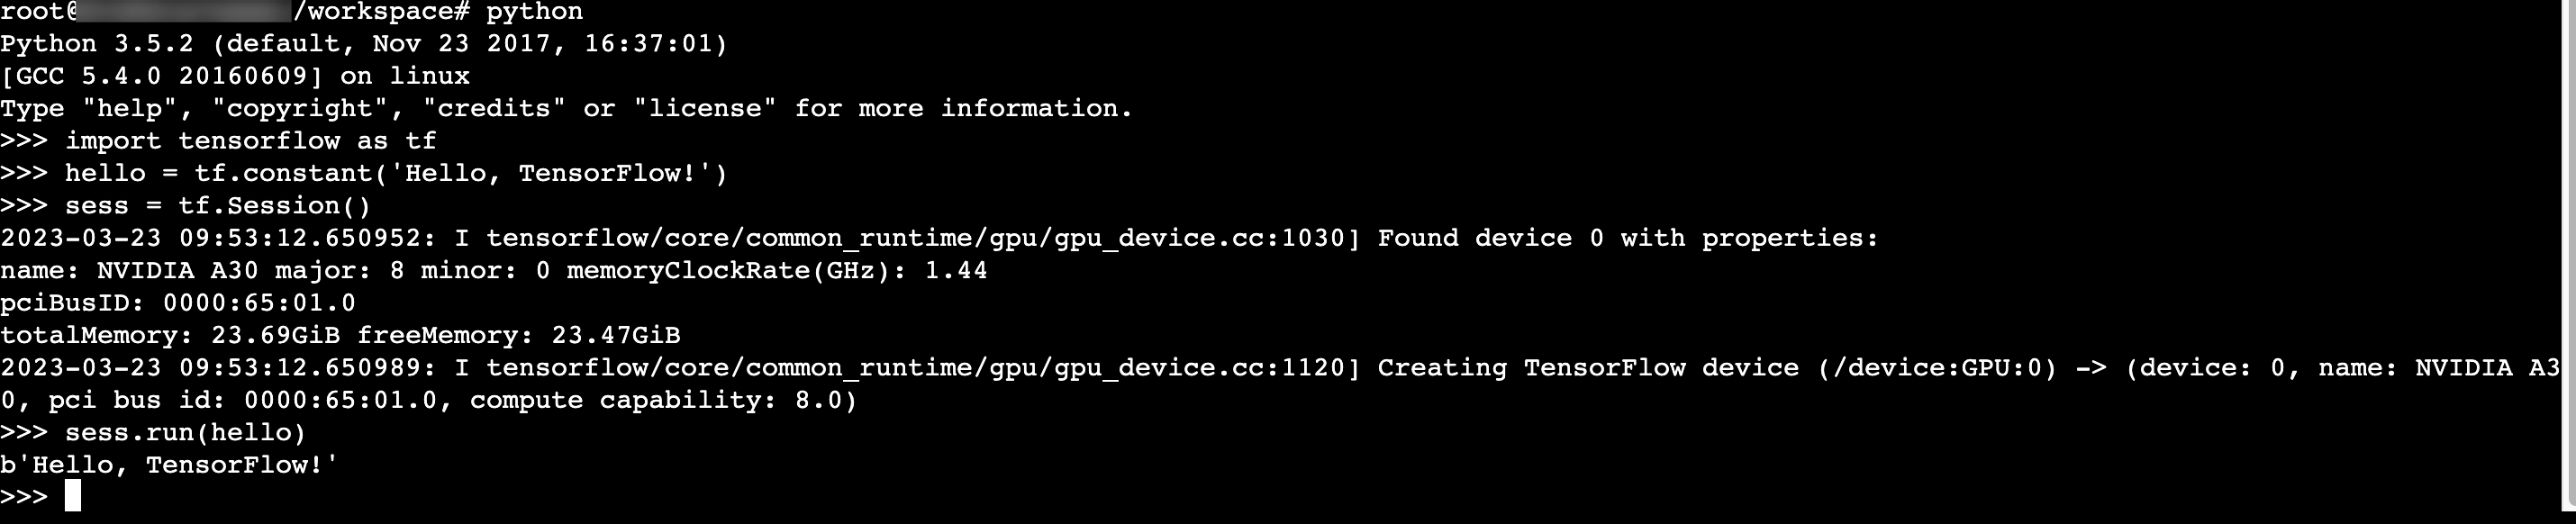
- Execute the python command. If the environment is normal, you will directly enter the Python environment.
- In the Python environment, execute the following commands in sequence.
- import tensorflow as tfhello = tf.constant('Hello, TensorFlow!')sess = tf.Session()sess.run(hello)
- If the following output is displayed, the TensorFlow environment is set up successfully.
-
Last updated: 2025.12.03 15:45:51
All rights reserved © Beijing Volcano Engine Technology Co., Ltd2024
