GPU Compute Service
GPU Compute Service


Document

- Documentation
 GPU Compute ServiceGPU Compute ServiceUser GuideInstalling NVIDIA driversInstalling NVIDIA Tesla driversInstalling CUDA toolkits
 Copy page
 Download PDF
Installing NVIDIA Tesla drivers
Installing CUDA toolkits
Copy pageDownload PDFInstalling CUDA toolkits
CUDA toolkit introduction
CUDA (Compute Unified Device Architecture) is a computing platform launched by NVIDIA. This platform enables GPUs to solve complex computational problems based on CUDA Instruction Set Architecture (ISA) and the parallel computing engines built into GPUs.
Since GPU instances use NVIDIA graphics cards, installing the CUDA development and runtime environment is required. We recommend installing the CUDA driver of the latest version, as it is compatible with various Linux and Windows operating systems, including CentOS, Ubuntu, Debian, Windows, and many others.
Scenario
If CUDA is not installed when you create a GPU instance, follow this topic to manually install the CUDA toolkit for the created instance.
tip
- For ease of use, when creating a GPU instance, you can select a public image that either supports auto-installation of specific versions of the GPU driver and CUDA or is pre-installed with them. For details, refer to NVIDIA driver installation guide.
- If you install the GPU driver and CUDA toolkit manually, ensure that their versions are compatible with each other. Learn more.
Prerequisites
You have purchased a GPU instance and associated an EIP with it, enabling the instance to connect to the Internet.
Install CUDA toolkit (Linux)
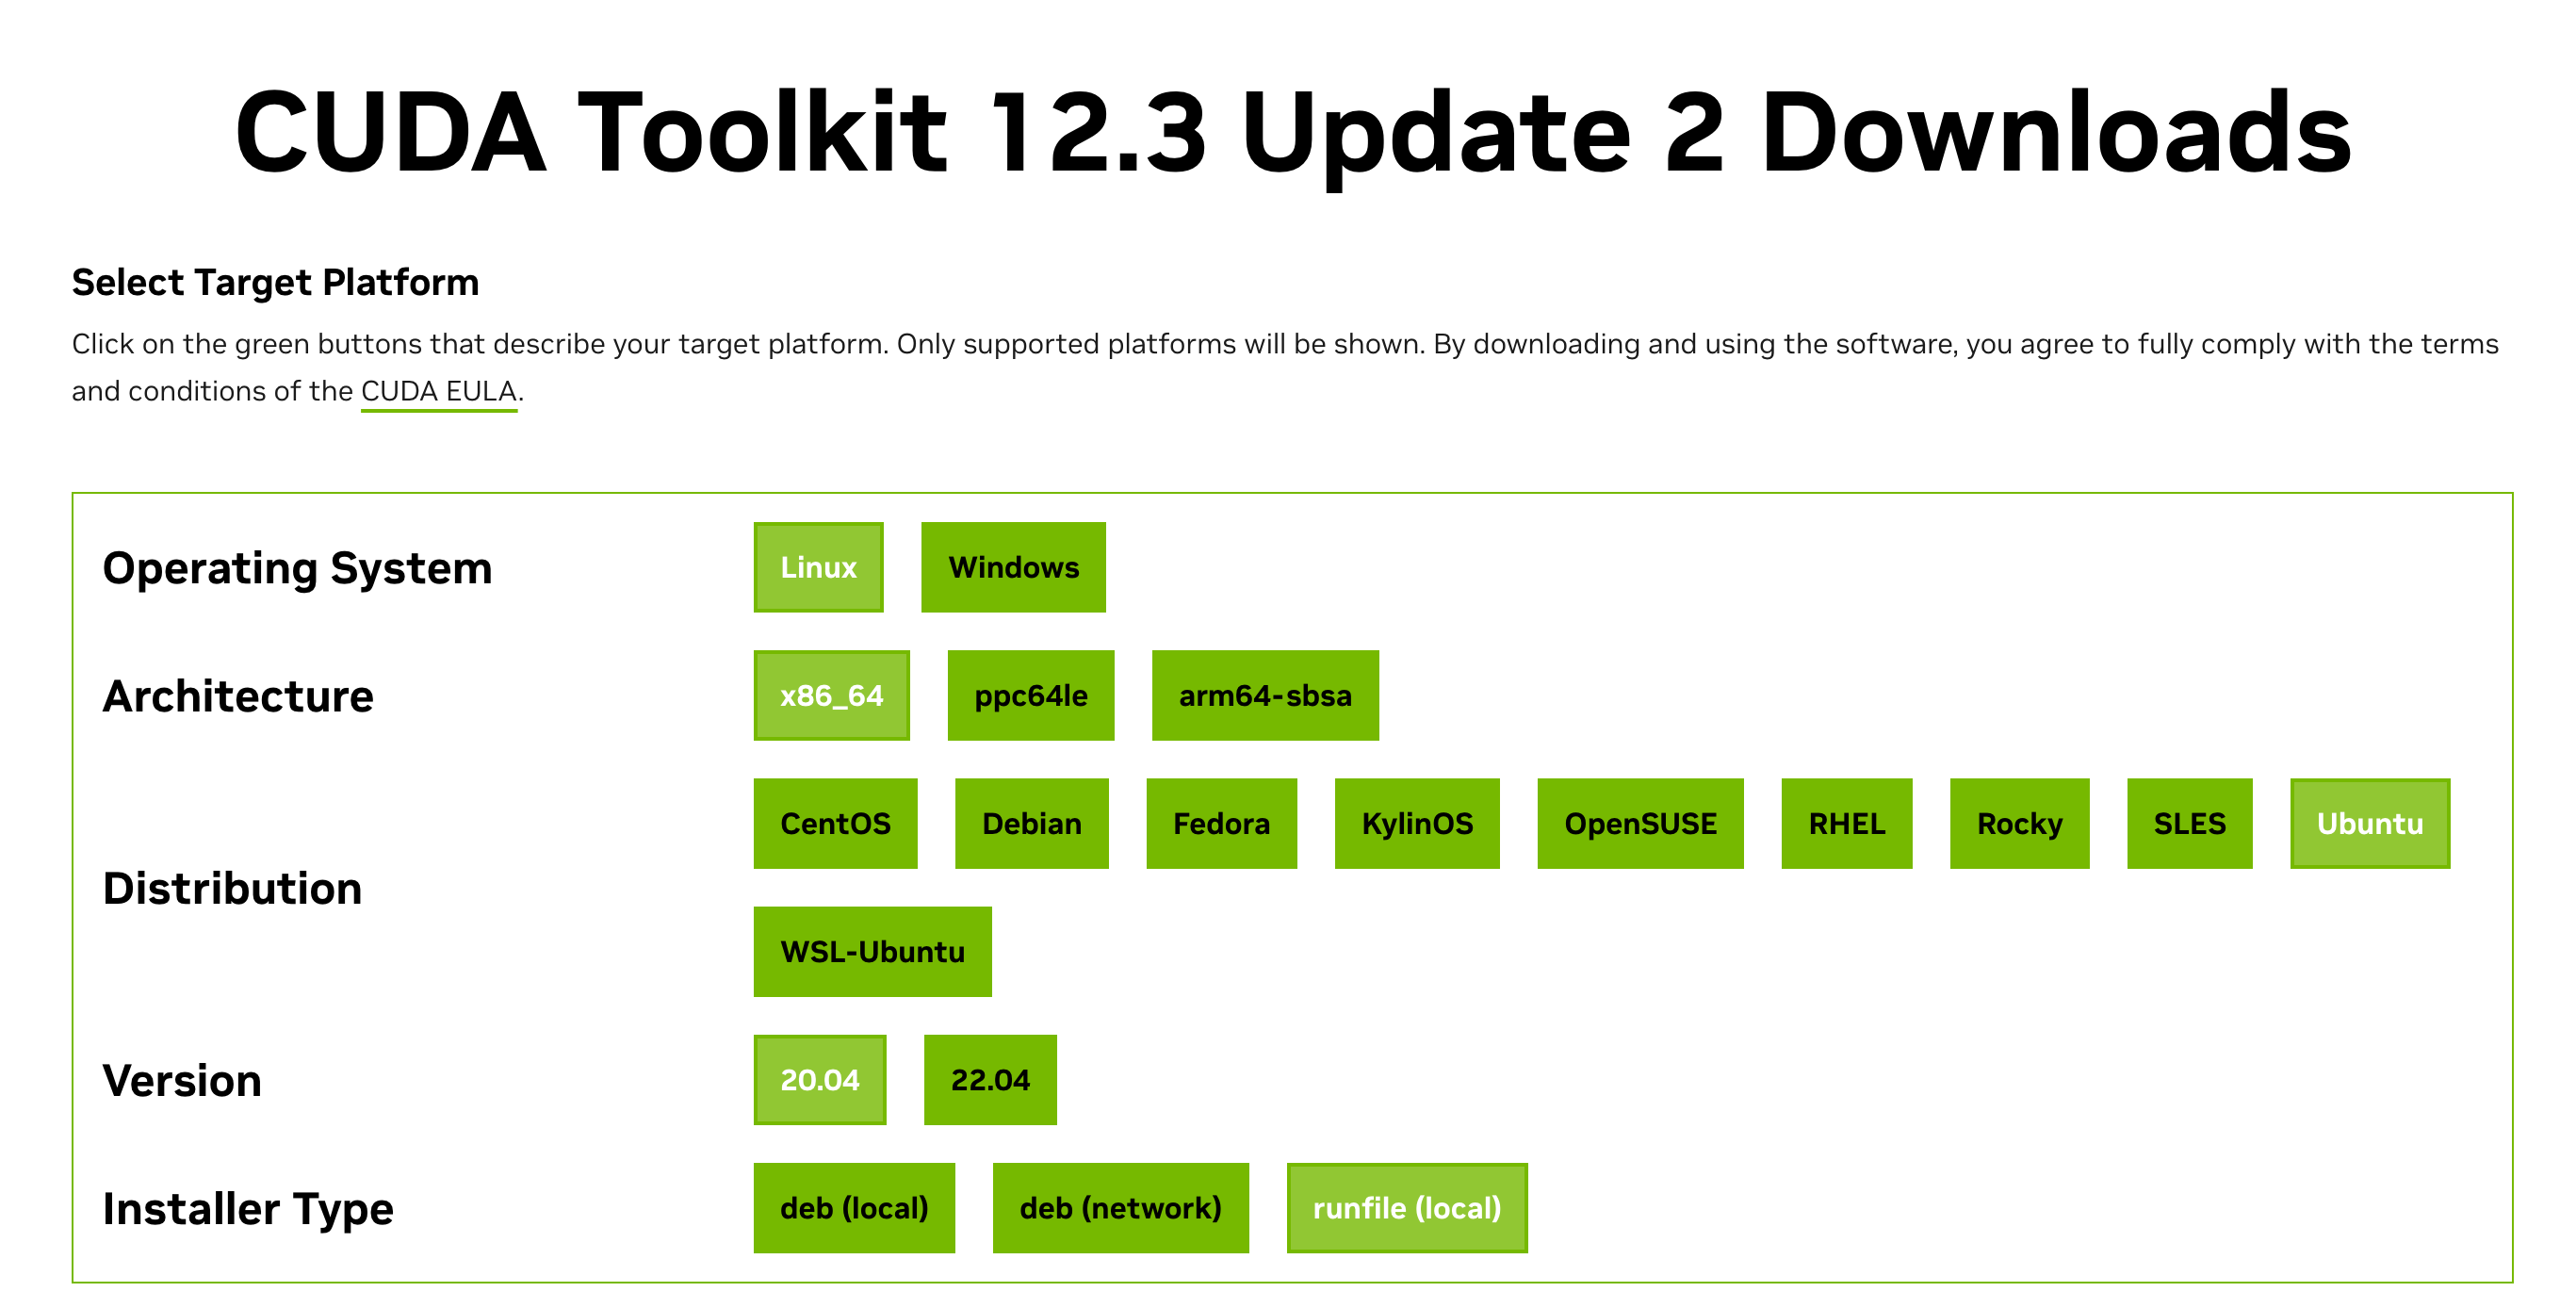
- Log in to the website to download the CUDA toolkit, and select the appropriate operating system and version based on the GPU instance configuration. In this topic, downloading CUDA 12.3 on Ubuntu 20.04 64 bit is used as an example, as displayed below.
tip
Two methods are supported to install CUDA: runfile and deb. runfile is recommended, as it does not require handling dependency packages and is simpler and faster.
-
- After you select the required options, the following page appears. Then, copy the installation commands.
-
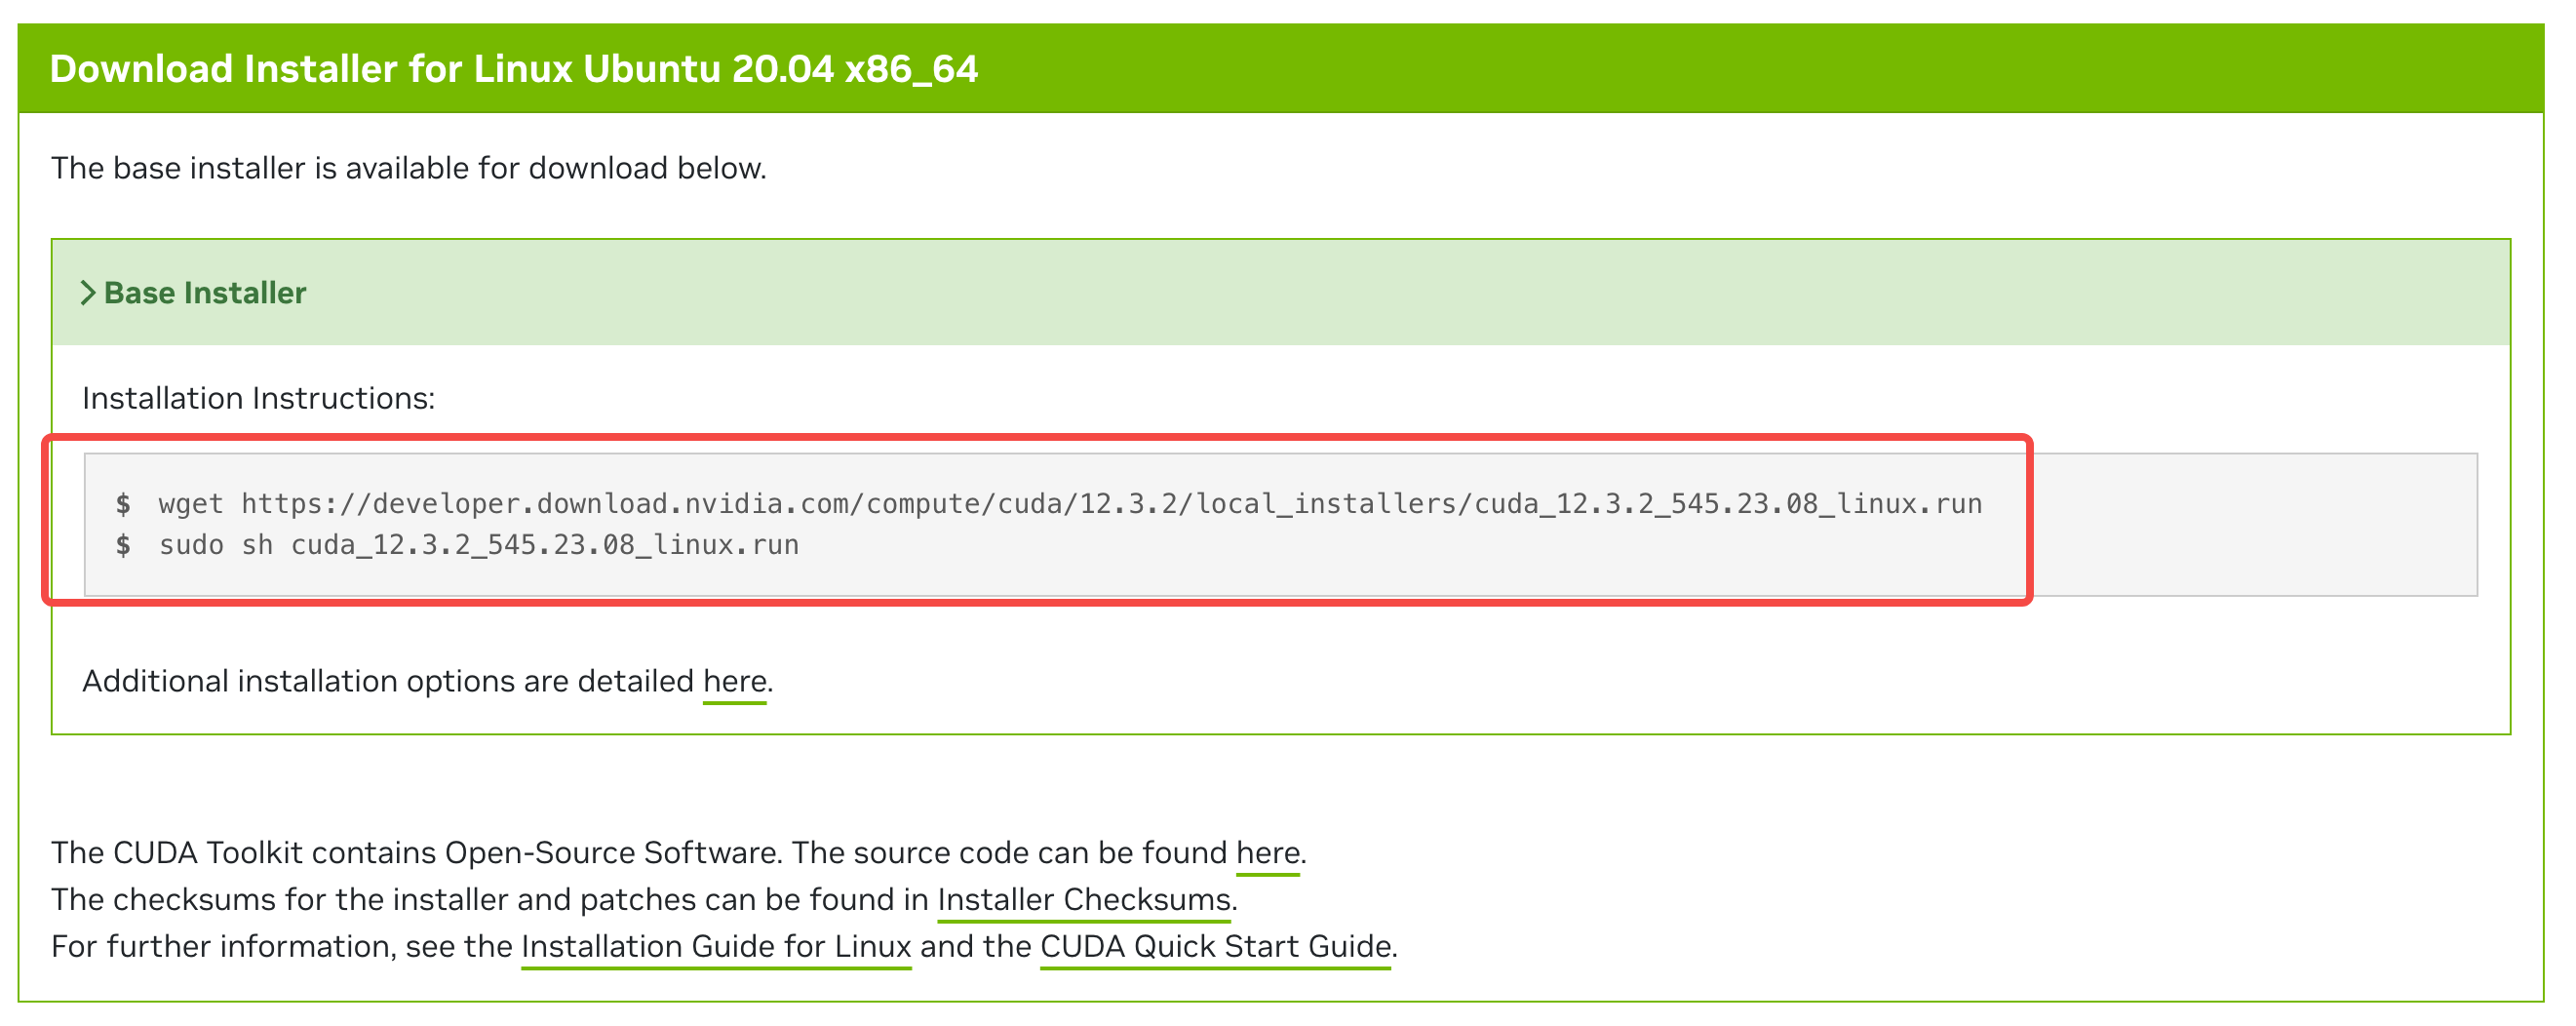
- Execute the commands obtained in step 2. When you execute the second command, refer to the following instructions to complete the operations in sequence.
- In the installation interface, enter "accept" and press Enter to proceed to the next step.
- Use the up and down arrow keys on the keyboard to select "Install", and press Enter to confirm and start the installation.
tip
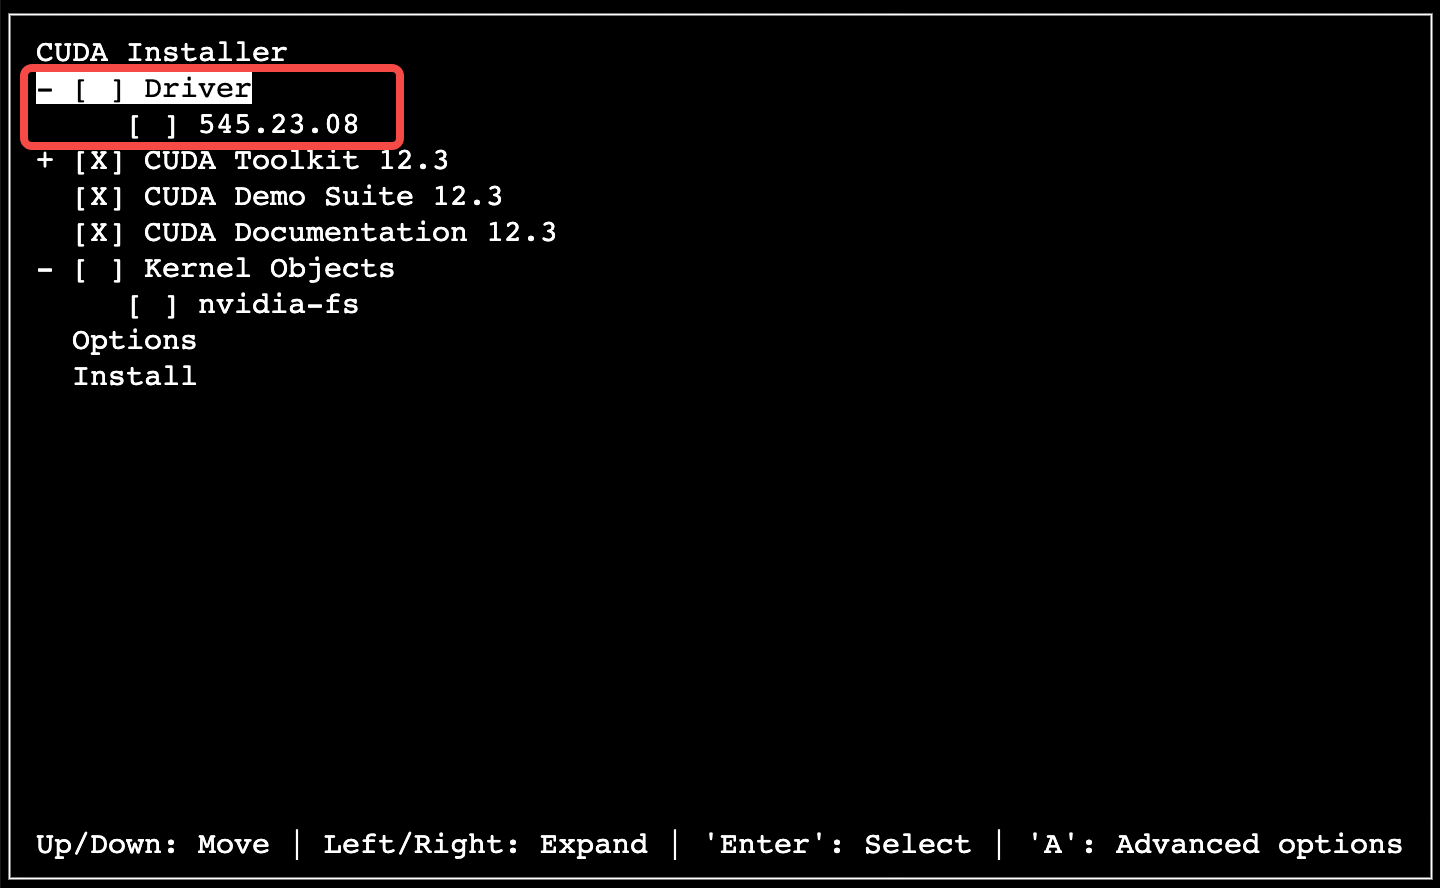
If your ECS instance has the GPU driver installed, press Enter as shown in the following picture to uncheck the GPU driver option before proceeding with the installation.
- After installation is complete, execute the following command to view the CUDA version. This indicates that CUDA is installed successfully.
- /usr/local/cuda/bin/nvcc -V
-

Install CUDA toolkit (Windows)
- In the remote desktop, use a browser to access CUDA download link, and select the appropriate operating system and version based on the GPU instance configuration.
-
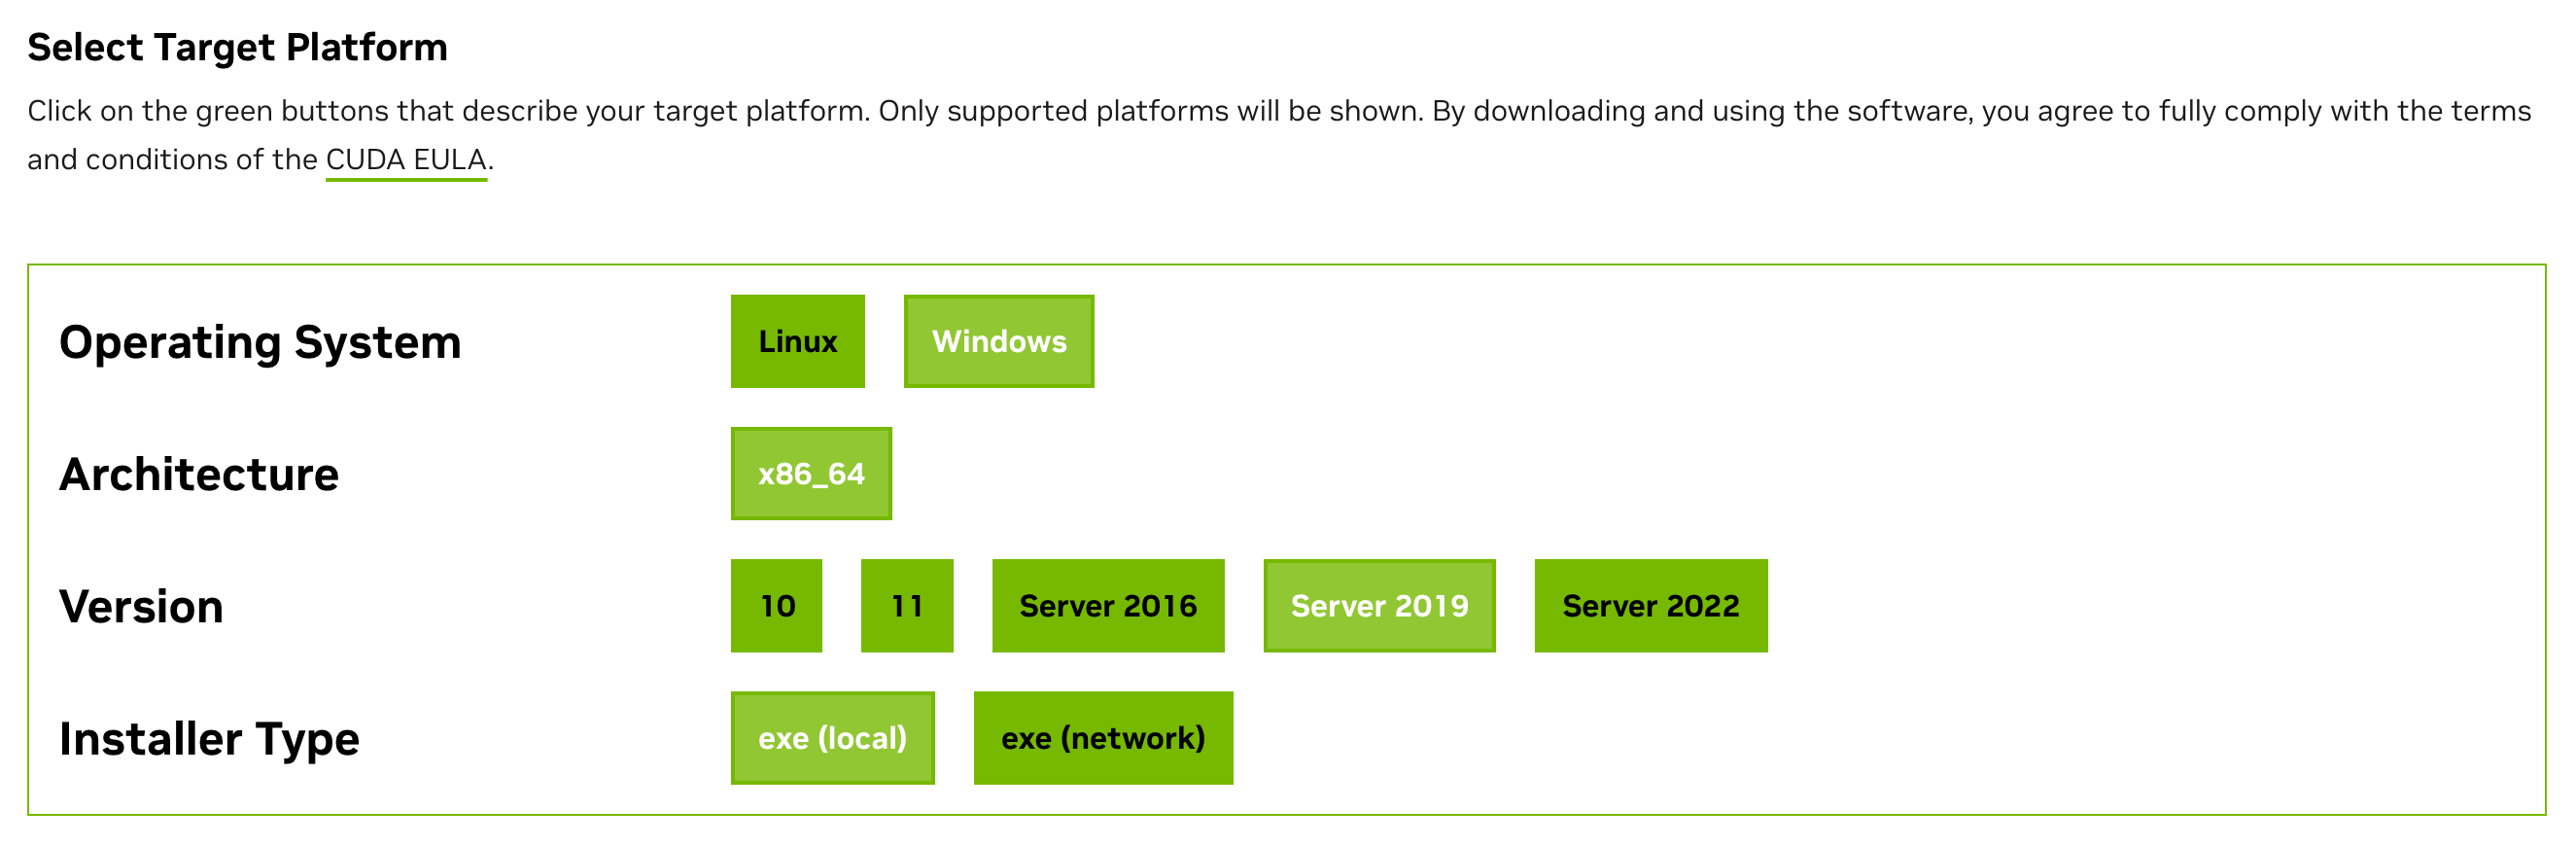
- After you select the required options, the following page appears. Then, click the "Download" button to the right of "Base Installer" to download CUDA.
-
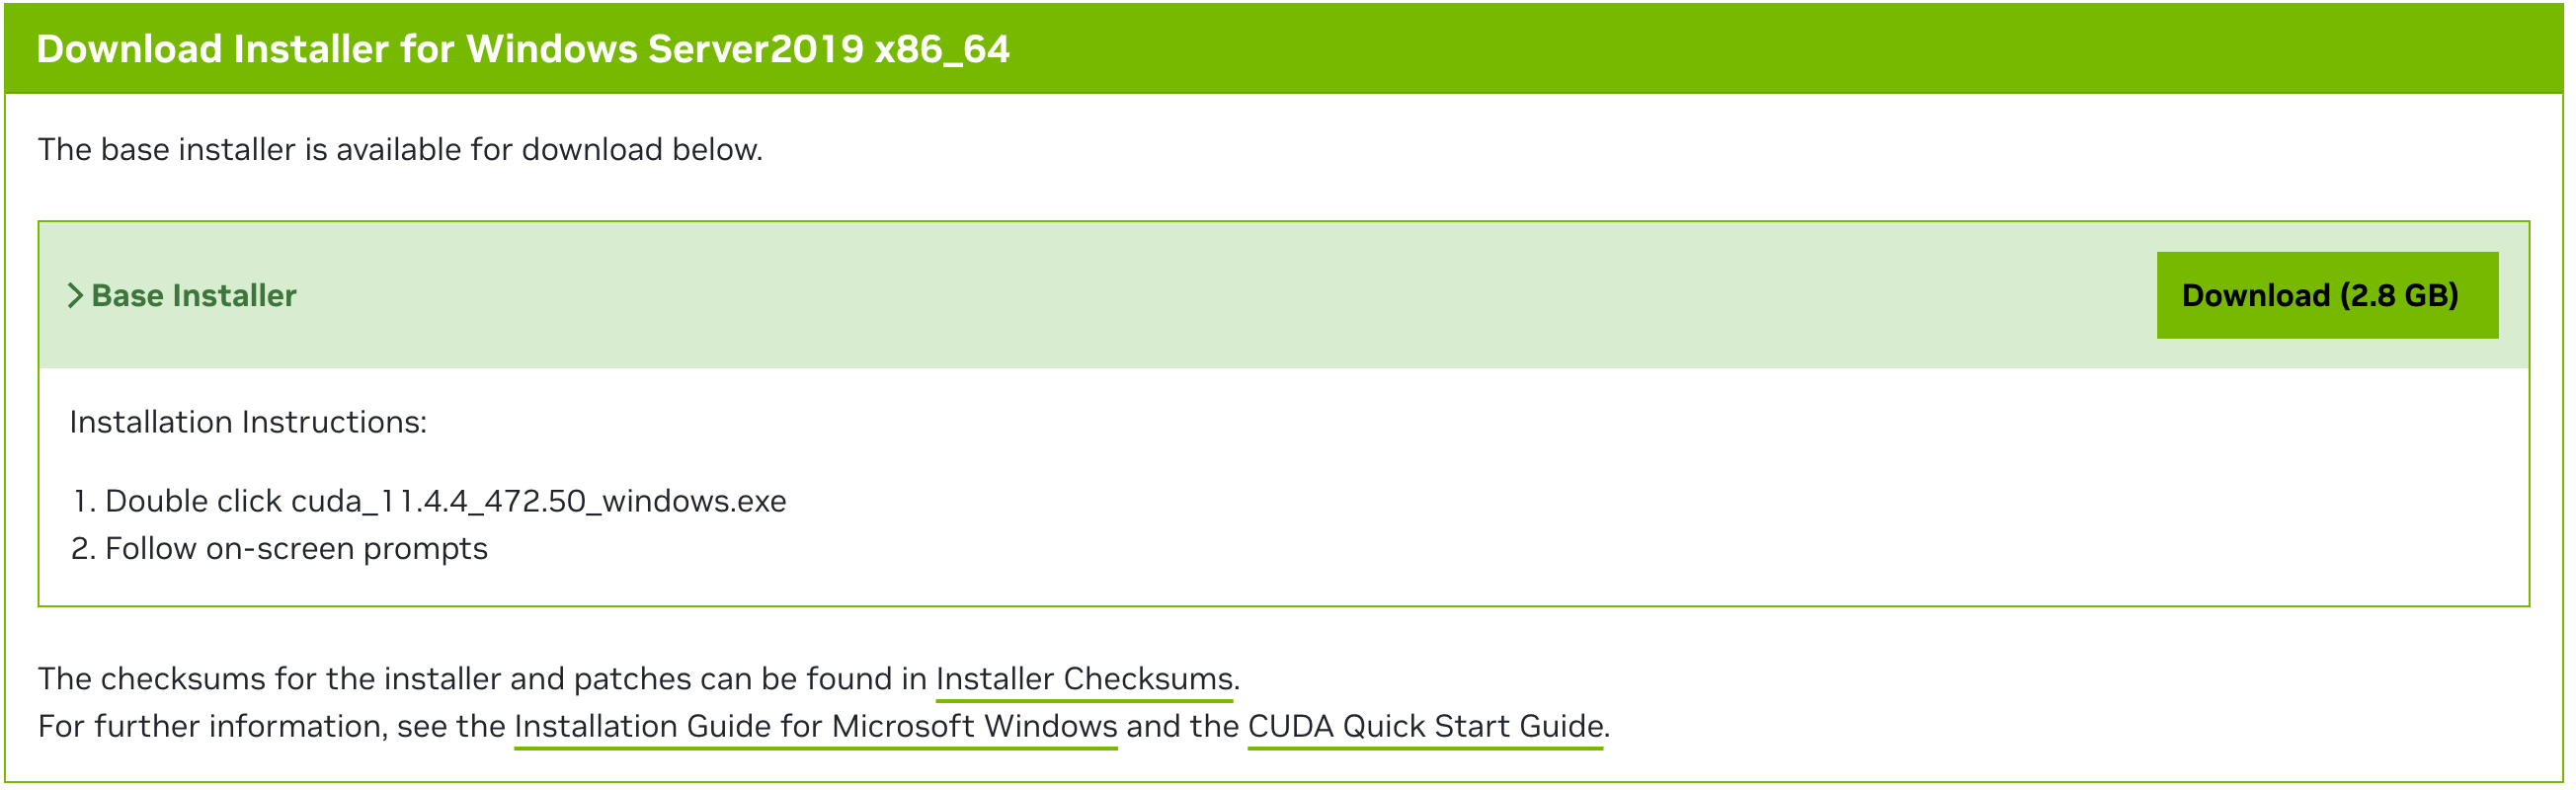
- After the download is complete, open the folder where the toolkit installation file is stored, double-click it, and follow the prompts to complete the installation.
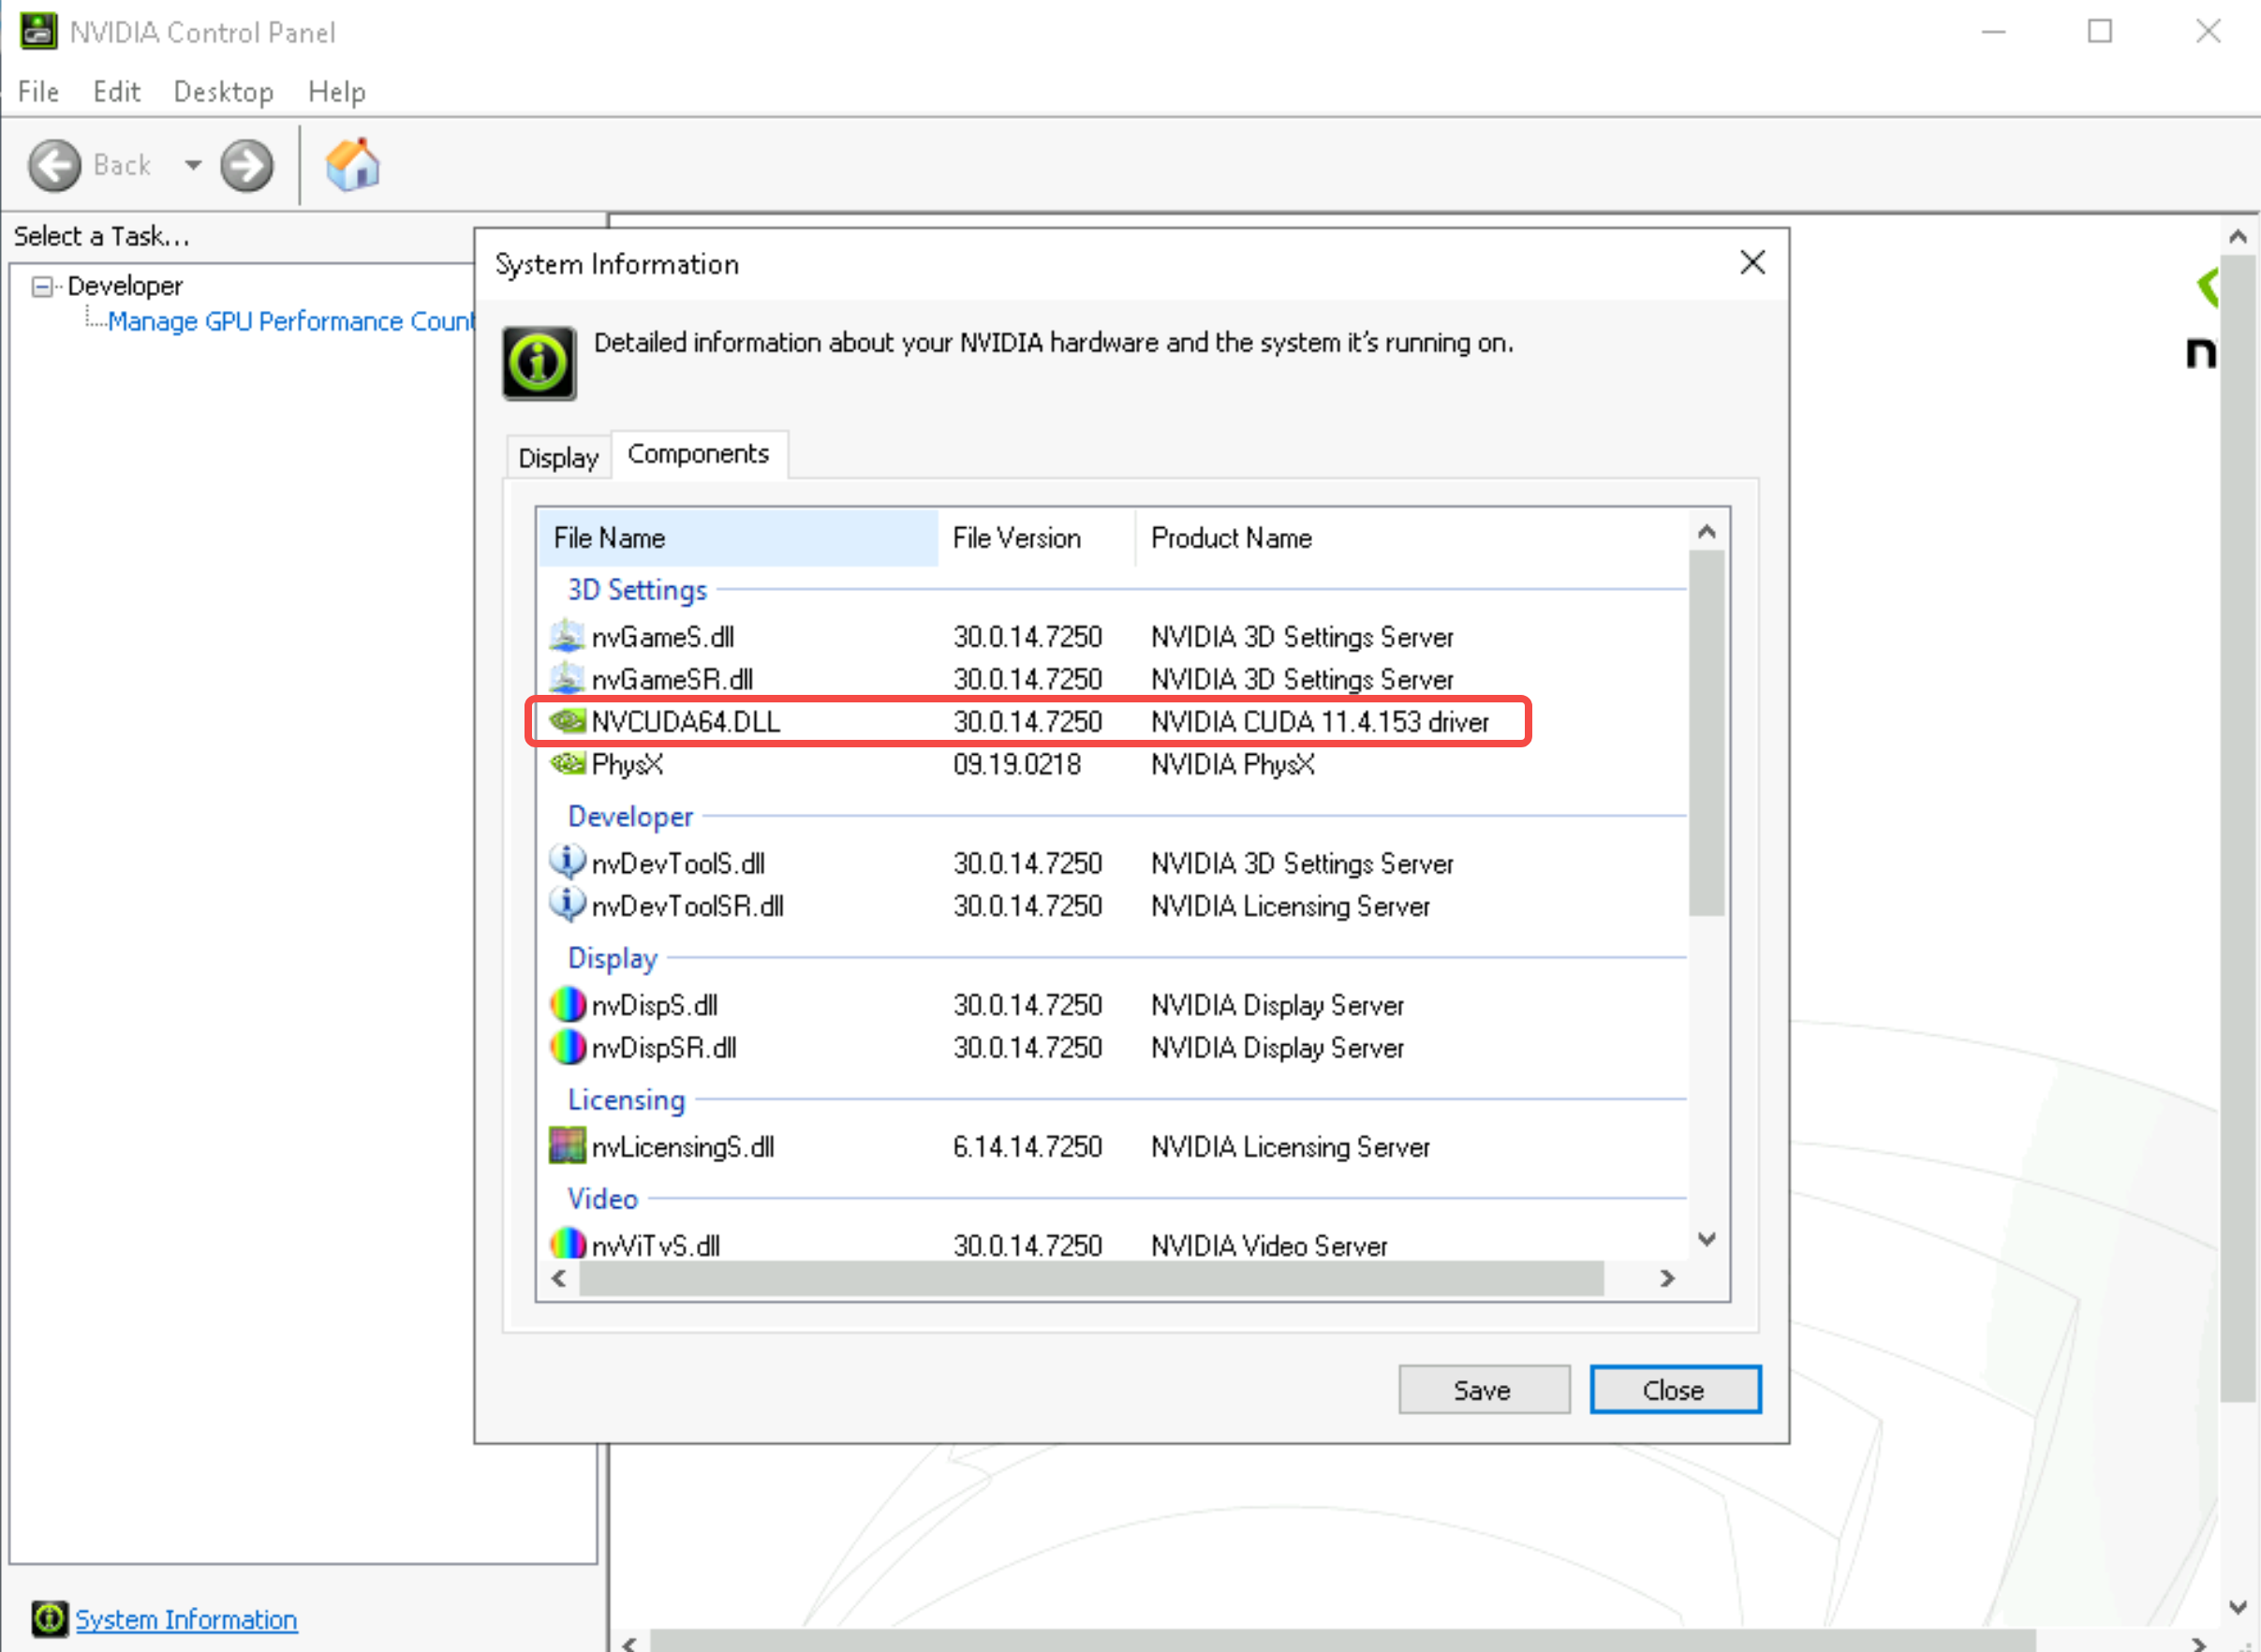
- After installation is complete, right-click on the desktop and select NVIDIA Control Panel from the context menu. Click "NVIDIA Control Panel", and select the "System Information" button in the lower left corner of the Control Panel. Select the "Components" tab to view the CUDA version.
-
Last updated: 2025.12.03 16:28:03
All rights reserved © Beijing Volcano Engine Technology Co., Ltd2024
