GPU Compute Service
GPU Compute Service


Document

- Documentation
 GPU Compute ServiceGPU Compute ServiceBest PracticesBuilding applicationsGPU - Deploying PyTorch applications
 Copy page
 Download PDF
Building applications
GPU - Deploying PyTorch applications
Copy pageDownload PDFGPU - Deploying PyTorch applications
This topic describes how to deploy PyTorch applications on a Linux instance.
PyTorch overview
PyTorch is an open-source Python machine learning library used for applications such as natural language processing (NLP). It not only enables powerful GPU acceleration but also supports dynamic neural networks.
Software versions
- Operating system: In the example provided in this topic, Ubuntu 18.04 is used.
- NVIDIA driver:
- GPU driver: A program used to drive NVIDIA GPU cards. In the example provided in this topic, GPU driver 470.57.02 is used.
- CUDA toolkit: A computing platform that enables GPUs to solve complex computational problems. In the example provided in this topic, CUDA 11.4 is used.
- cuDNN Library: A deep neural network library designed for high-performance GPU acceleration. In the example provided in this topic, cuDNN Library 8.2.4.15 is used.
- Anaconda: A package acquisition and management tool. It comes pre-installed with over 180 scientific computing packages and their dependencies, including Conda and Python, and enables the creation of isolated Python virtual environments. In the example provided in this topic, Anaconda 3 and Python 3.8.3 are used.
When PyTorch uses CUDA for GPU acceleration, if it still fails to work when CUDA and the GPU driver are installed, the issue is most likely a version mismatch. Strictly ensure the version compatibility of the aforementioned software.
Prerequisites
- You have purchased a GPU Accelerated Linux instance and selected "Automatically install GPU driver in the background". This way, the instance automatically installs the NVIDIA driver of the specified version when it starts. For more information, see Creating GPU Accelerated instances.
- An EIP is associated with the Linux instance, enabling the instance to connect to the Internet. For information about how to associate an EIP with an ECS instance, see Associating EIPs.
Step 1: Verify that the driver version is installed successfully
- Remotely connect to and log in to the ECS instance. For more information, see Logging in to Linux instances.
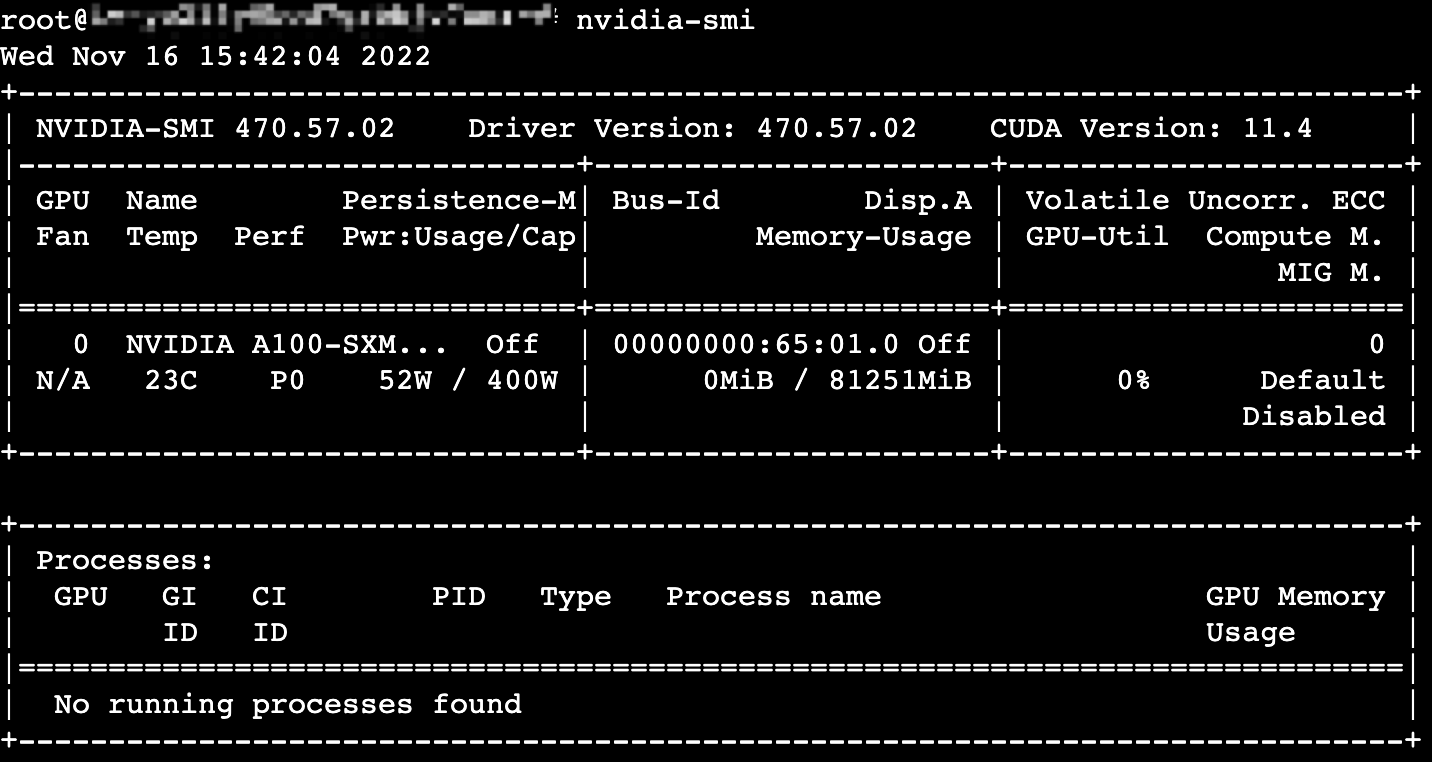
- Execute the following command to view the GPU driver.
- nvidia-smi
- If the following output is displayed, the installation is successful.
-
- Execute the following command to view the CUDA driver.
- /usr/local/cuda/bin/nvcc -V
- If the following output is displayed, the installation is successful.
-

Step 2: Create a virtual environment
- Execute the following command to download the Anaconda installation package.
- wget https://repo.anaconda.com/archive/Anaconda3-2022.05-Linux-x86_64.sh
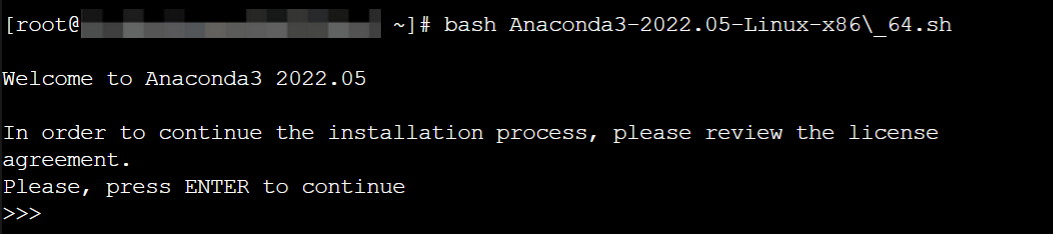
- Execute the following command to install Anaconda.
- bash Anaconda3-2022.05-Linux-x86_64.sh
- Keep pressing the "Enter" key to continue the installation.
-
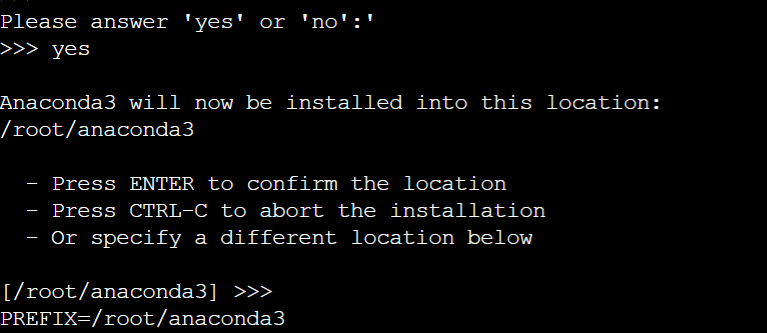
- Enter "yes" to confirm the information.
-

- Press the "Enter" key once. After a short wait, the installation will complete. Record the Anaconda installation path /root/anaconda3.
-
- Enter "yes" to confirm initialization of Anaconda.
-
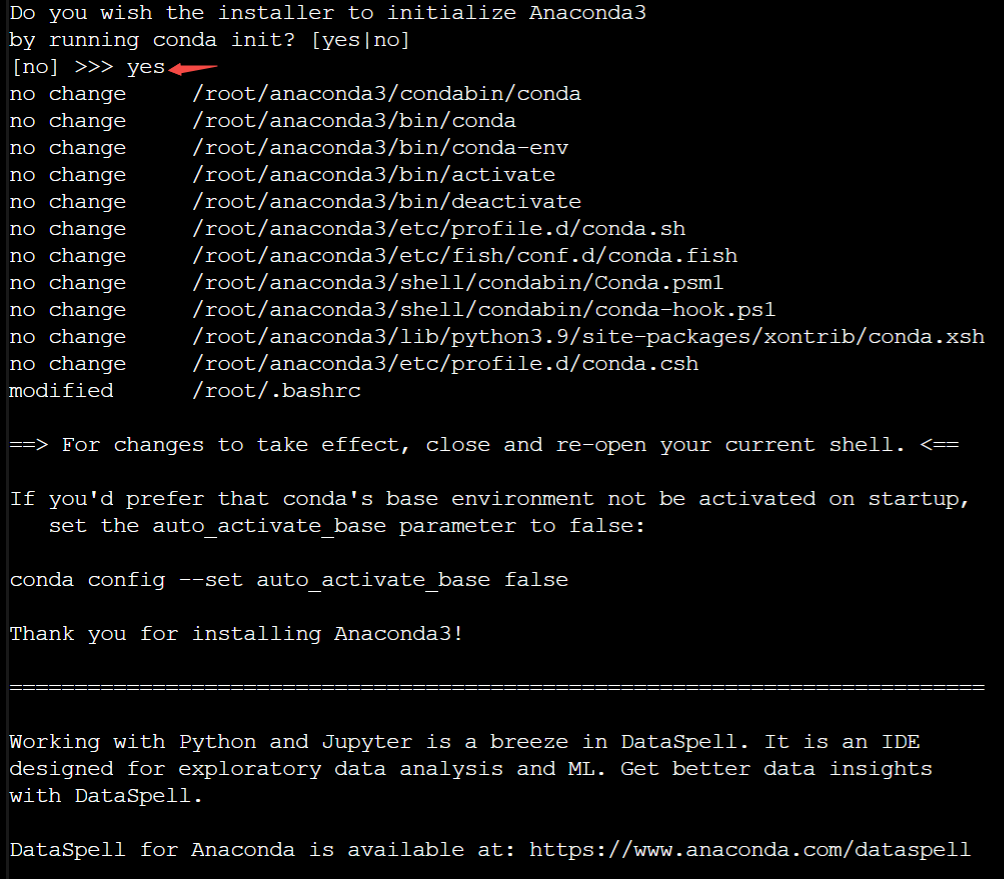
- Execute the source ~/.bashrc command to apply the configuration file.
- If the following output is displayed, the configuration is successful and you have entered the base environment.
-

- Create a virtual environment and specify the Python version.
- Execute the conda create -n cuda11.4 python=3.8.3 command. In the command, cuda11.4 is the name of the virtual environment, which you can change based on your needs.
- When Proceed ([y]/n)? is displayed, enter "y" to confirm the creation.
- Execute the following command to activate the virtual environment.
- conda activate cuda11.4
- If the following output is displayed, the activation is successful.
-

Step 3: Install PyTorch
- Visit the PyTorch official website, find the installation command that matches your CUDA version in Conda. For CUDA 11.4, select the installation package corresponding to CUDA 11.3.
-
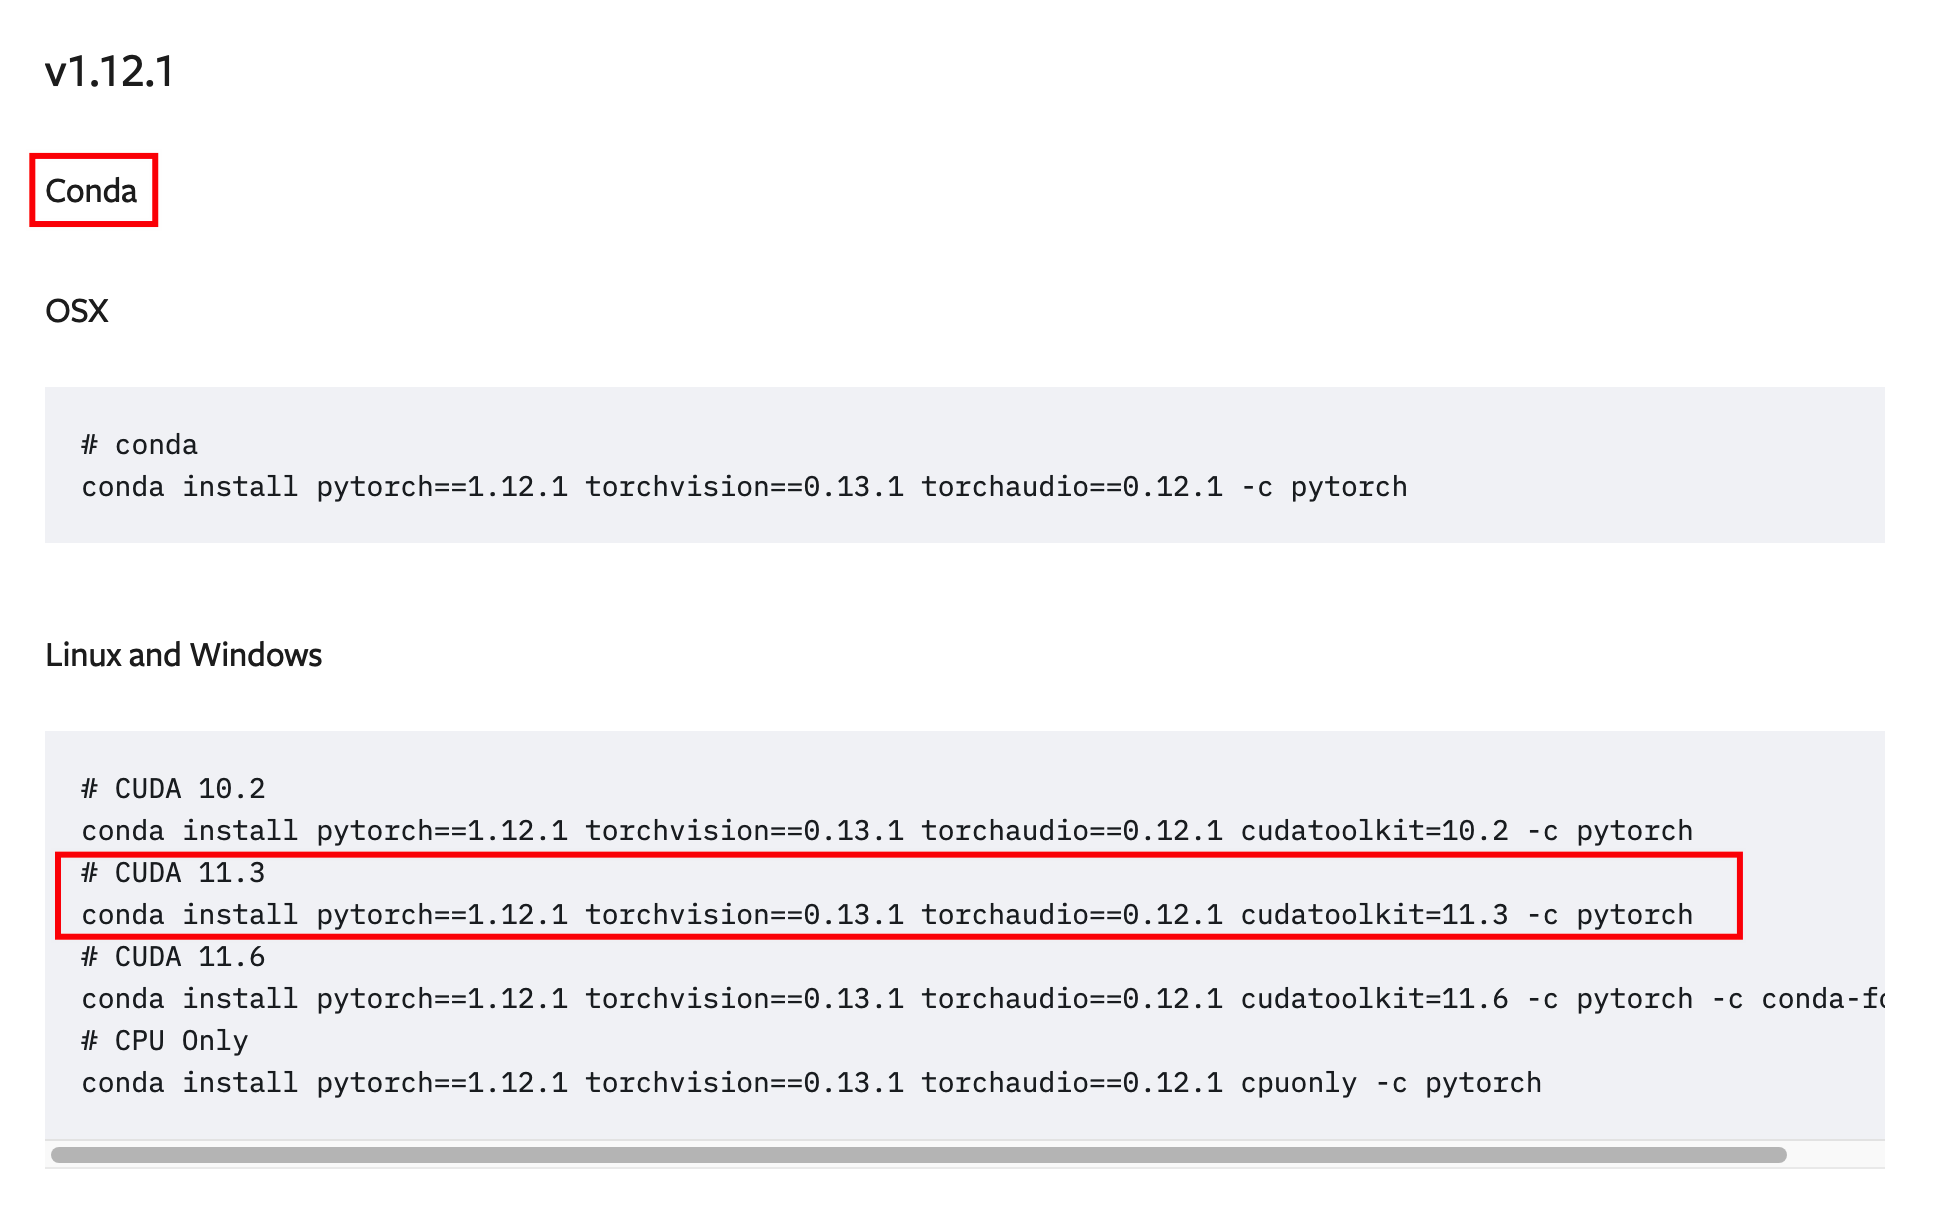
- Log in to the instance and continue to execute the installation command in the "cuda11.4" virtual environment. Enter "y" to confirm the installation.
- conda install pytorch==1.12.1 torchvision==0.13.1 torchaudio==0.12.1 cudatoolkit=11.3 -c pytorch
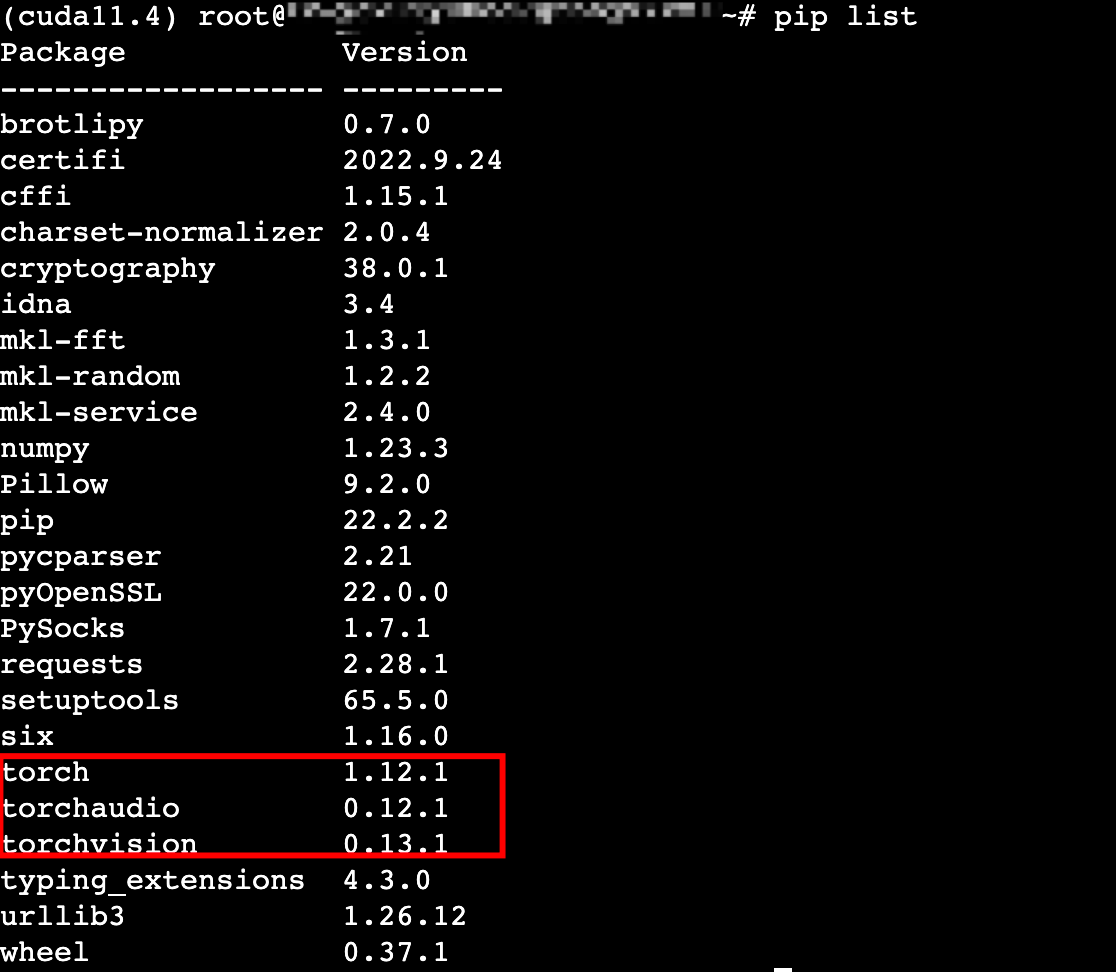
- Execute the pip list command. If the following output is displayed, PyTorch is installed successfully.
-
Step 4: Verify the environment
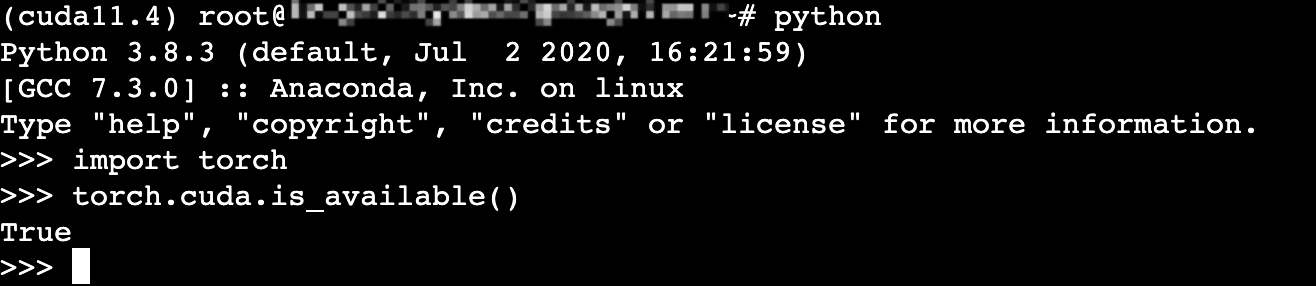
- Execute the following commands in sequence to test whether CUDA is available.
- python>>>import torch>>>torch.cuda.is_available()
- If the following output is displayed, PyTorch is deployed successfully.
-
- Enter conda deactivate to exit the virtual environment.
Last updated: 2025.12.03 15:45:51
All rights reserved © Beijing Volcano Engine Technology Co., Ltd2024
