GPU Compute Service
GPU Compute Service


Document

- Documentation
 GPU Compute ServiceGPU Compute ServiceBest PracticesBuilding applicationsGPU - Building AIGC capabilities (Windows)
 Copy page
 Download PDF
Building applications
GPU - Building AIGC capabilities (Windows)
Copy pageDownload PDFGPU - Building AIGC capabilities (Windows)
This topic describes how to deploy the Stable Diffusion WebUI frontend tool and Stable Diffusion training model to generate high-quality AI images. It helps you master the entire AI image generation inference process and the impact of key parameters on image output.
AIGC overview
AI Generated Content (AIGC) refers to a content production method that automatically generates content using AI technology. It signifies that AI has evolved from understanding language, text, images, and videos to generating content, representing a new "human-machine co-creation" model.
Software version
- NVIDIA driver: In the example provided in this topic, Tesla 571.71 is used with Cuda 11.7.
- Python: A programming language that provides machine learning libraries such as NumPy. In the example provided in this topic, Python 3.10.6 is used.
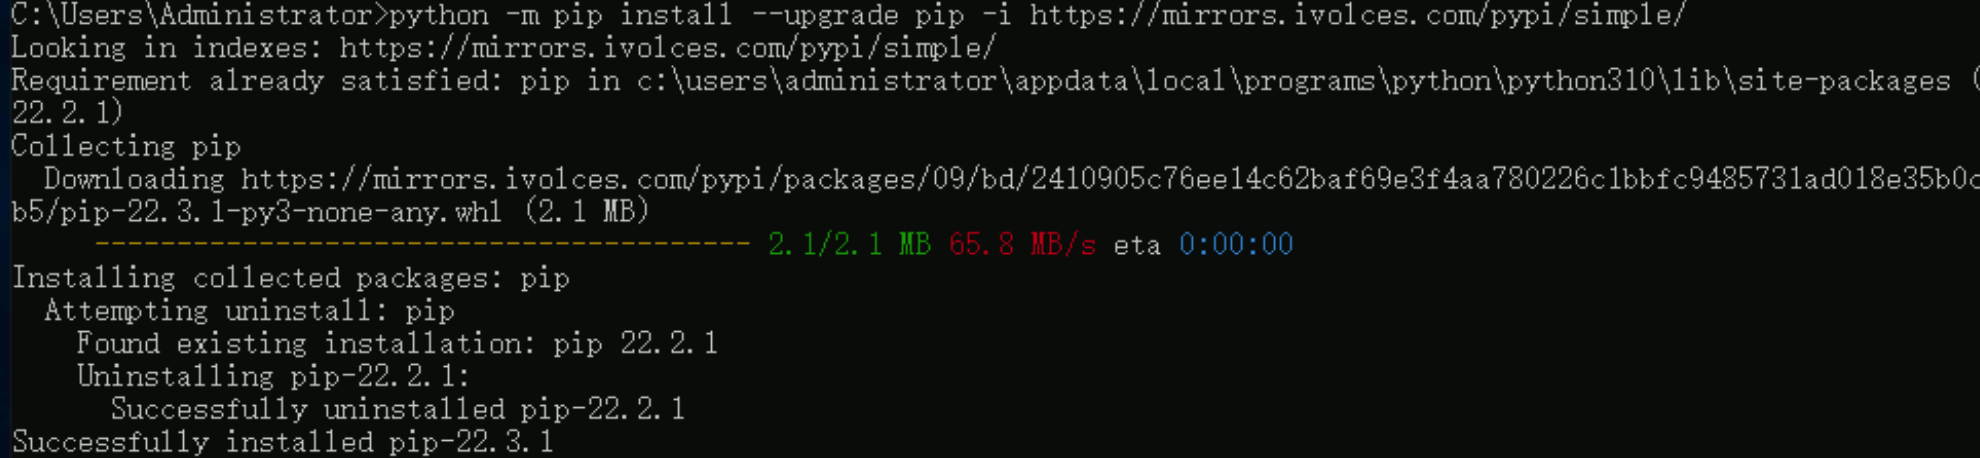
- PIP: A universal Python package management tool. In the example provided in this topic, PIP 22.3.1 is used.
- Git: A distributed version control system. In the example provided in this topic, Git 2.38.1 is used.
Usage notes
- To ensure the smooth operation of Stable Diffusion WebUI and the associated model, we recommend that you specify 12 GB of video memory and more than 16 GiB of memory for the instance. This enables support for larger images and higher preprocessing efficiency.
- In the example provided in this topic, the ecs.ini2.7xlarge instance type is used, equipped with an NVIDIA A30 GPU card, 24 GB of video memory, and 234 GiB of memory.
- Downloading the software required for this example may require access to websites outside the Chinese mainland. We recommend that you add a network proxy, such as FlexGW, to improve access speed. Alternatively, you can download the required software to your local device and upload the software to the GPU instance by referring to Overview of local data upload.
Step 1: Create a GPU Accelerated instance
Create an instance that meets the following conditions. For more information, see Purchasing instances by following the wizard.
- Instance type: ecs.ini2.7xlarge
- Image: Windows Server 2019 Datacenter Edition 64 bit (GPU)
- EIP: Select "Assign Elastic IP (EIP)".
Step 2: Install Python and PIP
- Remotely connect to and log in to the instance. For more information, see Using the console to log in to a Windows instance.
- Log in to the Python website.
- Scroll to the bottom of the page and click "Windows installer (64-bit)" to download the Python installation package, which already includes PIP.
-
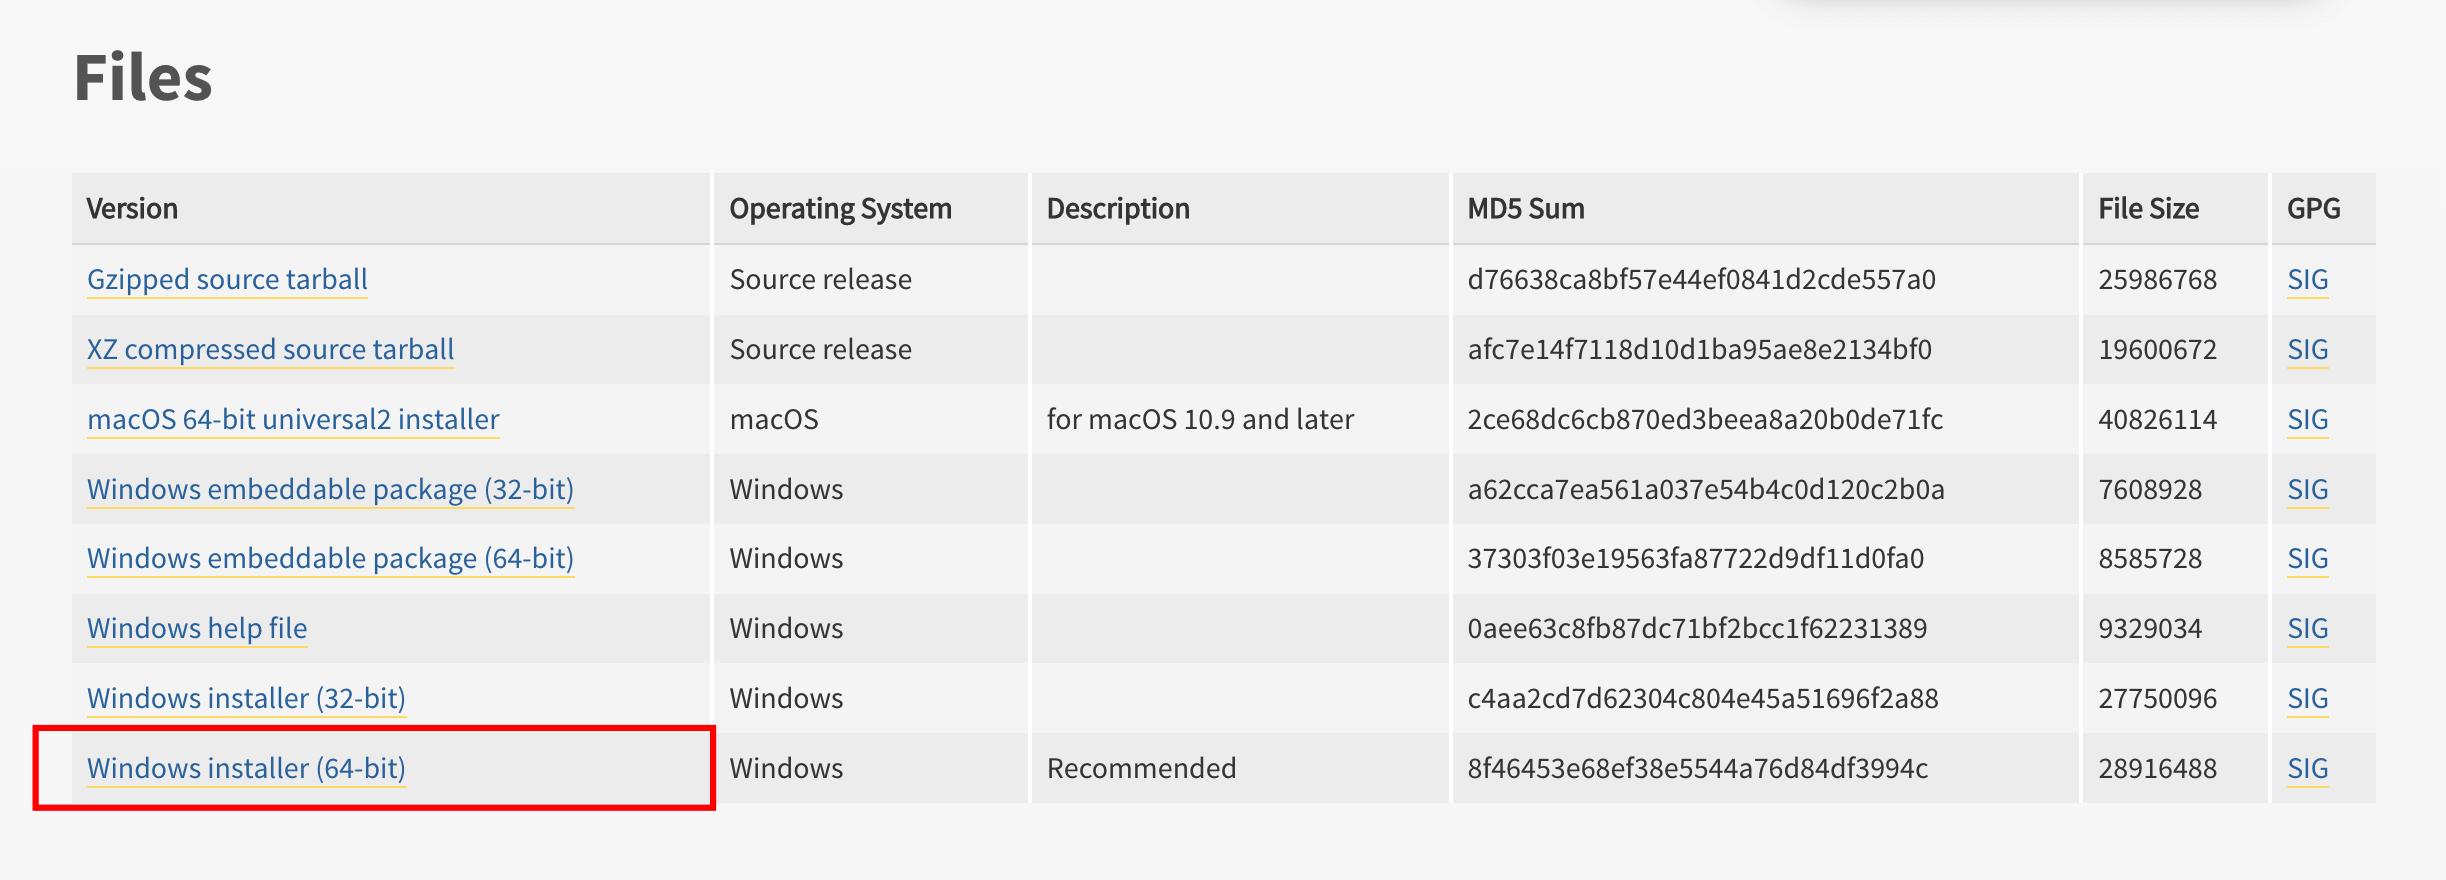
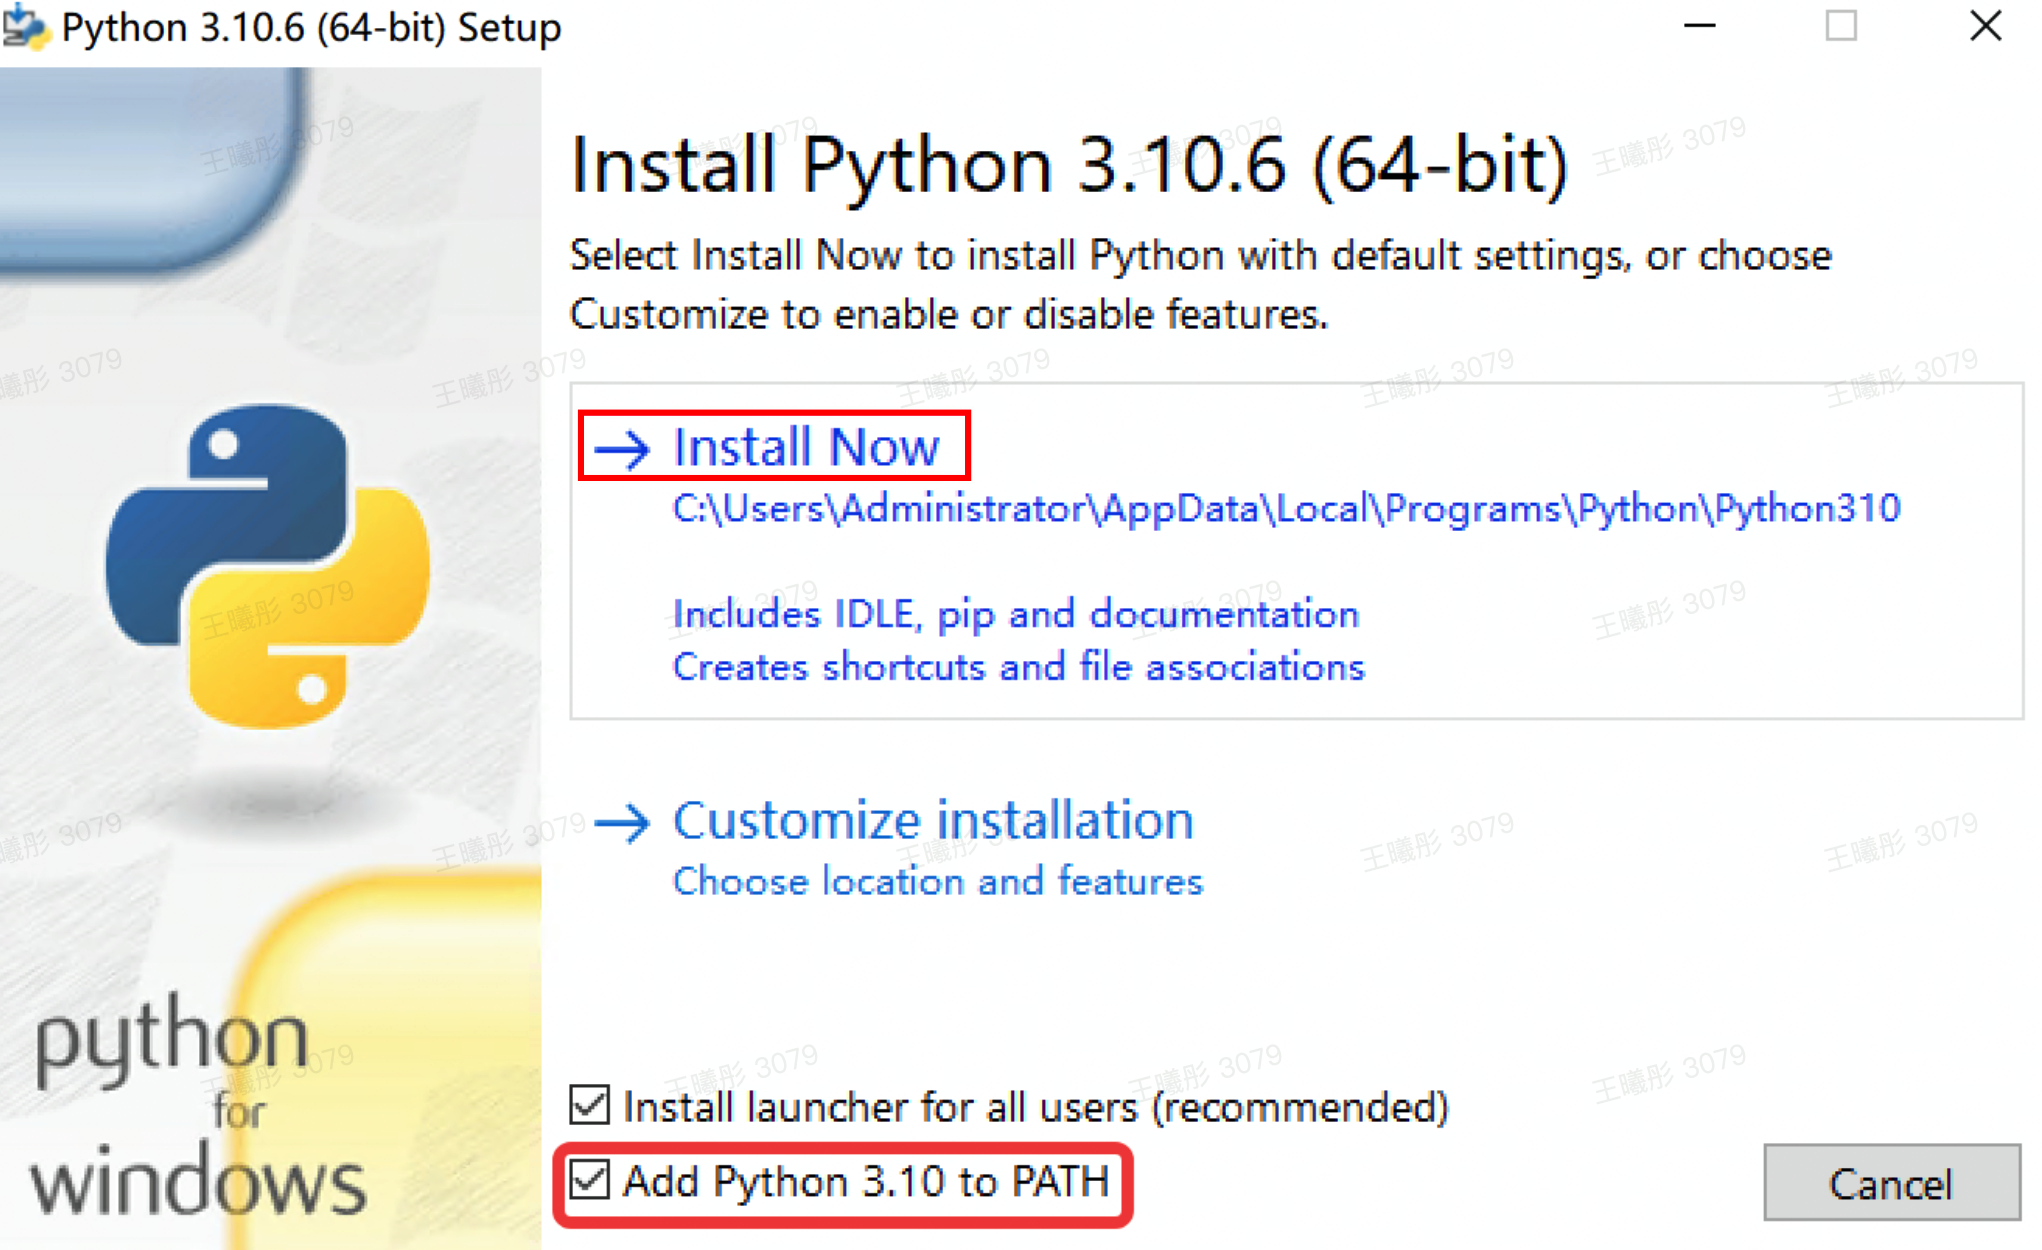
- Double-click the installation package to start the installation process. On the following page, select "Add Python to PATH", and then click "Install Now".
-
- Open "Command Prompt" and execute the Python -V command. If the following output is displayed, the installation is successful.
-

- Execute the python -m pip install --upgrade pip -i https://mirrors.ivolces.com/pypi/simple/ command to upgrade PIP to the latest version.
-
Step 3: Install Git
- Log in to the Git website.
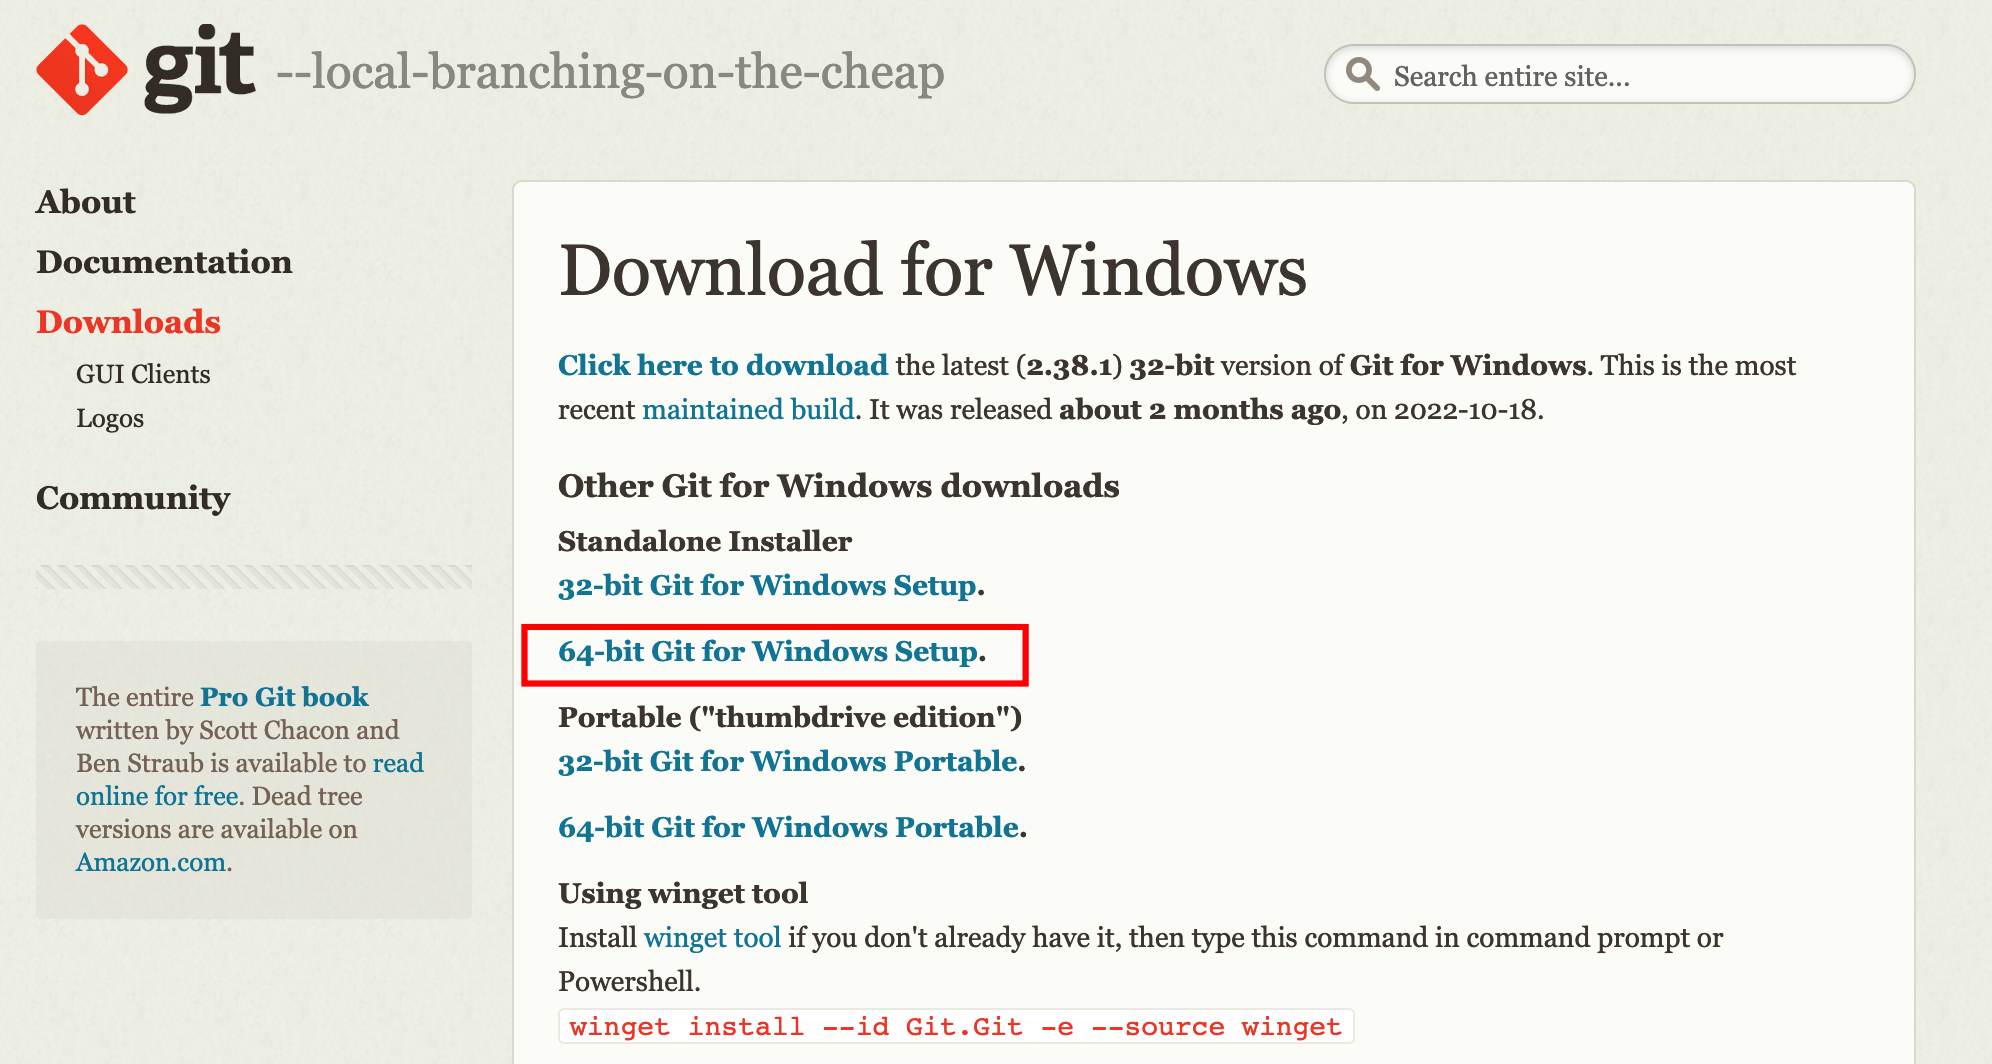
- Select "Windows" and click "64-bit Git for Windows Setup" to download the Git installation package.
-
- Double-click the installation package to start the installation process, and repeatedly click the "Next" button to complete the installation.
- Open "Git CMD" and execute the git --version command. If the following output is displayed, the installation is successful.
-

Step 4: Download the NVIDIA driver
- Uninstall the GPU driver pre-installed in the image. For more information, see Uninstalling NVIDIA driver (Windows).
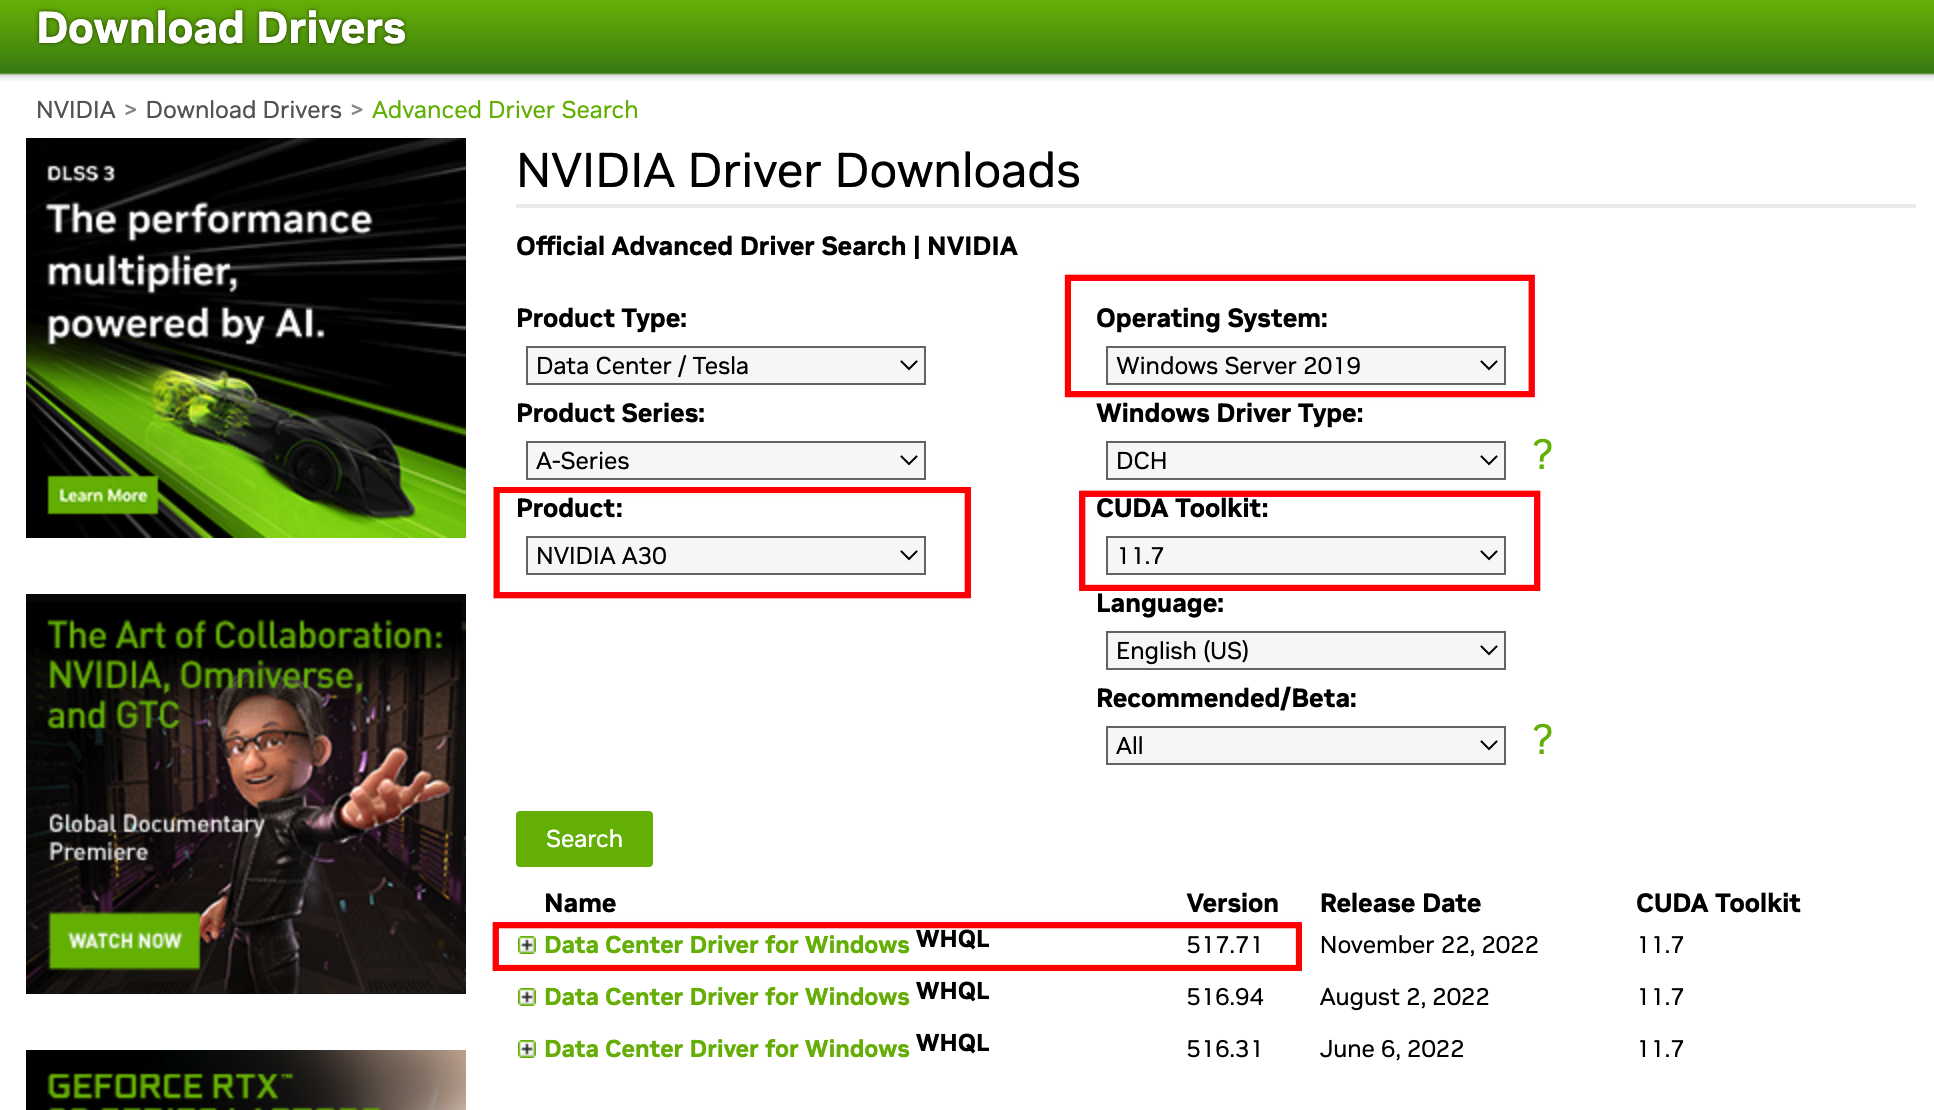
- Install the GPU driver Tesla 571.71 compatible with Cuda 11.7. For more information, see Installing GPU driver (Windows).
-
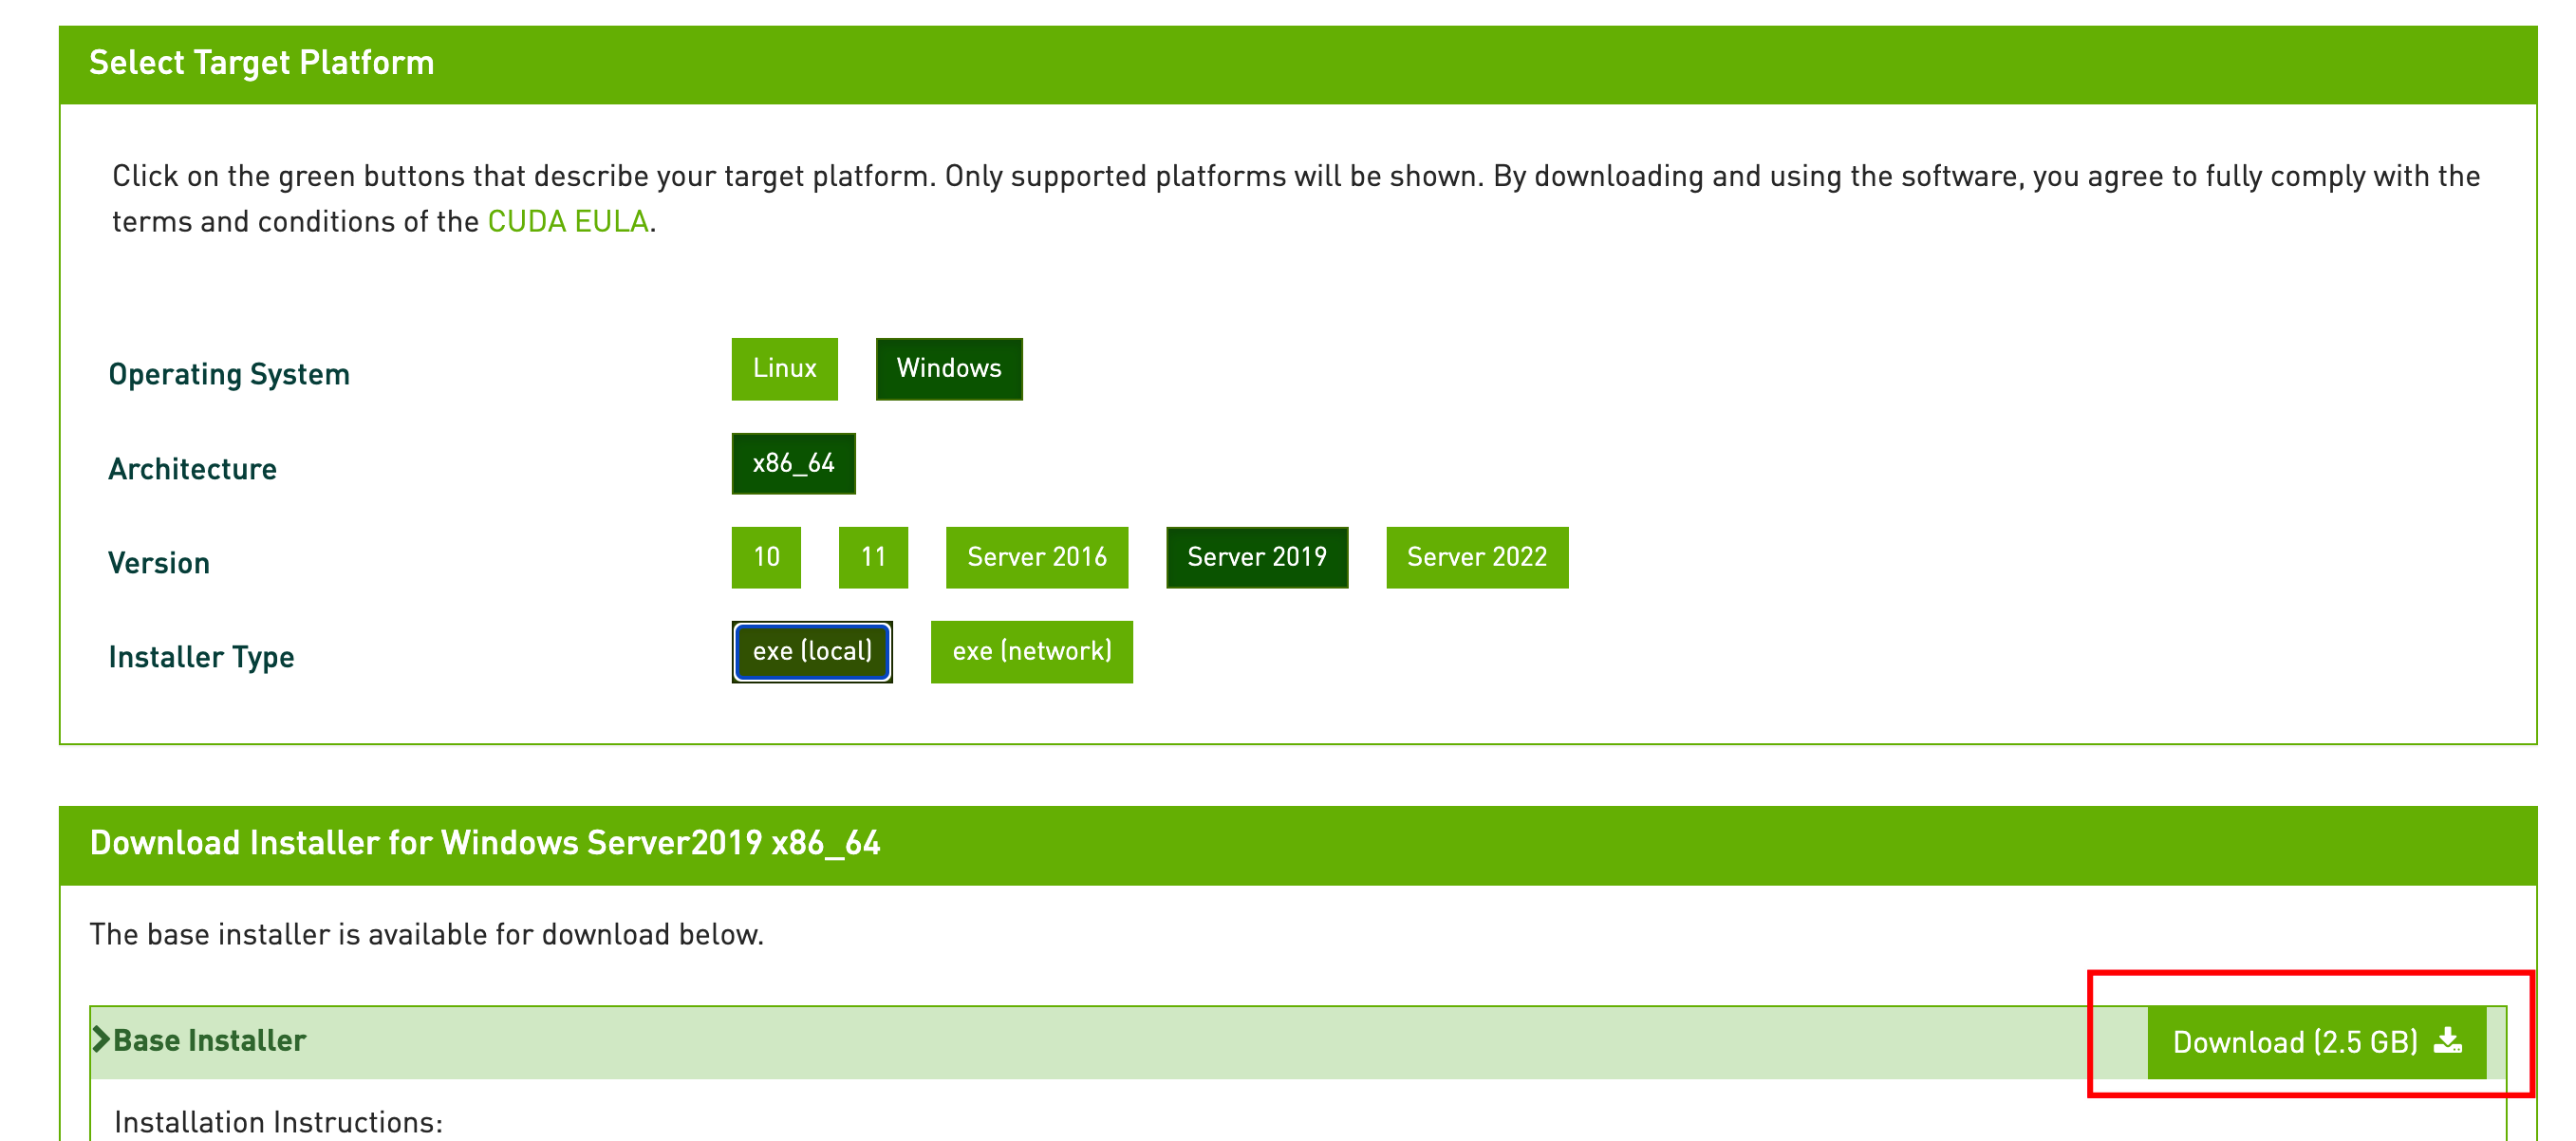
- Install the Cuda driver 11.7. For more information, see Installing CUDA toolkit (Windows).
-
Step 5: Install Stable Diffusion UI
Open "Git cmd" and execute the git clone https://github.com/AUTOMATIC1111/stable-diffusion-webui.git command.
If the following output is displayed, the download is successful.

Step 6: Download the Stable Diffusion training model
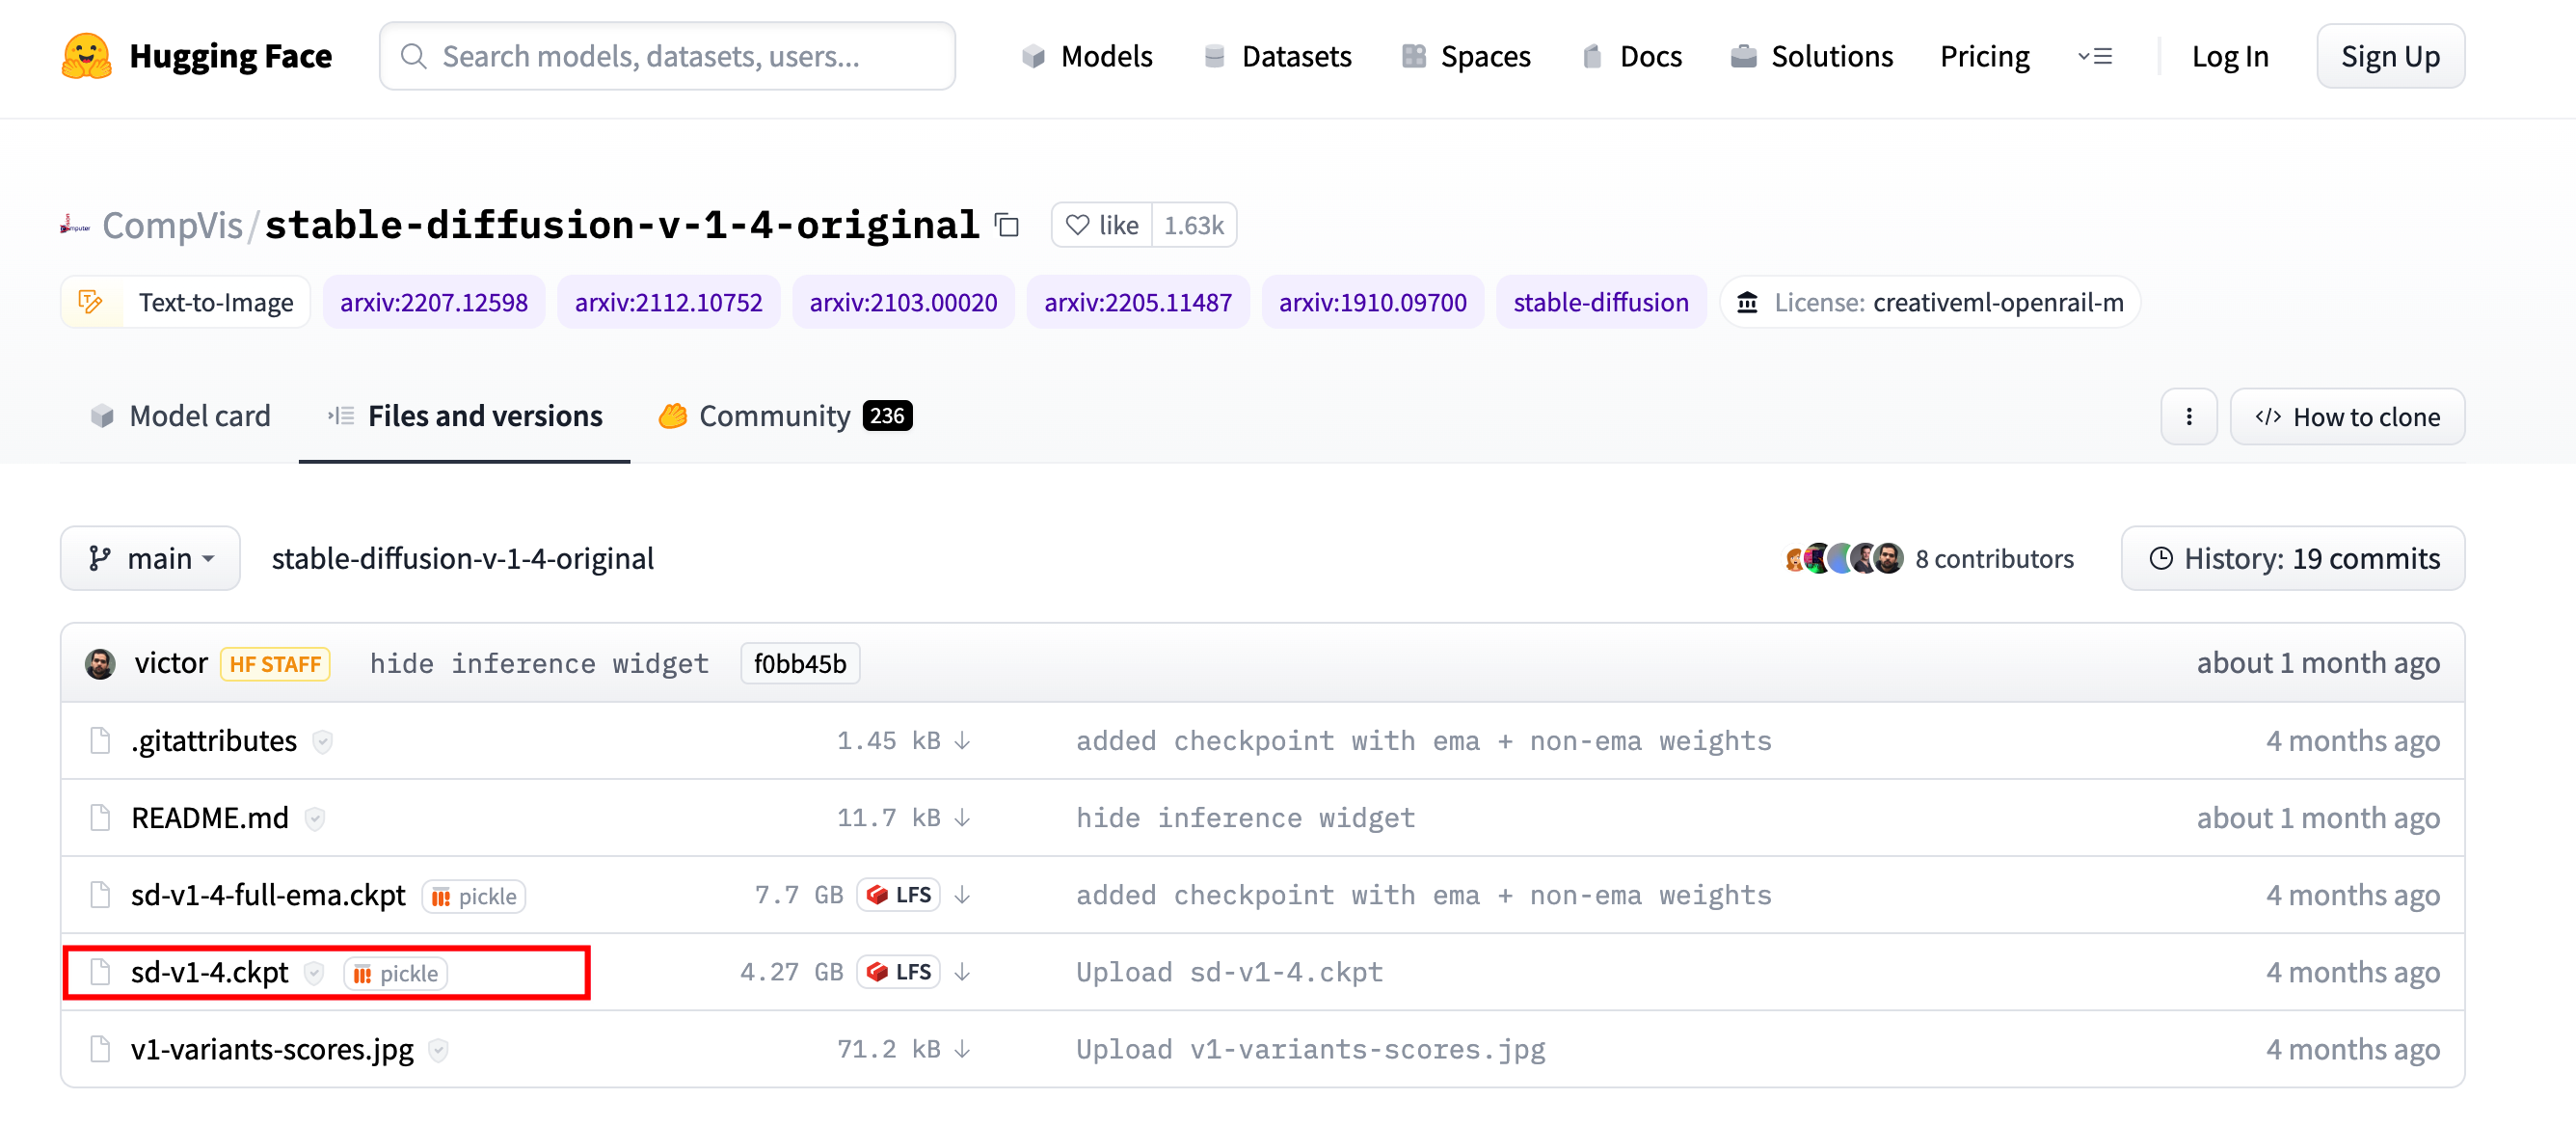
- Log in to the Stable Diffusion code repository and click the "Files and versions" tab.
- Download the "sd-v1-4.ckpt" training model to the \stable-diffusion-webui\models\Stable-diffusion\ directory.
-
- Go to the \stable-diffusion-webui\ directory and double-click the webui-user.bat file to run the file.
- After you double-click the file, the script download begins. The process typically takes 20 minutes to 2 hours, depending on your network speed. The status may remain unchanged as shown in the following figure for an extended period. Be patient and do not close the CMD window. As long as the bottom of the window does not display a prompt like "Press any key to close this window", the script is still running as expected.
- If the following output is displayed, the download is complete.
-
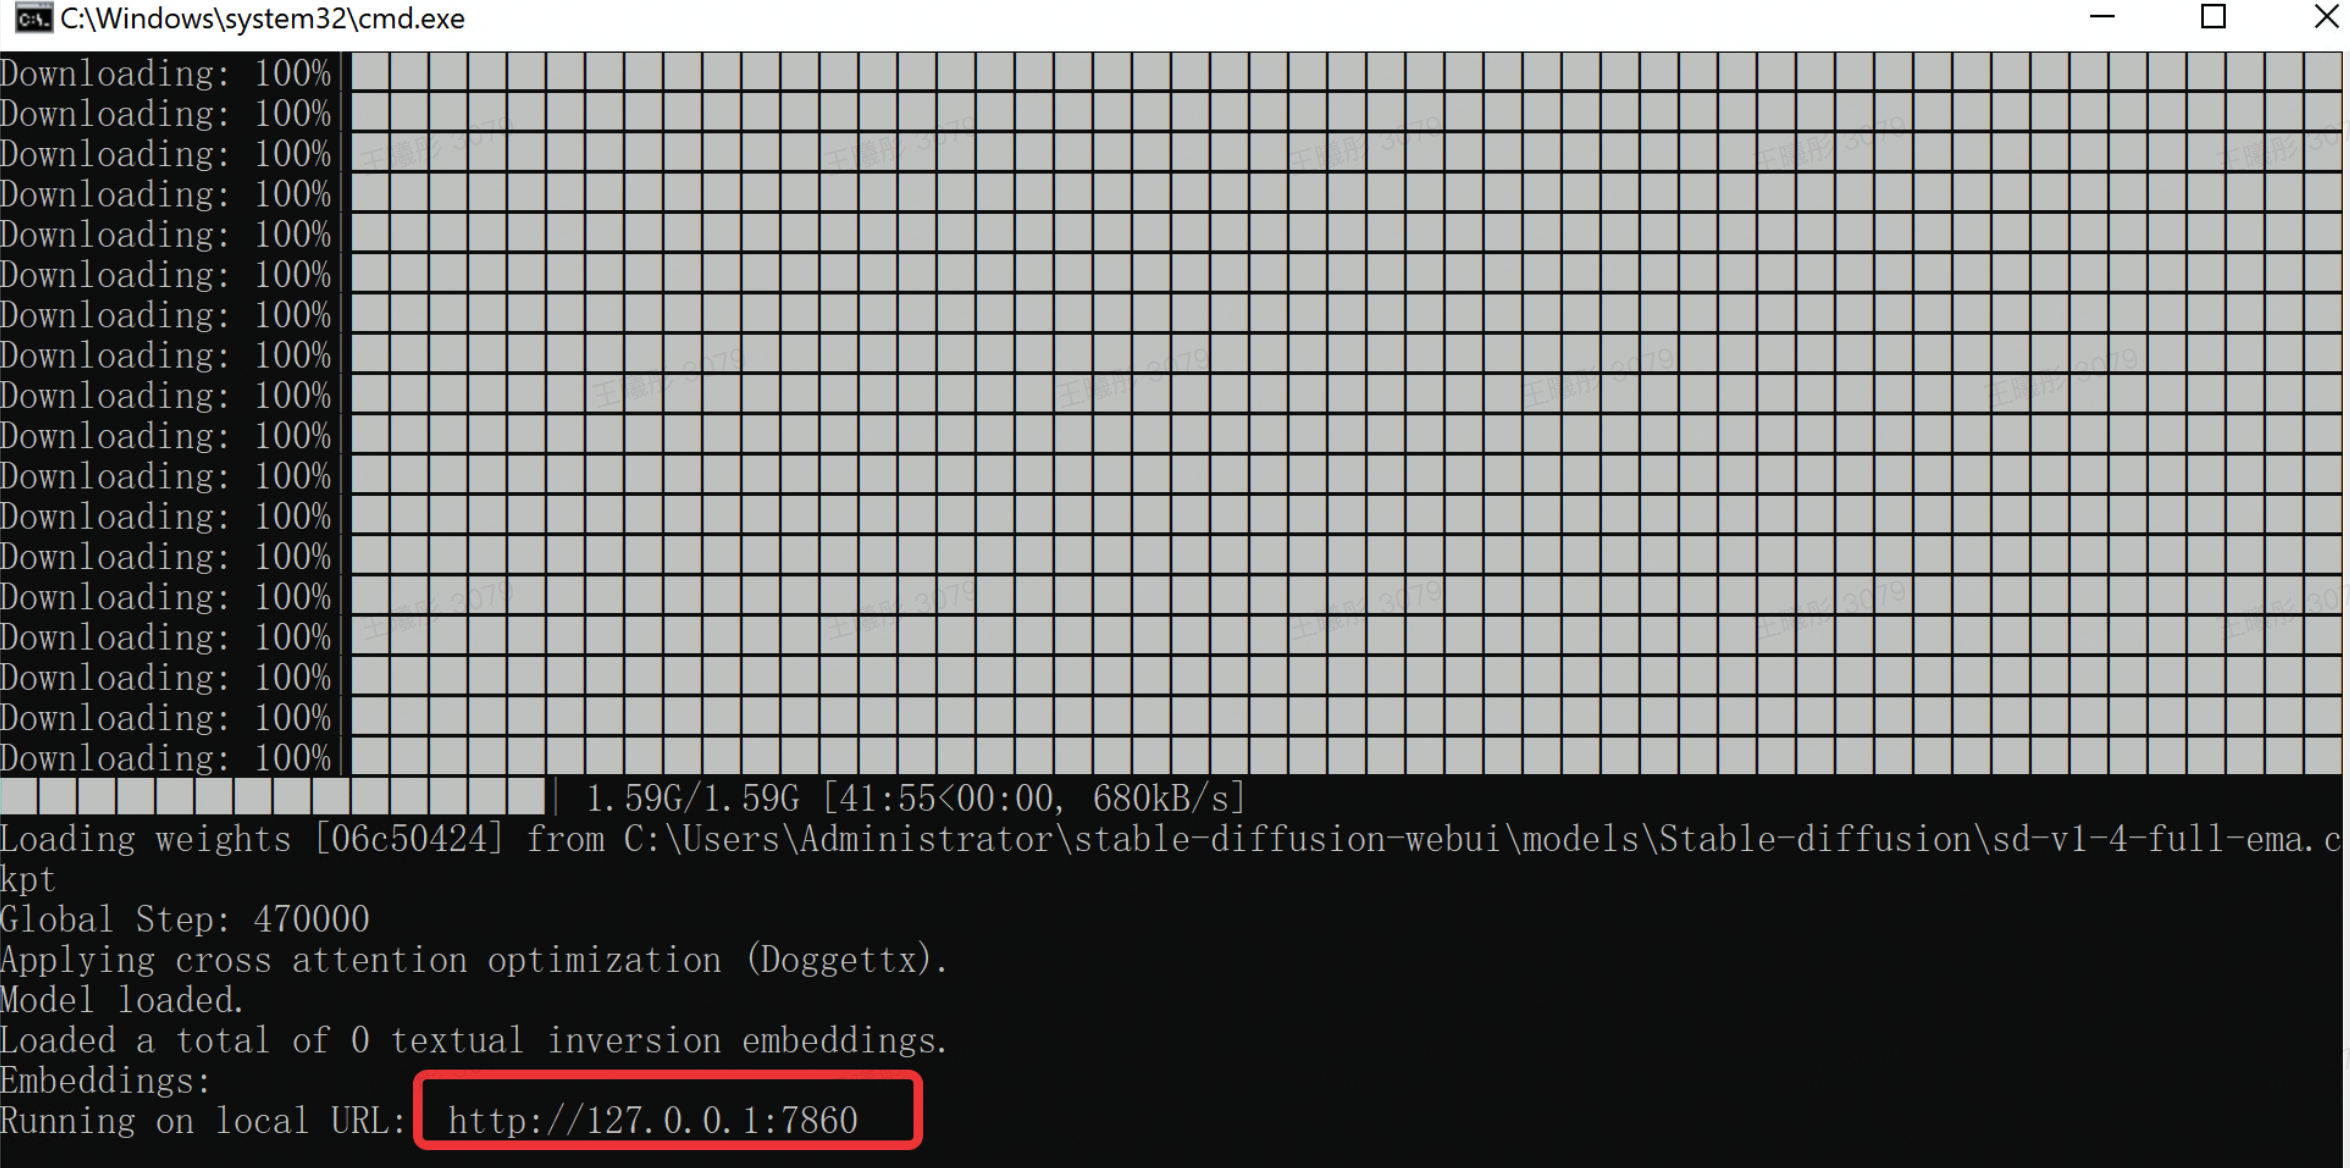
- Open http://127.0.0.1:7860 in your browser. Do not close the CMD window.
Step 7: Generate images
- Configure the relevant parameters in http://127.0.0.1:7860.
-
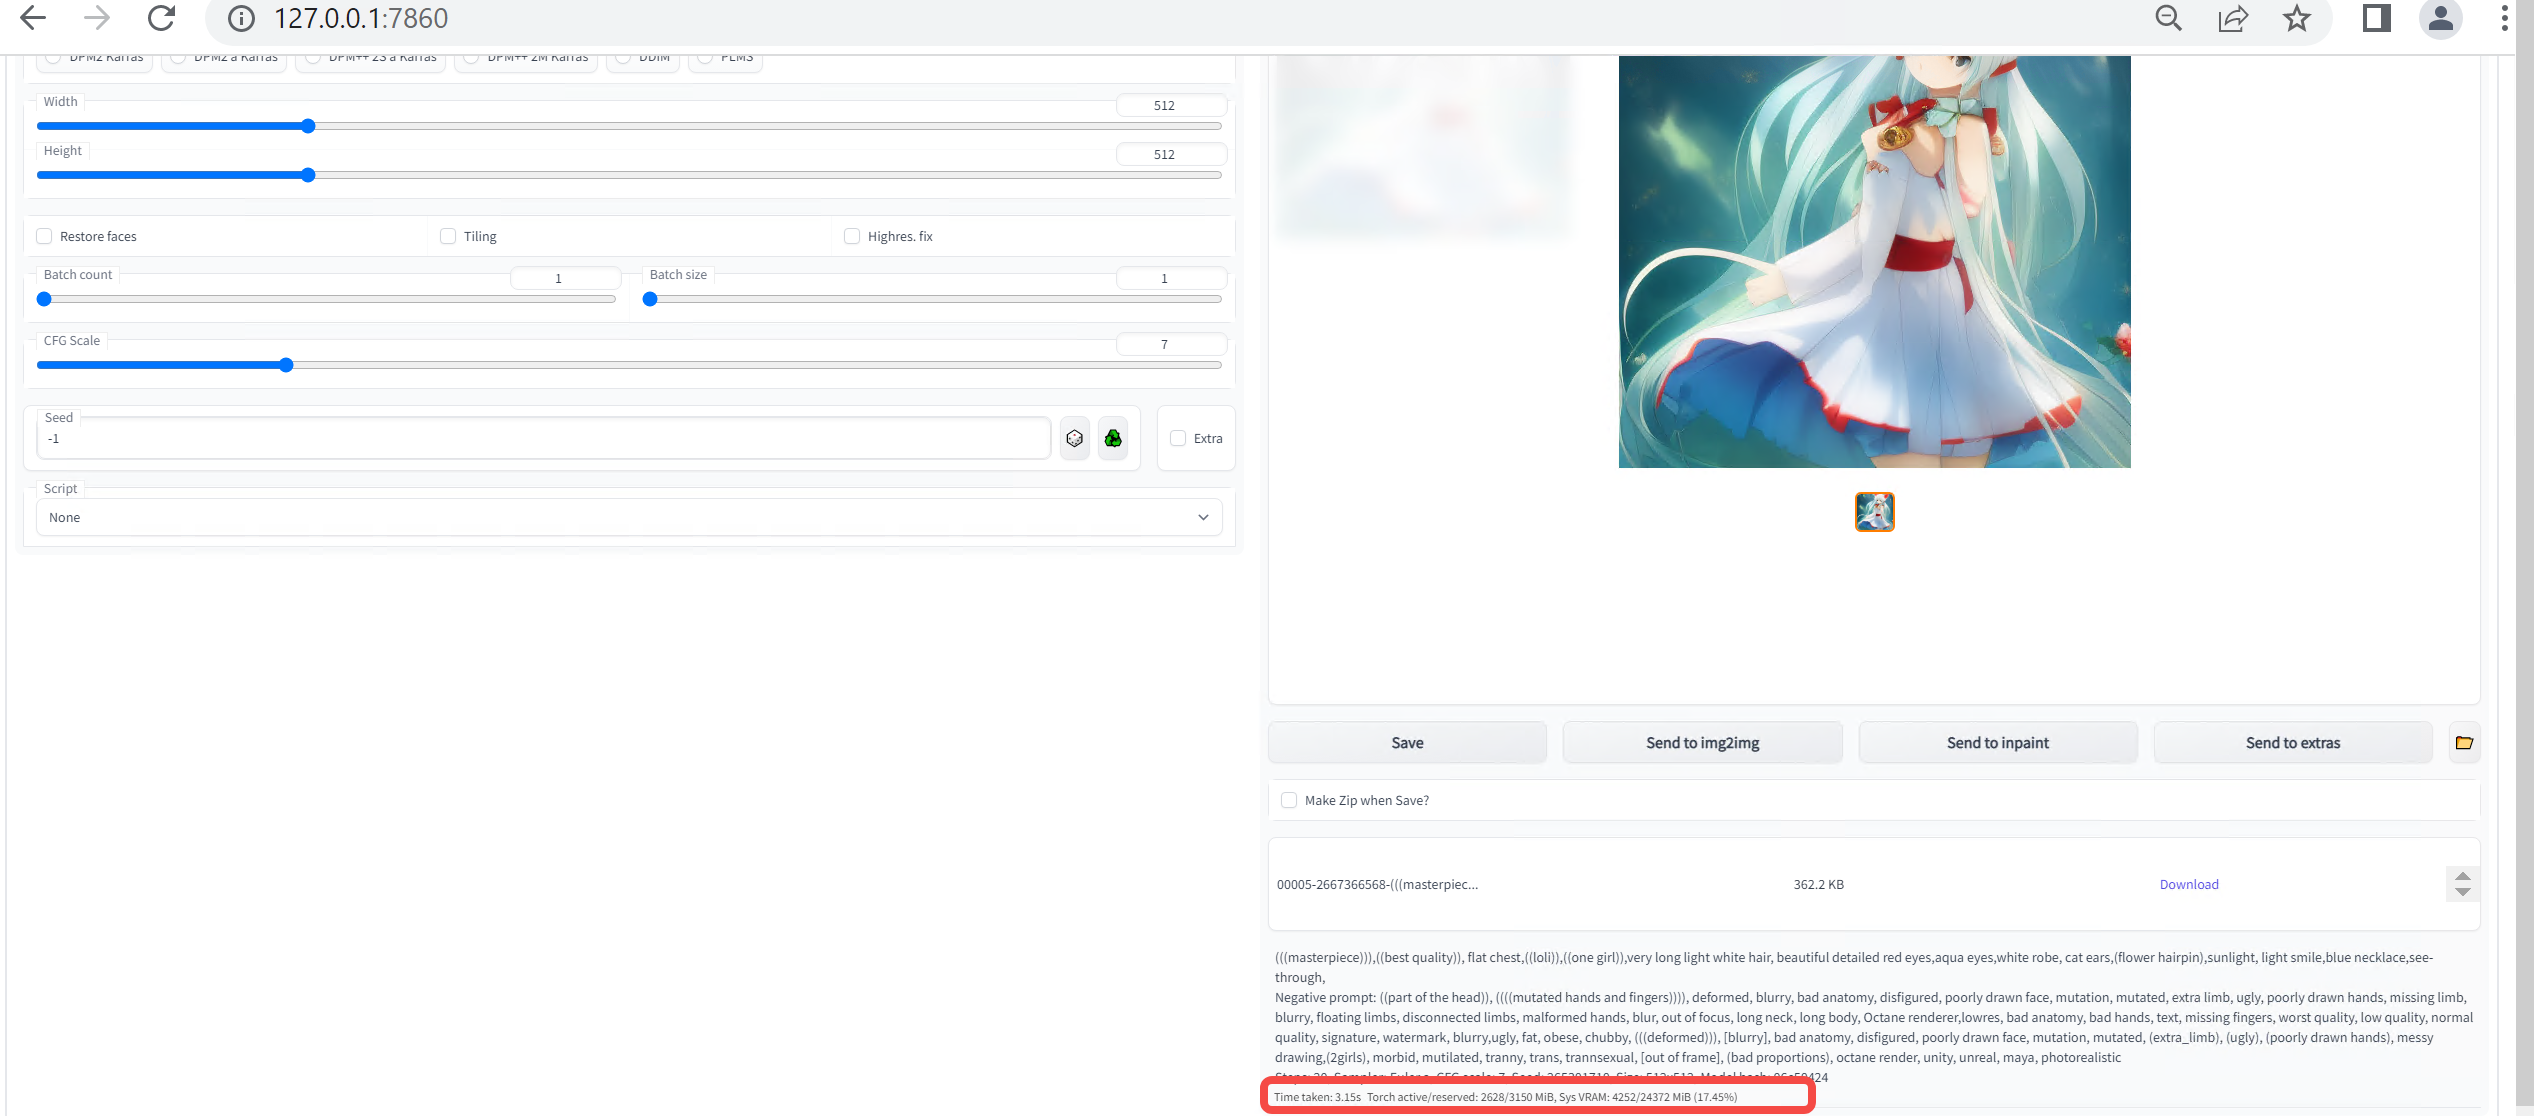
- After clicking the "Generate" button, you will obtain an AI-generated image stored locally, along with the image generation time and GPU utilization, as shown in the following figure.
-
Last updated: 2025.12.03 15:45:51
All rights reserved © Beijing Volcano Engine Technology Co., Ltd2024
