Cloud Monitor
Cloud Monitor


Document

- Documentation
 Cloud MonitorGetting StartedUsing Event Center
 Copy page
 Download PDF
Getting Started
Using Event Center
Copy pageDownload PDFUsing Event Center
The Event Center of Cloud Monitor enables you to monitor the events of various cloud products. You can use the Event Center to view the event details of integrated cloud products, and also configure custom event rules and event notification contacts. This enables you to capture critical events of cloud products in real time and promptly respond to the events. This topic uses ECS as an example to introduce how to view cloud product events and how to configure custom event rules.
Considerations
If you do not query the events of a cloud product by using the Event Center, it indicates that no events have occurred for the cloud product or that the events occurred over 30 days ago.
tip
Occurred events are saved for 30 days by default.
Step 1: Create a contact
- Log in to the Cloud Monitor console.
- In the left navigation bar, click Notification > Contacts.
- Click Create contact.
- In the Create contacts dialog box, specify the Name and Email or Phone parameters of the alert contact and then click Confirm.
- After you configure the email address or phone number and create the contact, Cloud Monitor will send a verification message to the specified email address or phone number.
- The following figure shows the verification message content sent to an email address. You need to click the URL to complete the verification.
Step 2: Create a contact group
When you create an alert policy, select the corresponding contact group to receive alert notifications through the contact group.
- Log in to the Cloud Monitor console.
- In the left navigation bar, click Notification > Contacts.
- Click the Contact group tab, and then click Create contact group.
- In the Create contact group dialog box, specify the Name, Description, and Select contacts parameters of the contact group and then click Confirm.
- For example, the created contact group is TESTGroup01.
Step 3: Create a callback URL
- Log in to the Cloud Monitor console.
- In the left navigation bar, click Notification > Callback.
- On the Callback address list page, click Create callback address.
- On the Create callback address page, specify the following parameters and then click Confirm.
- ParameterDescriptionsCallback address nameSpecify a custom name for the callback URL to identify the callback URL. Duplicate names are not allowed.Callback address typeSelect the callback URL type. Supported types include Lark, DingTalk, WeCom, and General callback address.Callback addressEnter a publicly accessible URL and then click Test to verify the callback URL.
- If the callback URL returns the HTTP status code 200, it indicates that the connectivity test is successful, and the callback URL can receive alerts and event notifications.
- The connectivity test enforces a one query per second (QPS) limit.
Step 4: Create an event rule
In this step, you will create an event rule to monitor ECS events that are in the Create instance: In progress state. If the ECS event occurs, Cloud Monitor will send the event information to the specified alert contact or contact group through the specified alert channel.
- Log in to the Cloud Monitor console.
- In the left navigation bar, click Event Center > Event Rule.
- On the Event Rule page, click Create event rule.
- On the Create event rule page, specify the following parameters, and then click Confirm.
tip
In this example, only the required parameters are specified. You can adjust the configurations based on your business requirements.
-
- After the event rule is created, you can view the information of the created event rule on the list on the Event Rule page. When an event of a monitored cloud product that meets the specified conditions occurs, you can receive alert notifications through email, phone calls, or SMS messages.
Step 5: View cloud product events
- Log in to the Cloud Monitor console.
- In the left navigation bar, click Event Center > Cloud Service Event.
- On the Cloud Service Event page, specify the following parameters to query ECS events.
-
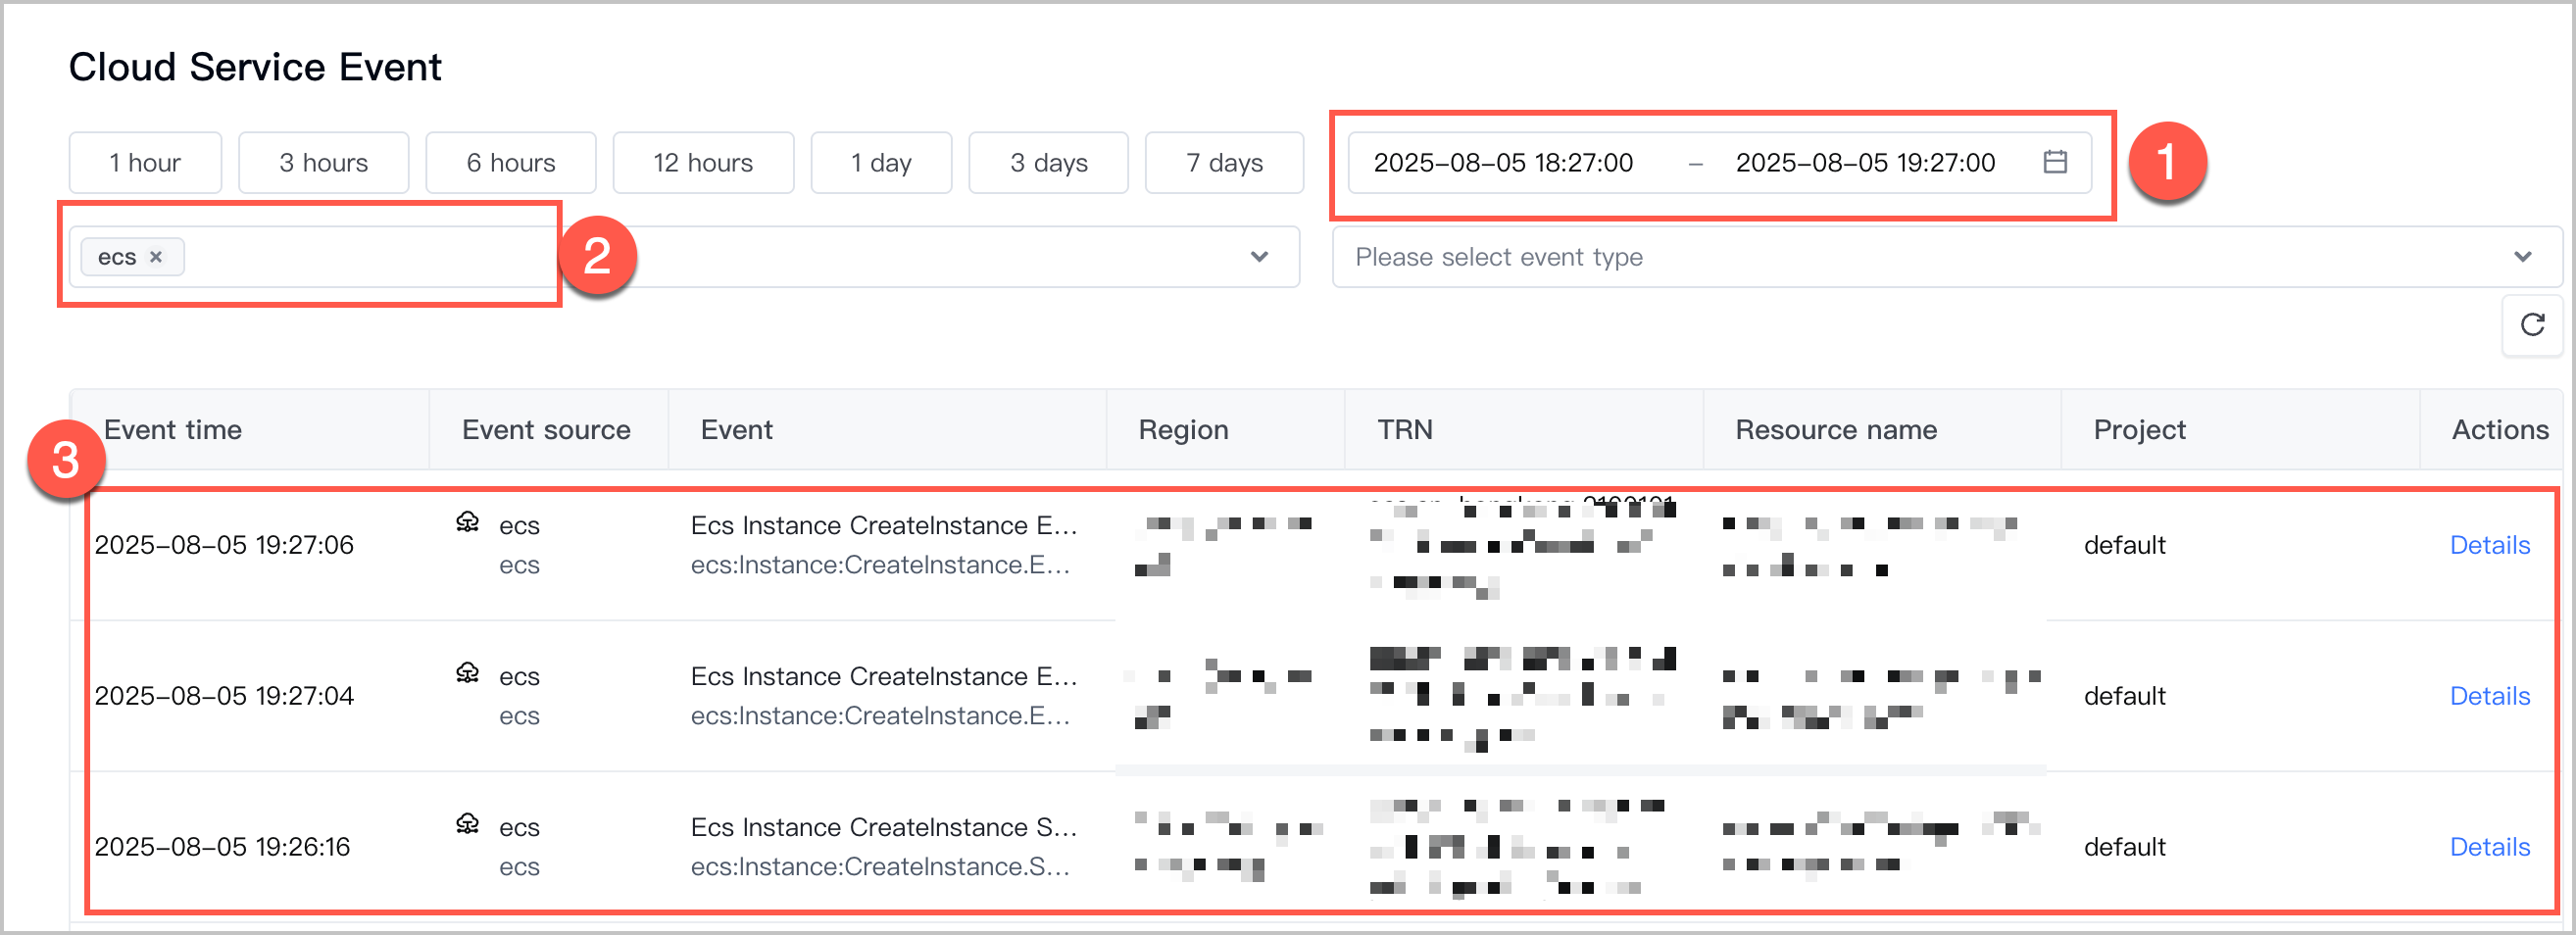
- List description:
- In Section ① in the preceding figure, query events that occurred during the time period from 2024-06-27 14:02:00 to 2024-07-05 14:02:00.
- In Section ② in the preceding figure, query ECS events that are in the Start instance: In progress state.
- After you configure the preceding query criteria, you can view the occurred events in Section ③.
- Find a specified system event and click Details in the Actions column.
- In the Event details panel, you can view detailed event information in JSON format, where the data field contains detailed information about the cloud product for which the event occurred.
Last updated: 2026.07.15 14:24:29
All rights reserved © Beijing Volcano Engine Technology Co., Ltd2024
