Cloud Monitor
Cloud Monitor


Document

- Documentation
 Cloud MonitorUser GuideCloud Service MonitorElastic Compute Service MonitoringMonitoring plug-in (O11yAgent)Creating O11yAgent endpoints
 Copy page
 Download PDF
Monitoring plug-in (O11yAgent)
Creating O11yAgent endpoints
Copy pageDownload PDFCreating O11yAgent endpoints
The O11yAgent collection add-on supports accessing the plugin management platform via PrivateLink to enable add-on status display, upgrade, and other features. This topic describes how to configure PrivateLink connections for the O11yAgent collection add-on.
tip
We recommend that you use the Volcano Engine account (root user) to configure and use this feature. When an IAM user creates an endpoint, it may be unable to select an available endpoint service. For details, see PrivateLink FAQs.
Background
By default, the O11yAgent collection add-on allows you to access the add-on management platform by using the CIDR block 100.xxx.xxx.xxx. The platform achieves features, such as add-on status display and add-on upgrade.
In some scenarios, the O11yAgent collection add-on may be unable to access the add-on management platform by using the 100.xxx.xxx.xxx CIDR block caused by CIDR block conflicts or other reasons. In this case, you can configure PrivateLink connections for the O11yAgent collection add-on and use PrivateLink to upgrade the add-on and achieve other features.
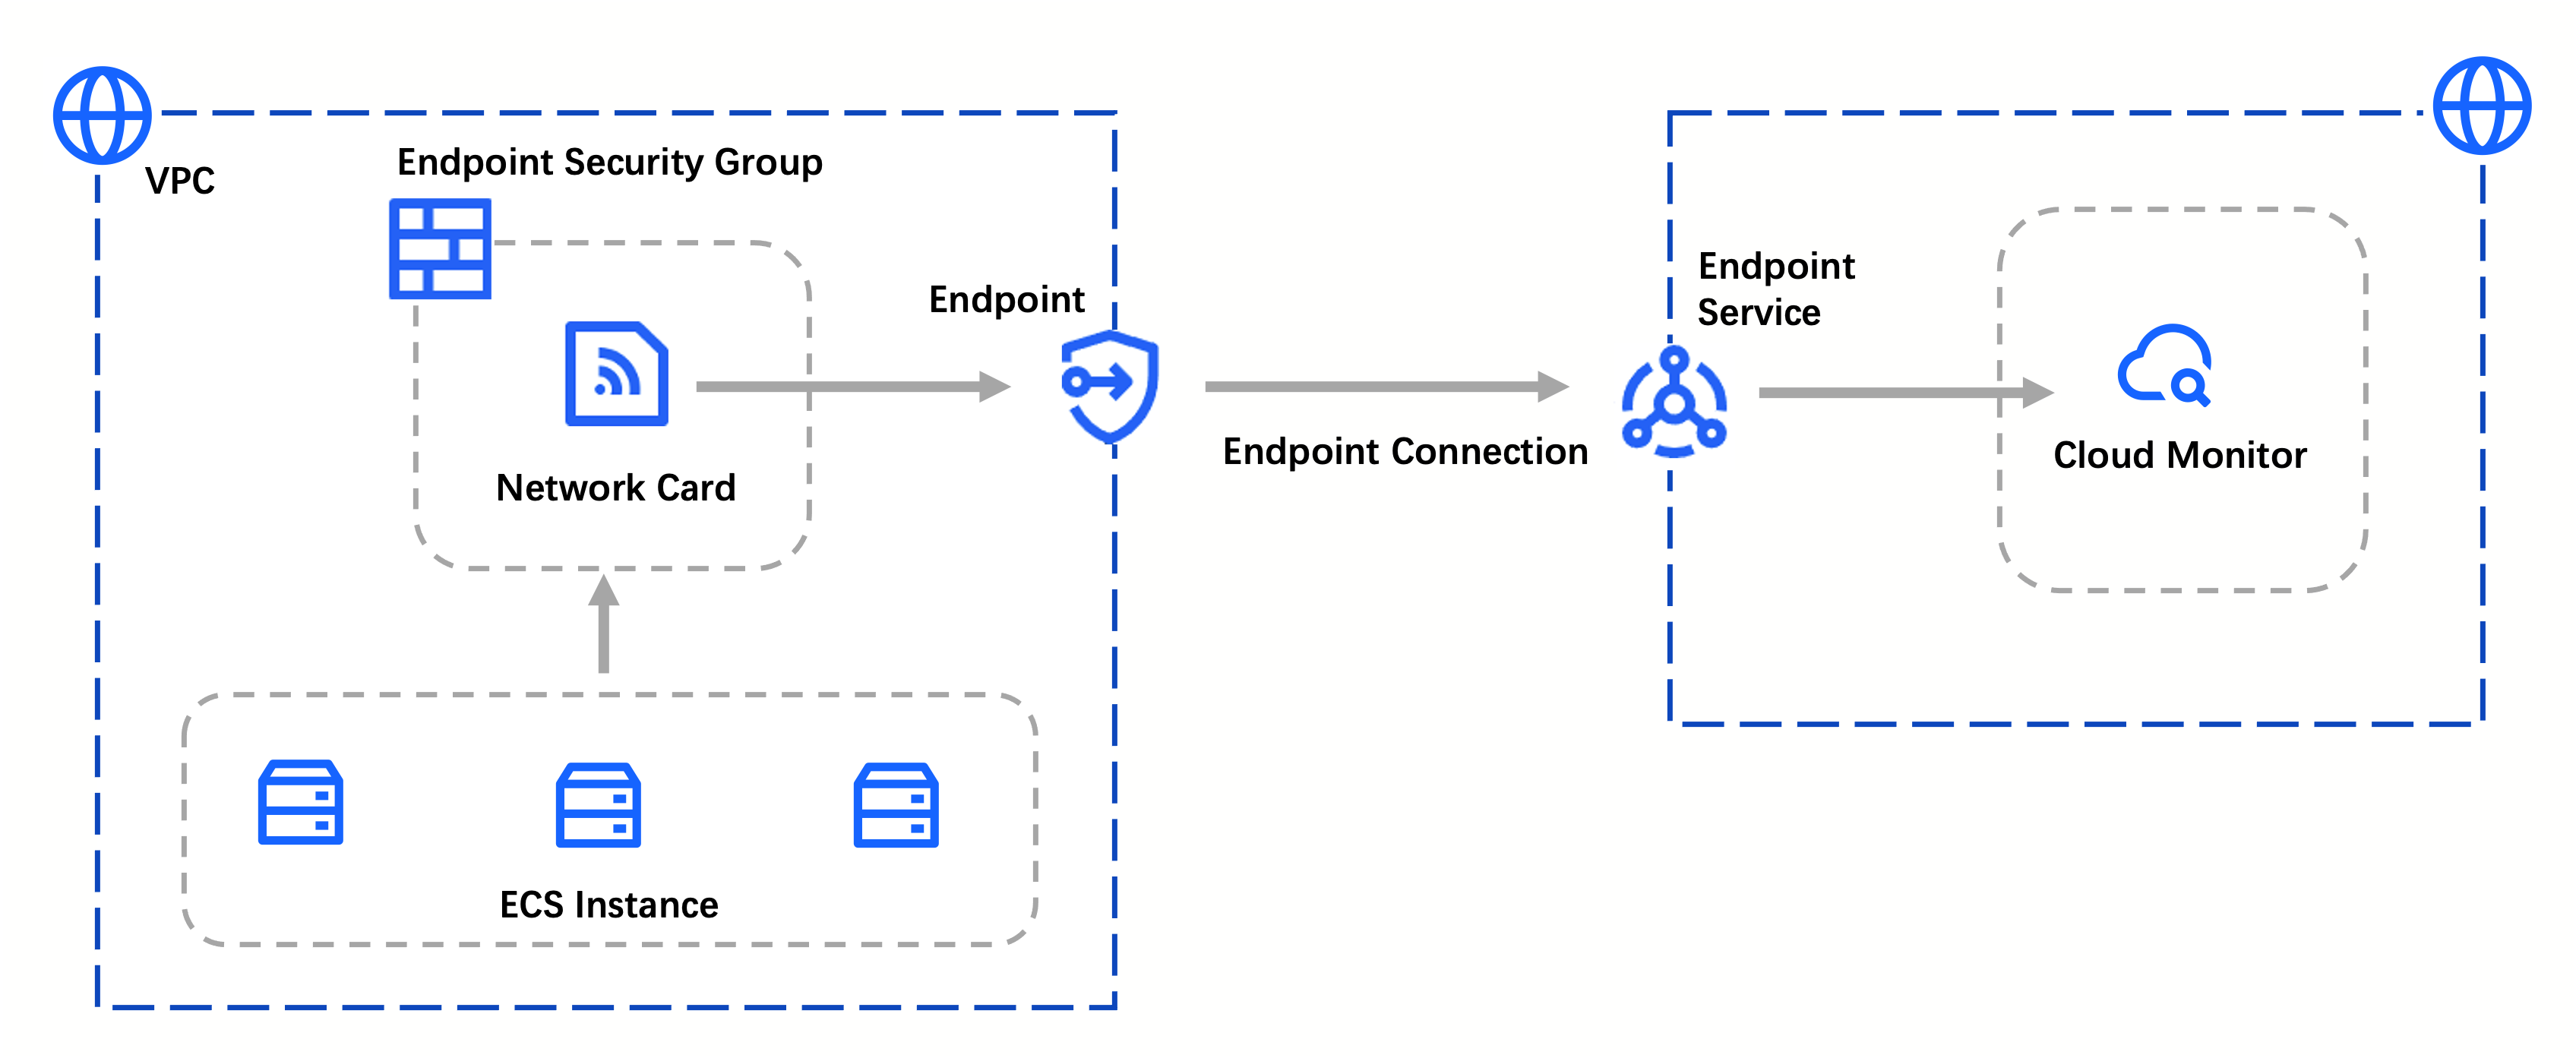
The following figure shows the technical principle of the O11yAgent collection add-on using PrivateLink.
tip
Considerations
- Fees are incurred for using PrivateLink, and additional bills are generated for creating endpoints. For details, see Billing Overview.
- You need to open Port 443 for the security group of the endpoint. Otherwise, access may fail.
Procedure
- Log in to the Cloud Monitor console.
- In the left navigation bar, click Cloud Service Monitor. On the page that appears, select ECS.
- In the drop-down list above the ECS instances list, select O11yAgent endpoint.
-
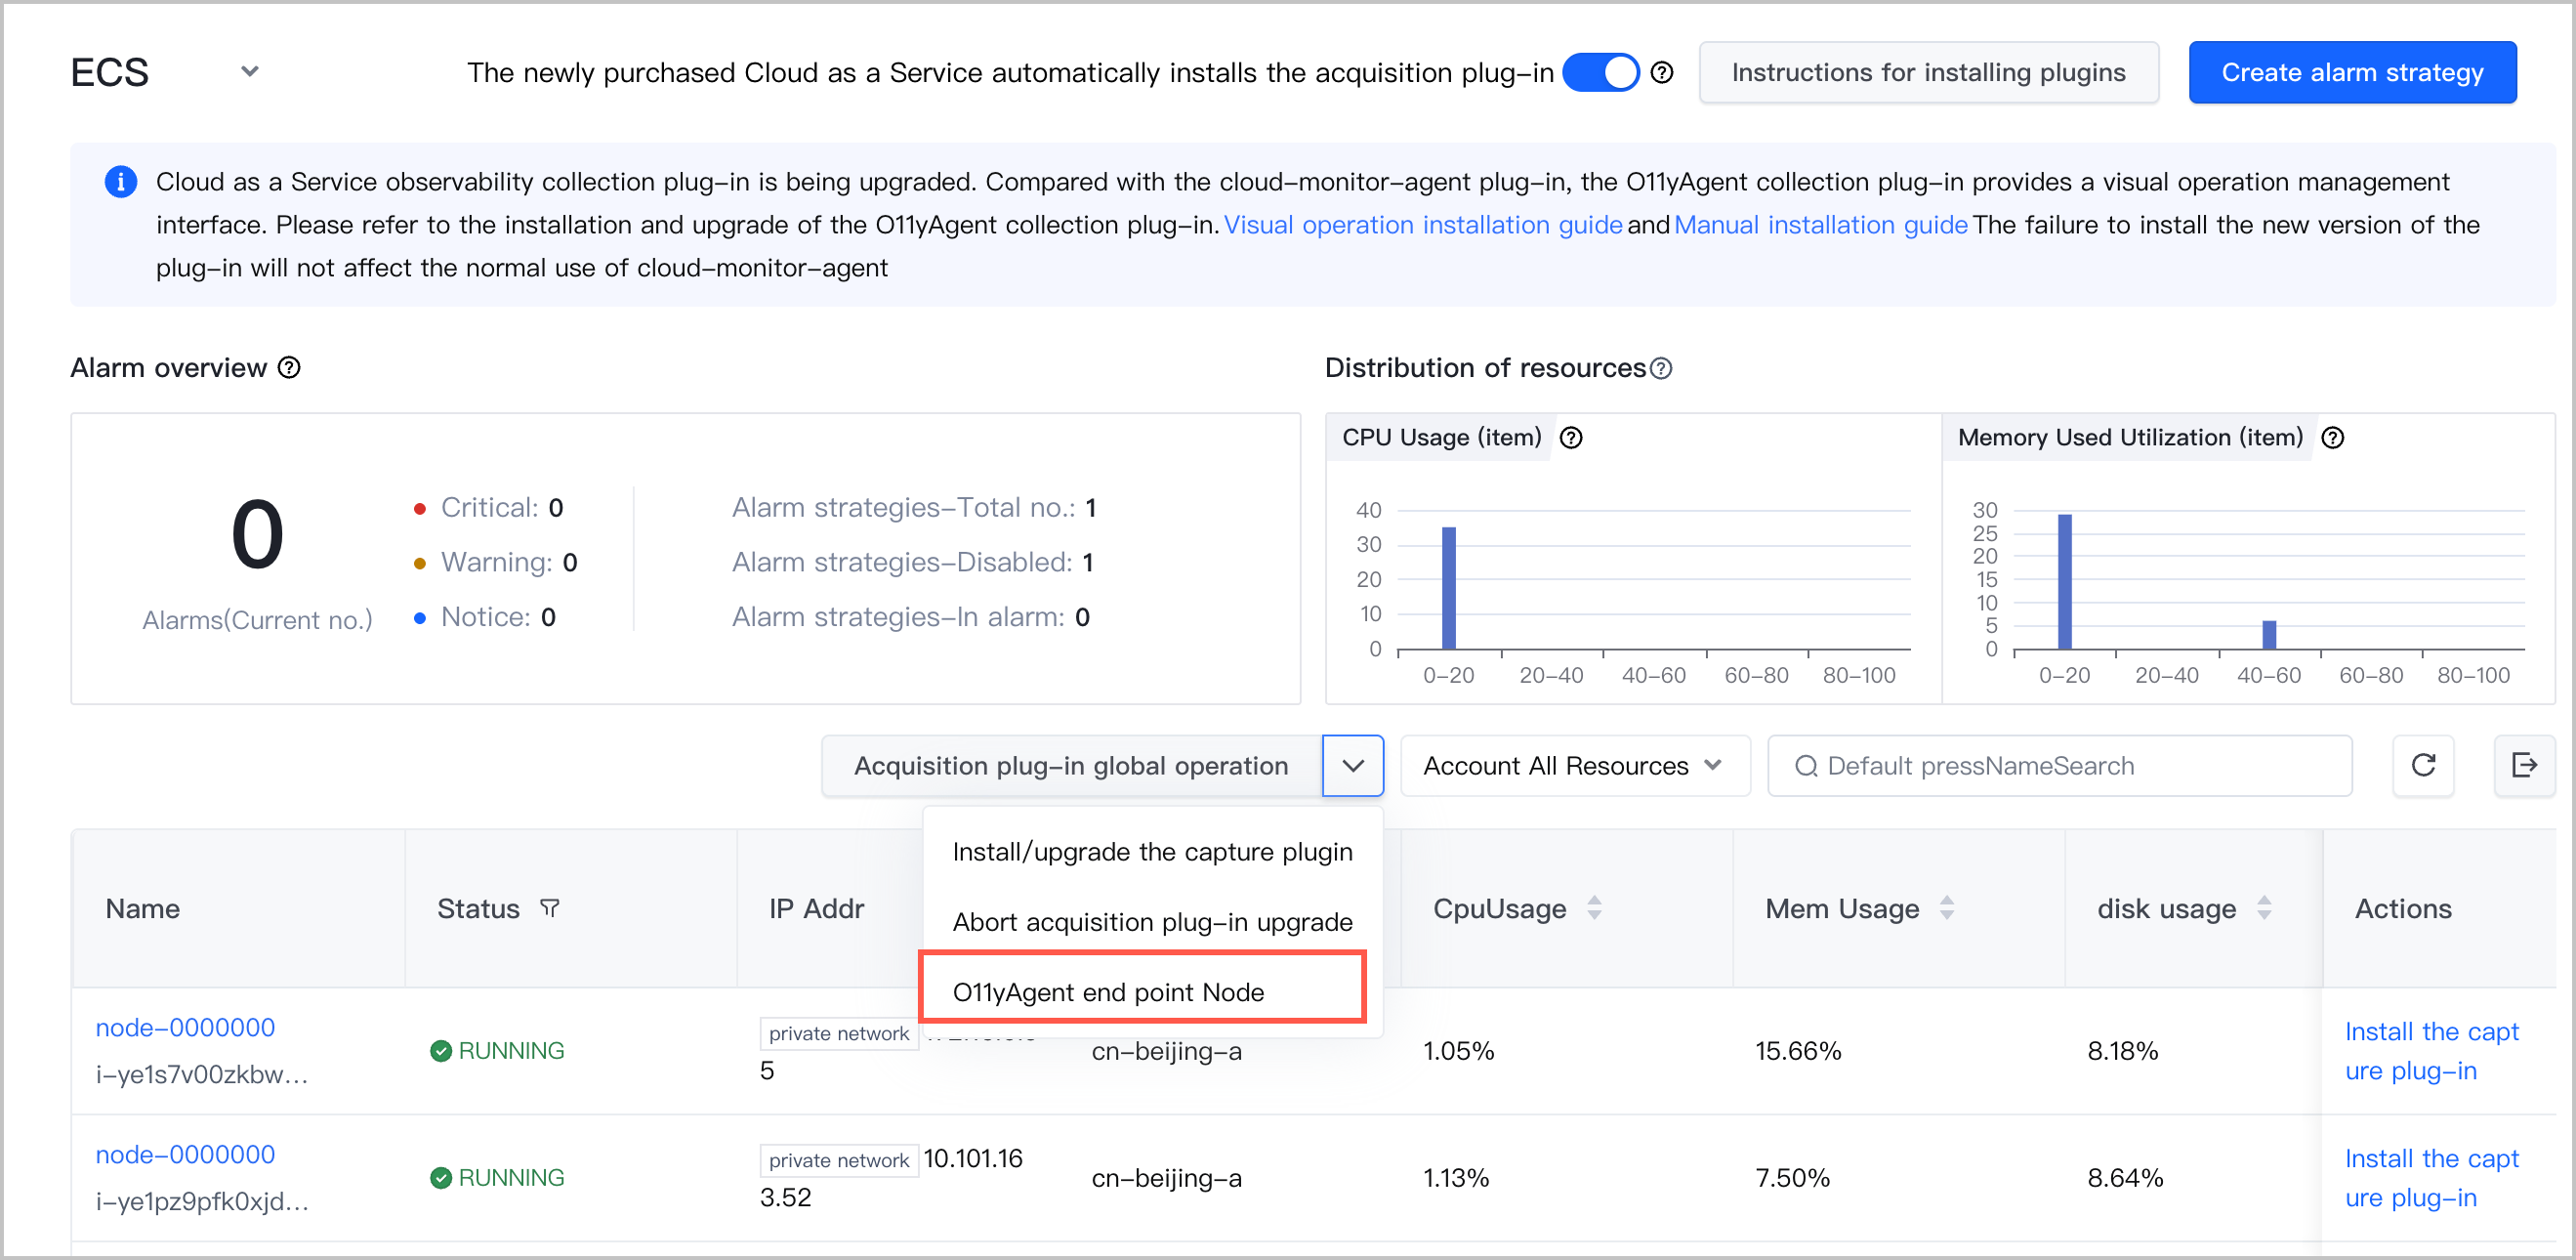
- In the pop-up dialog box, click Create endpoint and configure the endpoint information. For more configurations and detailed parameter descriptions, see Creating interface endpoints.
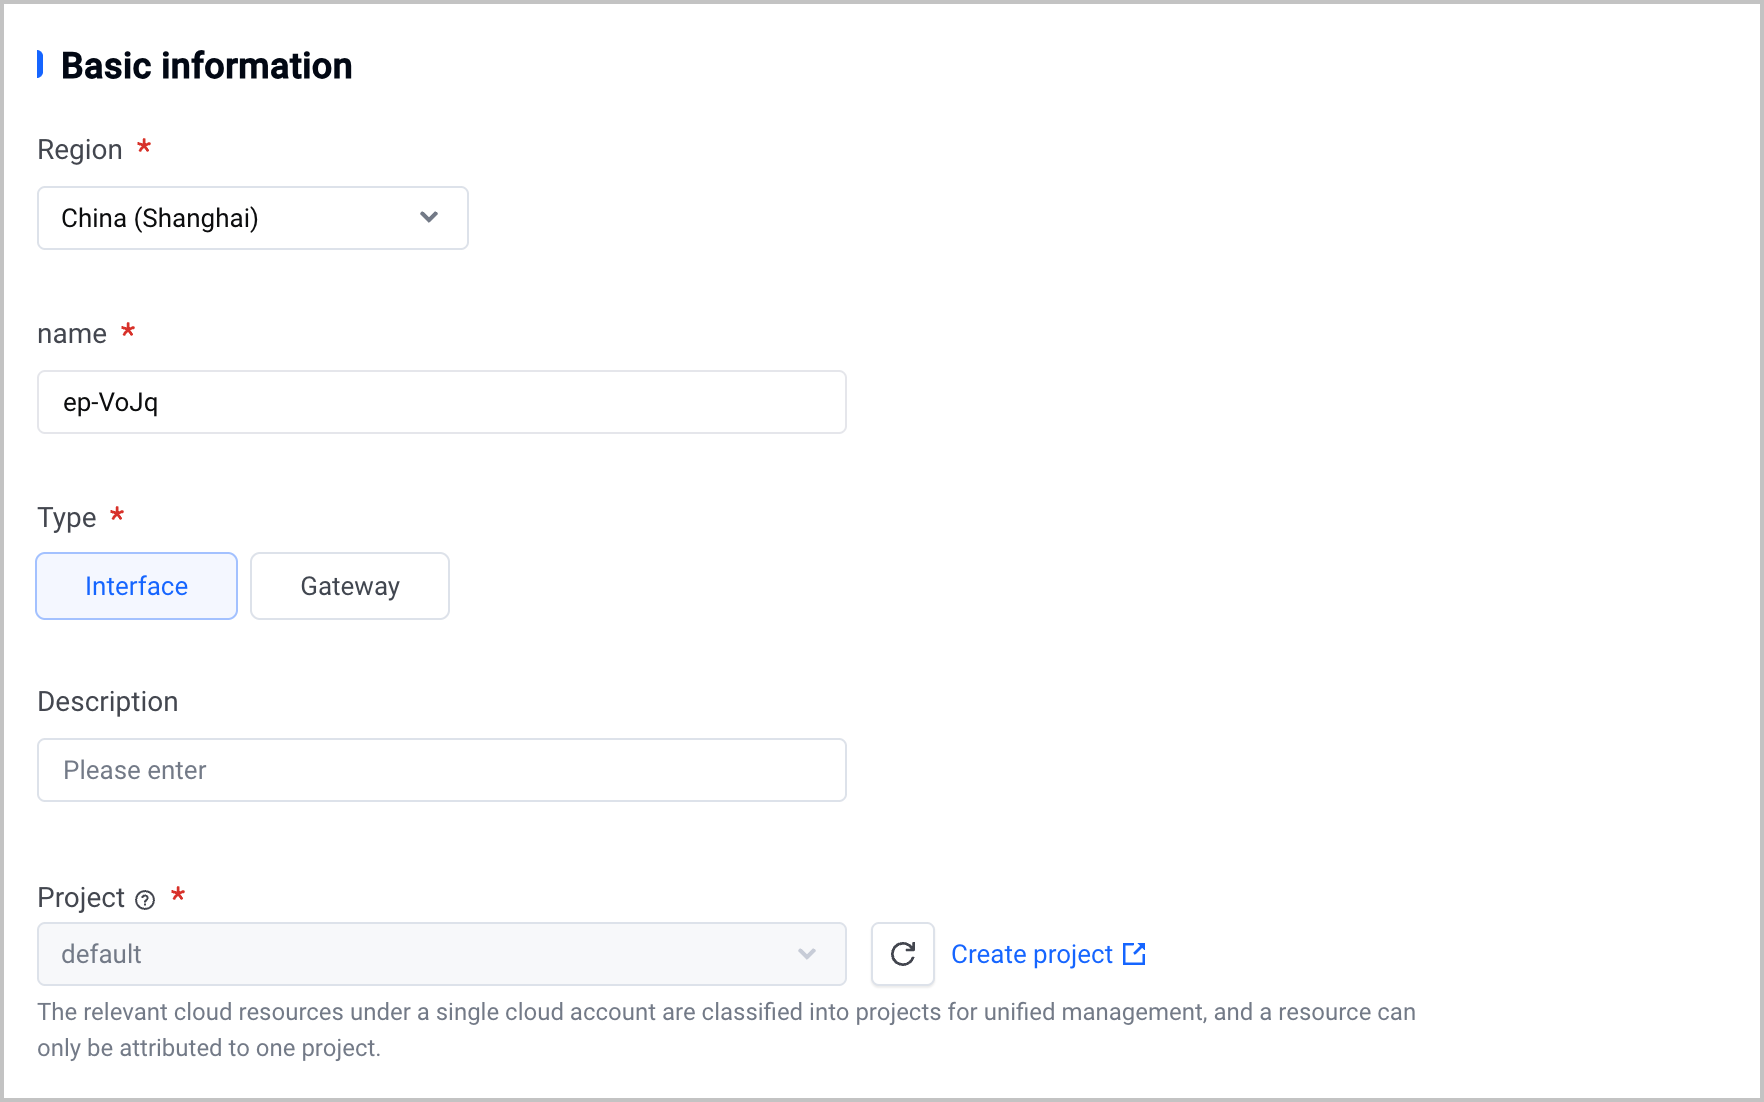
- Basic information: Select the region where the endpoint is located, specify a name for the endpoint, and then select the Interface type.
-
- Endpoint Service: Select VolcanoEngine Service from the Add method drop-down list, and select the service that corresponds to the O11yAgent add-on from the Endpoint Service drop-down list. The name of the service is in the format of com.volces.privatelink.<region-id>.o11yagent-platform, where <region-id> indicates the region ID of the service.
tip
You can use the o11yagent-platform keyword to search for the service that corresponds to the O11yAgent add-on from the service list.
- Network configuration: Select your VPC, availability zone, subnet, and security group.
Note
- After you configure the endpoint, the O11yAgent add-on in this VPC will access the add-on management platform by using the endpoint. The O11yAgent add-on in other VPCs still directly accesses the add-on management platform by the 100.xxx.xxx.xxx CIDR block.
- You need to open Port 443 for the security group of the endpoint. Otherwise, access may fail.
- Advanced options: When you create an endpoint for the first time, you need to enable Private DNS name. When you delete the endpoint and reconfigure it, you do not need to enable this configuration.
- Click Buy now and check again to complete the configuration.
Verifying results
Viewing connection status
After the endpoint is configured, you can view the connection status in the endpoint list. If Connected is displayed in the Connection status column that corresponds to the endpoint, the connection is successful. In this case, the O11yAgent add-on can access the add-on management platform by using the endpoint.
You can also view the status of the corresponding endpoint in the Cloud Monitor console.
Testing network connectivity
- Log in to the endpoint console.
- In the endpoint list, find the target endpoint and click the name of the endpoint to go to the endpoint details page. On the Overview tab, view the domain name of the endpoint.
- In an ECS instance within the VPC bound to the endpoint, run the following command to check whether the endpoint, domain name, and network are in normal status.
- ping ep-2byzj***.o11yagent-platform.cn-shanghai.privatelink.volces.com
tip
The endpoint domain name in the preceding code is used for illustration purposes only. In actual use, replace the domain name in the code with your endpoint domain name.
- The expected result is as follows: If you can successfully ping the endpoint domain name, the network is connected.
- PING ep-2byzj***.o11yagent-platform.cn-shanghai.privatelink.volces.com (192.168.0.4): 56 data bytes64 bytes from 192.168.0.4: icmp_seq=0 ttl=46 time=0.053 ms64 bytes from 192.168.0.4: icmp_seq=1 ttl=46 time=0.122 ms64 bytes from 192.168.0.4: icmp_seq=2 ttl=46 time=0.055 ms64 bytes from 192.168.0.4: icmp_seq=3 ttl=46 time=0.079 ms
-

Last updated: 2026.07.10 14:02:23
All rights reserved © Beijing Volcano Engine Technology Co., Ltd2024
